Honestly, before starting my zero waste journey, I didn’t think about how many ‘every day’ items produce waste. I also didn’t think about ways I could replace harsh chemical cleansers with more natural options.
The harsh cleaner in a plastic bottle was ‘just what we used’ – why would I question it?
Well, I’m glad I did, because I’ve since began to look more critically at the cleaning products I use. And though I haven’t stopped using the ‘before’ products completely, I am happy with the cleansers I’ve since switched.
And since I know I’m nowhere near the only new zero waster out there, I thought I’d share 2 more zero waste recipes to replace store bought items. (If you missed the first article, check it out here!)
Hand Soap
Ingredients:
Soap Nuts
Water
I’m going to admit that this one… I’m kind of dumb for not realizing. This recipe involves the ever-amazing soap nuts. You know, the little nuts that naturally produce soap you can use to wash your clothes?
Yeah, apparently, that soap they produce can also be used to wash your hands! Shocker, I know. But it took me an embarrassingly long time to put two and two together. If it’s good enough to wash my clothes (and reusable pads), it should be able to clean my hands!
Though I’d like to blame society for this one, (why are there so many different soap products if they all do the same thing, anyway?) I’ve been an adult long enough I should’ve realized this.
Thankfully, the second best time to do something is today (the first being yesterday), so just like with veganism, now that I know, I can’t un-know.
To make the hand soap, all you gotta do is bring some soap nuts to a boil in a pot of water (depending on the size of the batch, use the same amount you would in your laundry, which is typically about 5), then once it’s boiling immediately turn off the heat and let them continue to sit in the water for about 20 minutes.
Once done, you can either fish the nuts out of the water, or you can mash them up and then strain the liquid into a hand soap bottle. If you don’t like the scent of soap nuts (it can be pretty… specific) you can add a few drops of your favourite essential oil to the mix.
Most recipes I’ve seen to make this hand soap say to use a foaming hand soap container, but just like with using DIY toothpaste, that’s more for feel than affect. The soap will work just fine in a non-foaming container. You may need to make it more often (foaming soap containers supposedly use less product than non-foam), but since you can buy soap nuts in bulk, it really shouldn’t make that big of a difference.
2. Surface Cleaner
Ingredients:
Lemon Juice
Vinegar
Water
This cleaner is another amazing recipe. Just like how baking soda and vinegar can be used to clean almost everything, this recipe can be used to clean basically everything else.
Like most of these zero waste recipes, all you need to make this cleaner is an empty bottle to mix the ingredients in. Pour the vinegar and water into the bottle in a 1:1 ratio, then add either 1-2 Tbsp of lemon juice, or the rind from half a lemon.
If you’re using lemon rind, you’ll want to let the mixture sit for a while to give the rind time to infuse with the vinegar and water (about 30 min), if you’re using juice, you should be able to start using it right away.
This cleaner can be used to clean glass, counter tops, floors, etc. I was originally going to call this all purpose cleaner, but there are some things you won’t want to use this on. For example, if you have porous items (like a couch or favourite chair), the lemon juice + vinegar might leave unwanted spots, or possibly leech the colour out of the item.
This is due to the lemon and vinegar’s natural acidity – which is actually the reason you can use it to lighten your hair!
If however you don’t care about spots or fading colour, then you can go ahead and use it on whatever you want.
Just don’t say I didn’t warn you.
Like this article? Check out more zero waste tips here!
Who doesn’t love summer? The long, cold winter is finally over, plants are in full bloom, and you generally just feel better all around now that you can actually go outside and see the sun.
But, there is one downside to summer: it gets hot.
I know, I know, when you’re coming out of a winter that got down to -40, hot weather is something of a salvation. But! When it’s hot out, you won’t want to turn on the oven and make your place even hotter. And, let’s be honest, there’s only so many days in a row you can BBQ before you get sick of it. (Especially the clean up)
So, in a bid to save your electric bill and your BBQ, here is a list of 8 simple, no-cook summer recipes to get you through the days when you just cannot eat a burger.
1 Nice-Cream
While technically nice-cream isn’t a ‘meal’, it is no-cook, also, who’s gonna complain about a new way to make ice cream?
This nice-cream is super simple to make. All you really need is some frozen bananas, some Silk (or other non-dairy milk), and a blender. If you don’t want it to taste like bananas, you can throw other stuff in the blender as well. (I’ve tried frozen cherries, and cocoa powder with chocolate Silk, but really pretty much any frozen berry you’d want would probably work)
Once you have all your ingredients, toss them all into the blender at the same time, and blend until its maybe Slushy consistency. Don’t worry if you over-blend it. If it gets too runny, then just call it a smoothies.
And boom! That’s it.
Told you these were simple!
2 Chickpea Salad Sandwich
I know I might be late to the game with this, but I recently discovered that chickpea salad sandwiches are actually pretty good – and this is coming from someone who doesn’t really like chickpeas! (Unless they’re in roasted red pepper hummus form)
I also learned that chickpeas in a can don’t have to be cooked before eating (but you should still rinse them), which is great in the summer because then you won’t even have to turn the stove on!
Another nice thing with not only this recipe, but with a lot of summer recipes, is that since they’re all meant to be eaten cold, you can make a lot on one day, and then just eat them directly out of the fridge for a few days after. No-cook weeks are awesome not only because they won’t heat your house when it’s already hot, but they also save you a lot of time!
Most meal prep takes about an hour, but if you don’t have to cook every single day, that’s an extra hour you’re gaining back to do one of the other millions of things I’m sure you’re ‘getting around to’.
Okay, so to make chickpea salad, you can actually do pretty much whatever you like (again, it’s food, which means it’s based on your tastes), but this is the way I like it:
1 can of chickpeas
1 tsp lemon juice
½ tsp of Paprika (about)
1 tsp Garlic Powder
1 tsp Black Pepper
1 tsp Dill
1 Tbsp vegan mayo (optional)
Once you have all the ingredients, then all you have to do is smash the chickpeas with whatever masher you’d like – you can use an actual potato masher, or a fork, or a hammer, whatever way you like smashing your chickpeas – and smash them up so there are a lot of bits and halves, but also be sure to leave in some whole ones. This gives it a better texture.
Once all the chickpeas are somewhat smashed, add all the other ingredients to the bowl and mix until it’s all pretty much evenly distributed. You can then either eat it right away, or (depending on how long it took you to smash the chickpeas), throw it in the fridge until it gets cold again, then you can put it on a sandwich.
You can also add other things like lettuce or spinach to the sandwich to make it a little more filling. Or you could over-fill the sandwich so there’s a lot of chickpeas in it. When I make them, I use about 2-3 Tbsp of the chickpea mix per sandwich.
Or, you could go even simpler and just eat the chickpea mix right out of a bowl and skip the sandwich making all together.
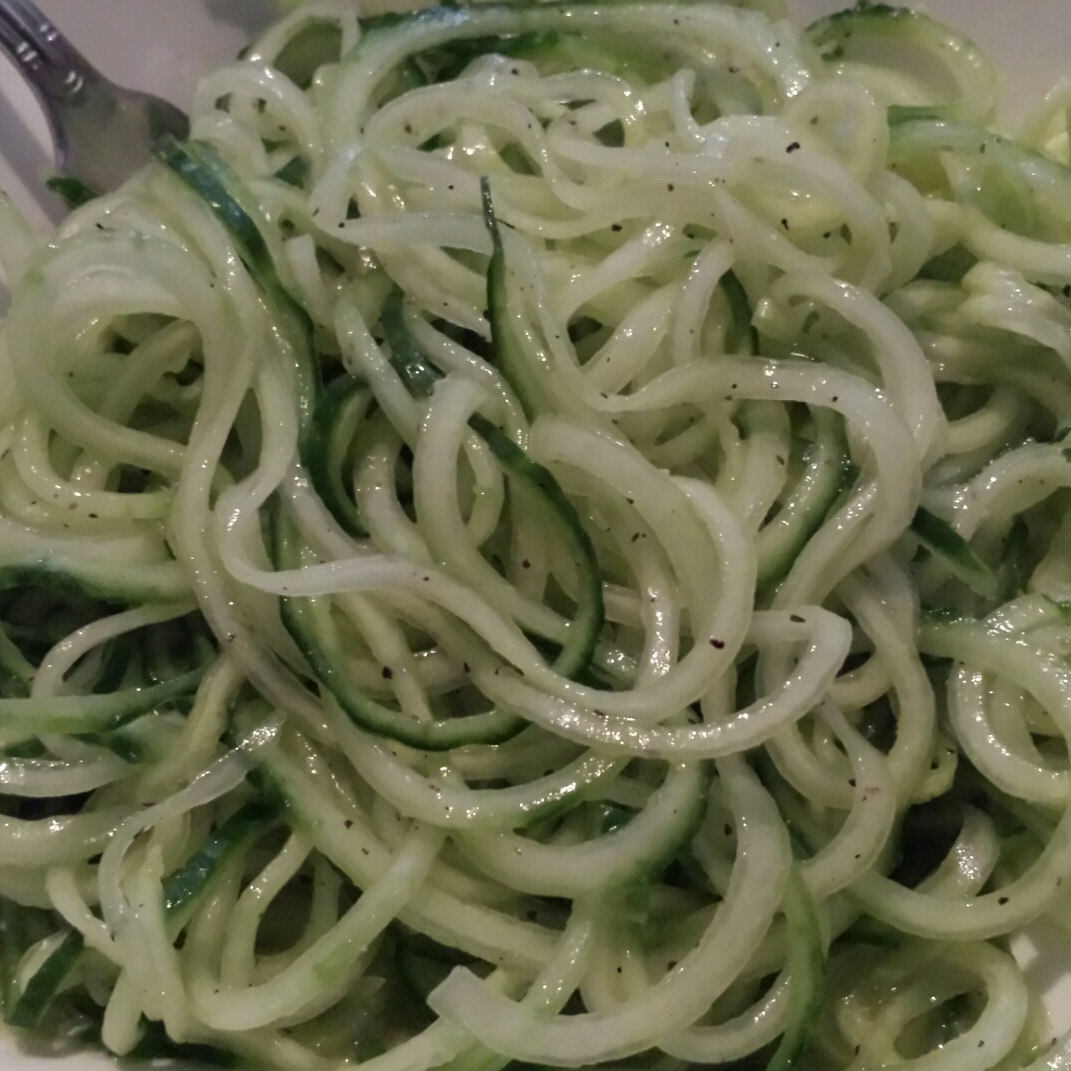
Cucumber Noodles
I know cucumber noodles are pretty big in the raw vegan community, and they have all kinds of inventive dressings, sauces and ways you can dress up these bad boys, but I like mine kept simple, with just a little salt and pepper.
You could try one of the thousands of sauces that are out there, but sometimes you just need something simple to hit the spot. I mostly make cucumber noodles when I want to eat cucumber slices, but want to make them ‘fancy’.
You can achieve the ‘noodle’ like strands with the cucumbers by either running it through a Spiralizer, hand-cutting them thinly, or I believe a mandolin would work, as well.
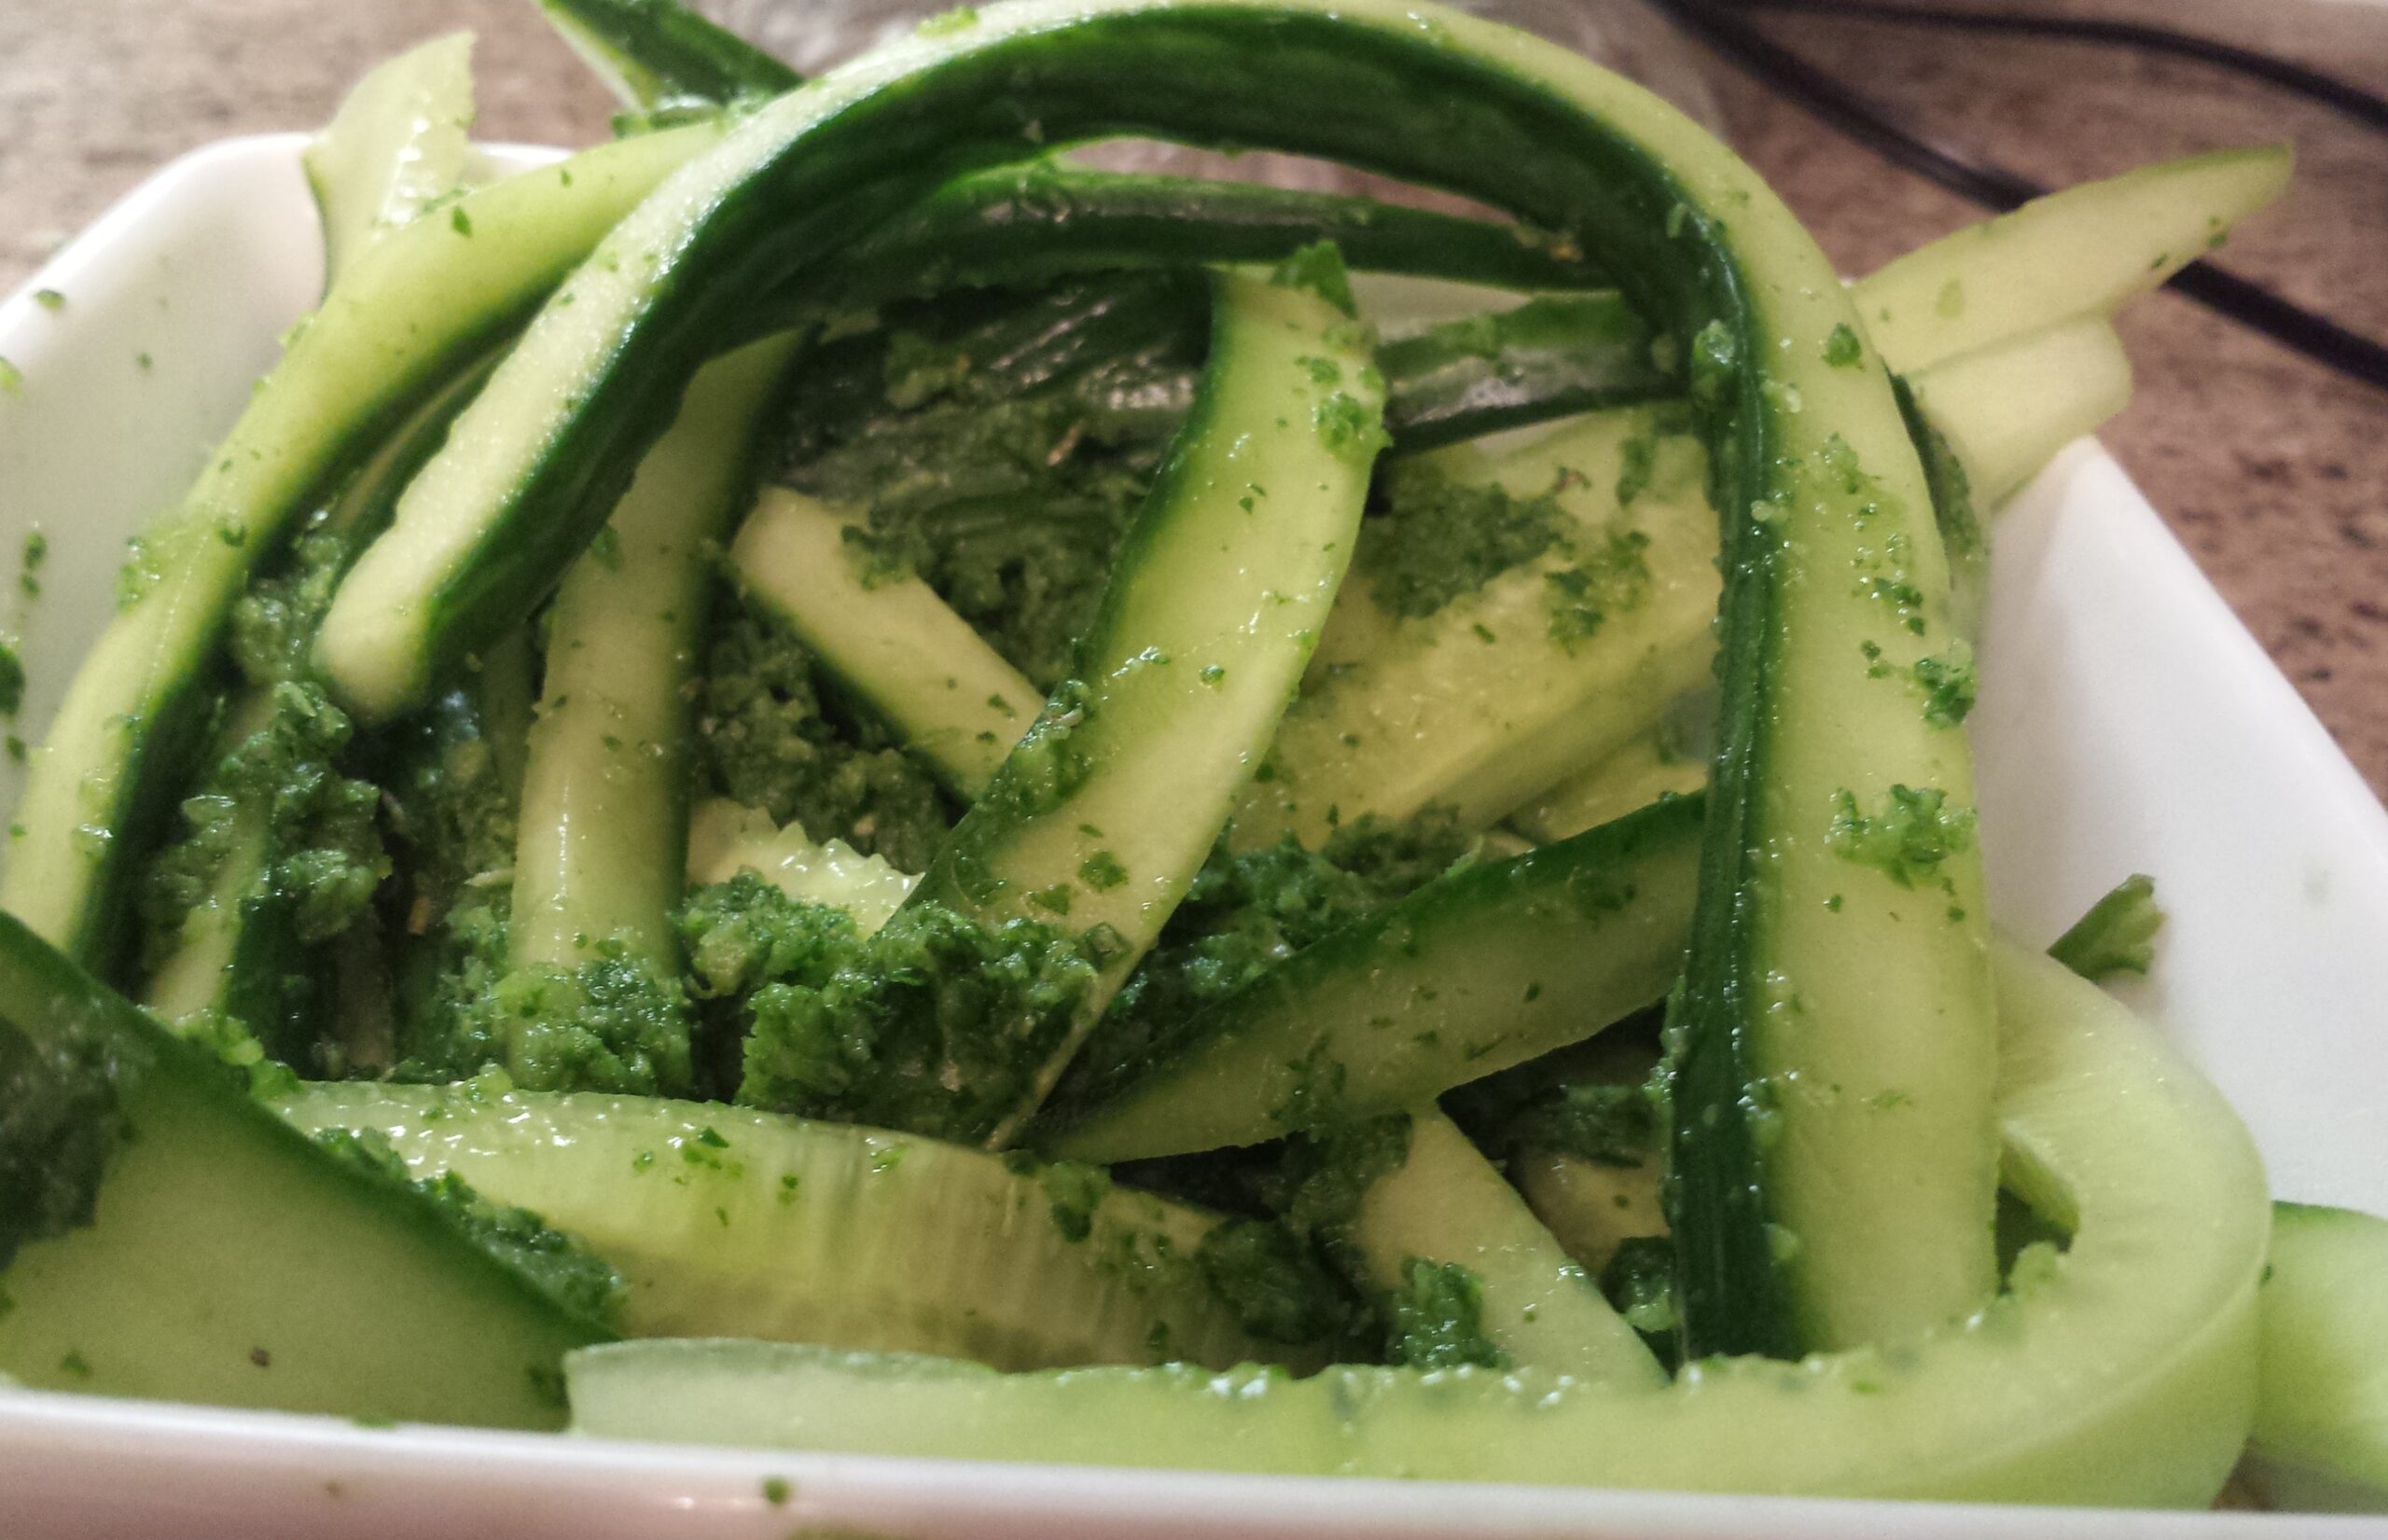
The first time I tried cucumber noodles, I actually hand-cut them. They didn’t look nearly as appetizing as the above noodles, though they still tasted good! It was still just cucumber after all.
See? Not the prettiest, but taste was on point! (Minus the pesto)
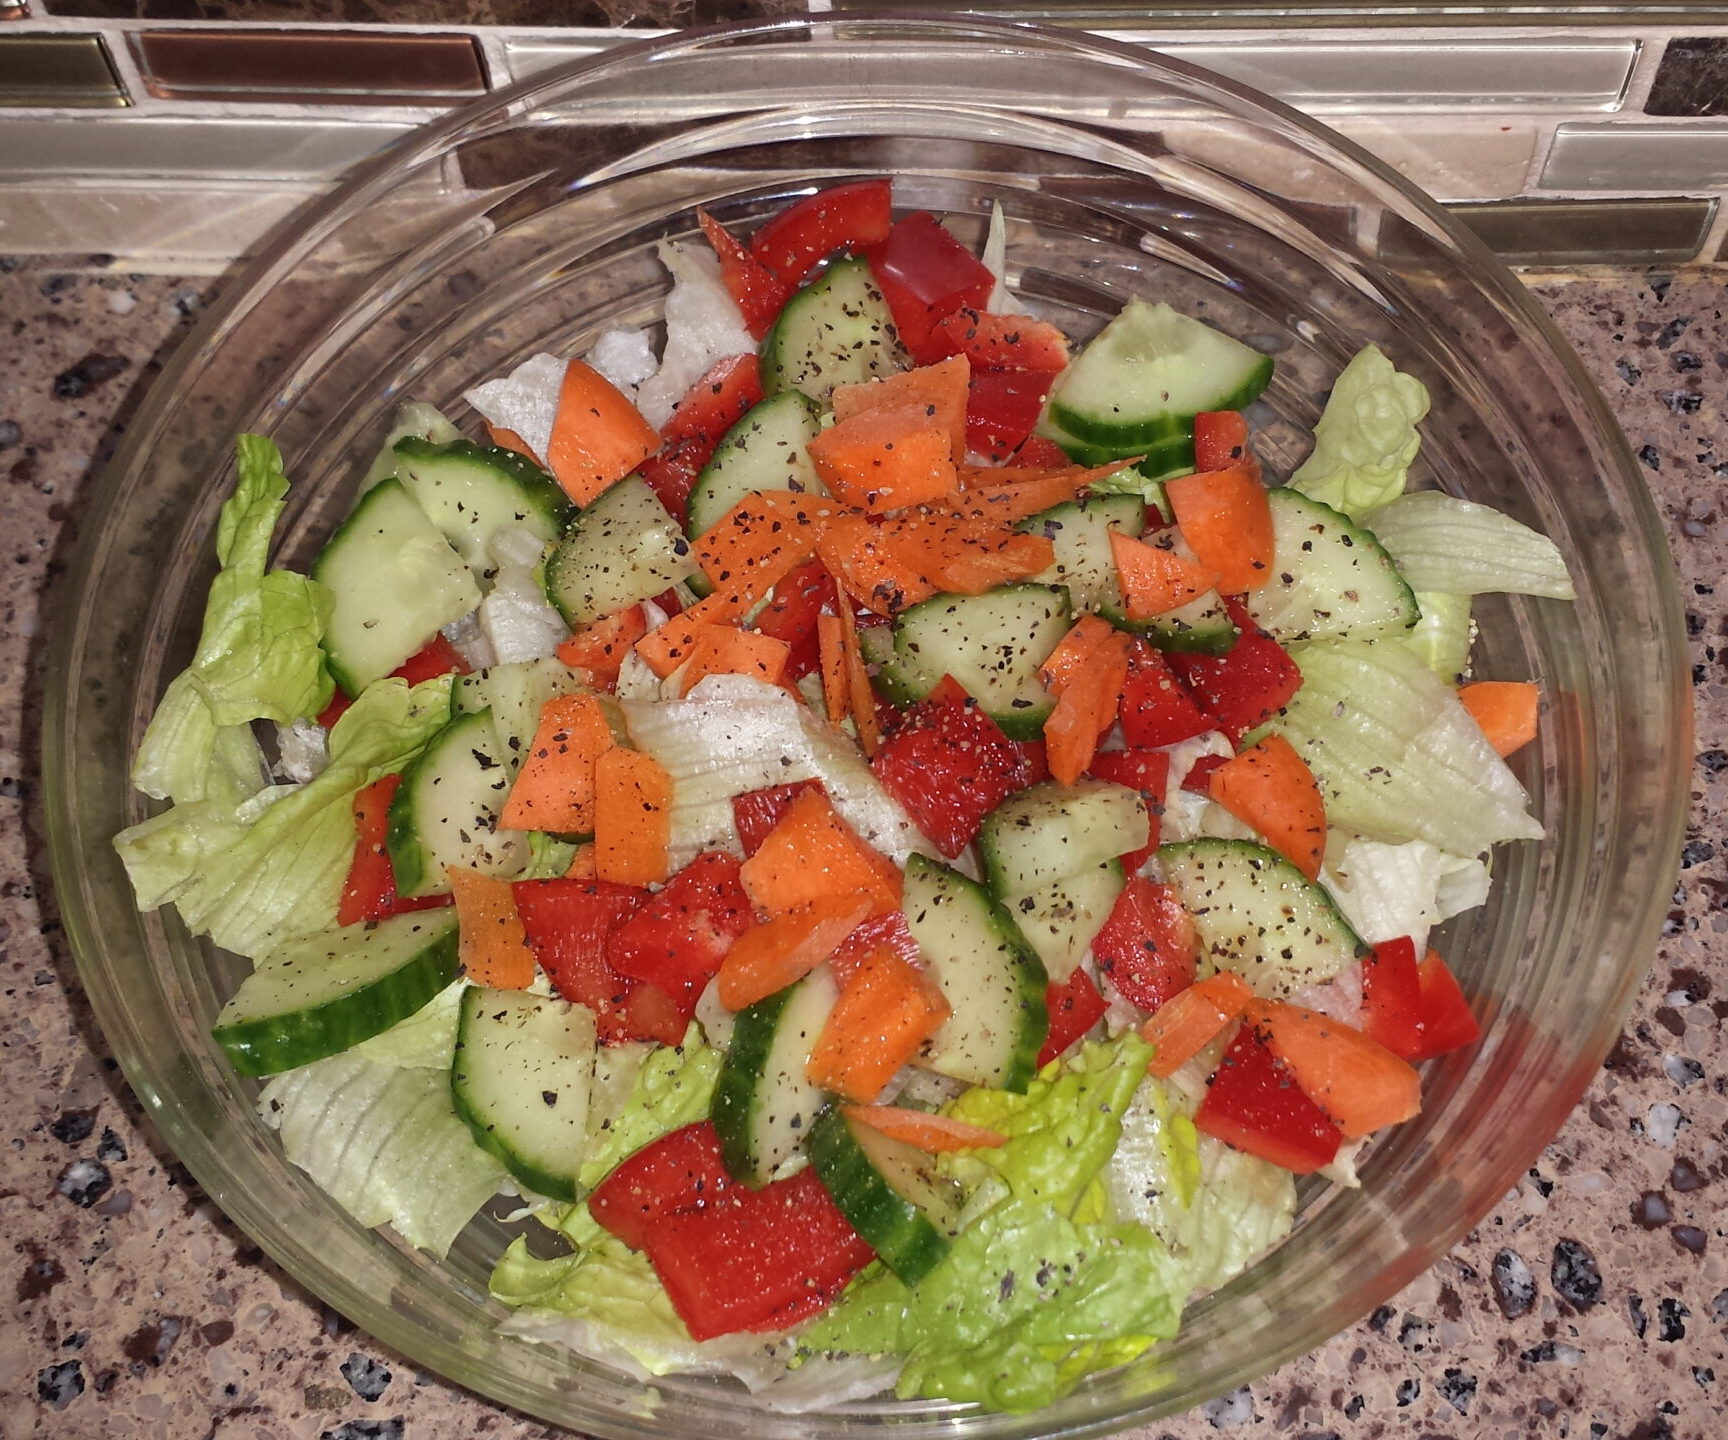
Salad
You know, for as bad of a wrap salads get (no pun intended), they are actually quite a handy meal. You can basically throw together anything in a bowl and call it a salad. Fruits, vegetables, beans, pasta – there are like a million different ‘salad’ recipes possible.
Which is great, because many of them only require you to chop up a few things and mix them in a bowl. You can’t get much simpler than that! And, what’s more, is once you have the salad done, you can use it in other meals, too. For example, instead of just eating a salad in a bowl, if you throw it in a tortilla, now you’ve got yourself a salad wrap!
This will of course depend on what kind of salad you’re gonna make. While I’m not trying to limit your salad creations, I just don’t think a fruit salad wrap would work. But you do you.
For a lettuce salad, I always start with the same basics
Lettuce
Cucumber
Bell Pepper
Hemp Hearts
Nooch/Cheese Shreds
Then from here, you can dress it up however you want! Sometimes I’ll add black salt to give it an ‘egg-y’ taste, or you can add bacon bits (No Name Bacon Bits are vegan!), dill, vegan mayo, and lemon juice to make a ranch/Caesar style dressing.
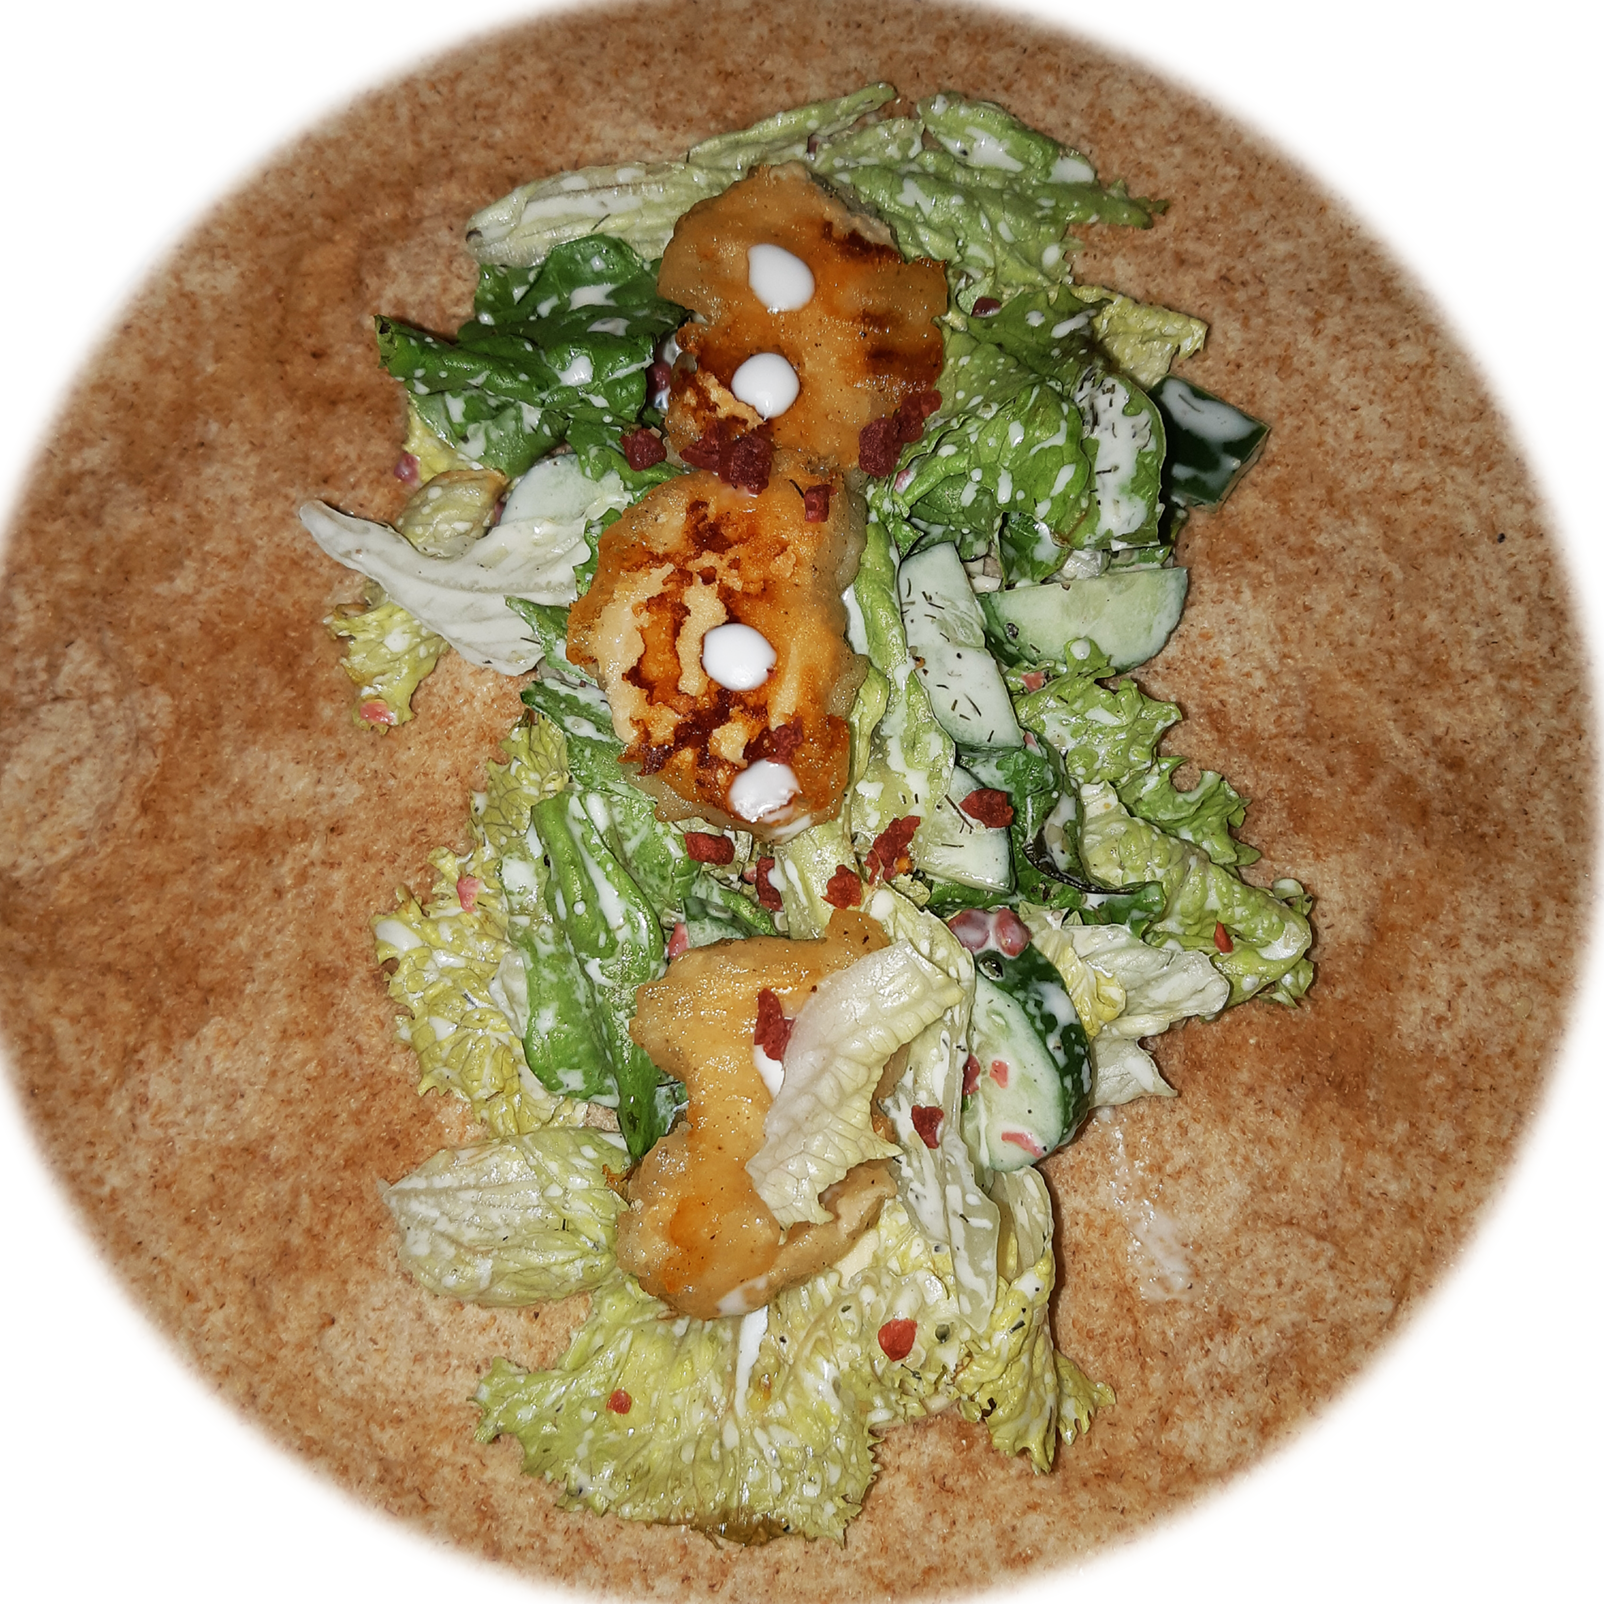
Or if it’s not astronomically hot, and you don’t mind turning on a burner, you could cook up some chick’n nuggets/strips and add those to your salad to turn it into a chick’n salad.
Or, you could make pasta salad, instead. For pasta salad, I usually add peas, bell pepper and celery to the noodles (either macaroni or Scoobi-Doo shapes are the best for pasta salad), and then for the dressing, I add: white vinegar, yellow/French’s mustard (optional), salt, pepper, garlic powder, onion (either powder or very small cubes), nooch (optional), and vegan mayo (also optional). Then you mix it together and let it cool in the fridge, or you could be one of those freaks who eat it when it’s still a little bit warm.
I love making pasta salad in the summer, not only because it’s super easy, but because it takes just as much effort to make a little bit of it as it does to make a lot. So I can usually make a big ‘batch’ of it, and then throw it in the fridge and eat it all week!
Also, same as lettuce salad, you could get a little creative and make a pasta salad wrap, or use leftovers in a warm pasta dish (I’ve turned left over pasta salad into mac n cheese) if you make it at the tail-end of summer. And, assuming it would last long enough you need to turn it into something else.
Avocado Toast
I’ll be honest, I haven’t actually made avocado toast all that much, since I’m not that big of a fan of how avocados taste. I don’t know what it is, but it’s just not really my bag.
That said, I have been trying to force myself to eat them more often (which isn’t hard when you’re starting at ‘never’), because I know they’re super good for you. So, with that in mind, I’ve only made avocado toast twice, but both times I didn’t feel the need to immediately vomit, so I’m taking that as a good sign.
This is the first way I tried it. I made some VeganEgg scrambled eggs, and then put some avocado slices on top of toast with a little bit of salt and pepper on top.
This… it tasted good, but as my first time trying avocado toast, with the giant pile of egg, it was too much of a not-that-great-texture in my mouth at once. I didn’t spit it out, but it was waaay too mushy for my liking. I did however finish it.
Some time after this, I had discovered I could eat at this place called Chipotle, so I went on a bit of a Chipotle kick, and decided to always get guac ‘on the side’, so I could continue to test the avocado waters. I wouldn’t eat the whole container of the guac (partly because Chipotle is super filling, and partly because I still wasn’t too into the taste), but my friend was more than happy to help me out. (This was pre-COVID, when sharing was still a thing we were allowed to do)
After that week of basically eating Chipotle straight, I didn’t eat avocado again until this year (2021), when I tried my hand at avocado toast again.
This time around, I figured since I liked chickpea salad, if I made it ‘taste like summer’, I’d probably enjoy it more. Which, I don’t know if that’s why I liked it, or if my body had just gotten more used to eating avocados, but this time when I ate it, it wasn’t that bad. (Which was good, because I had another avocado in the fridge)
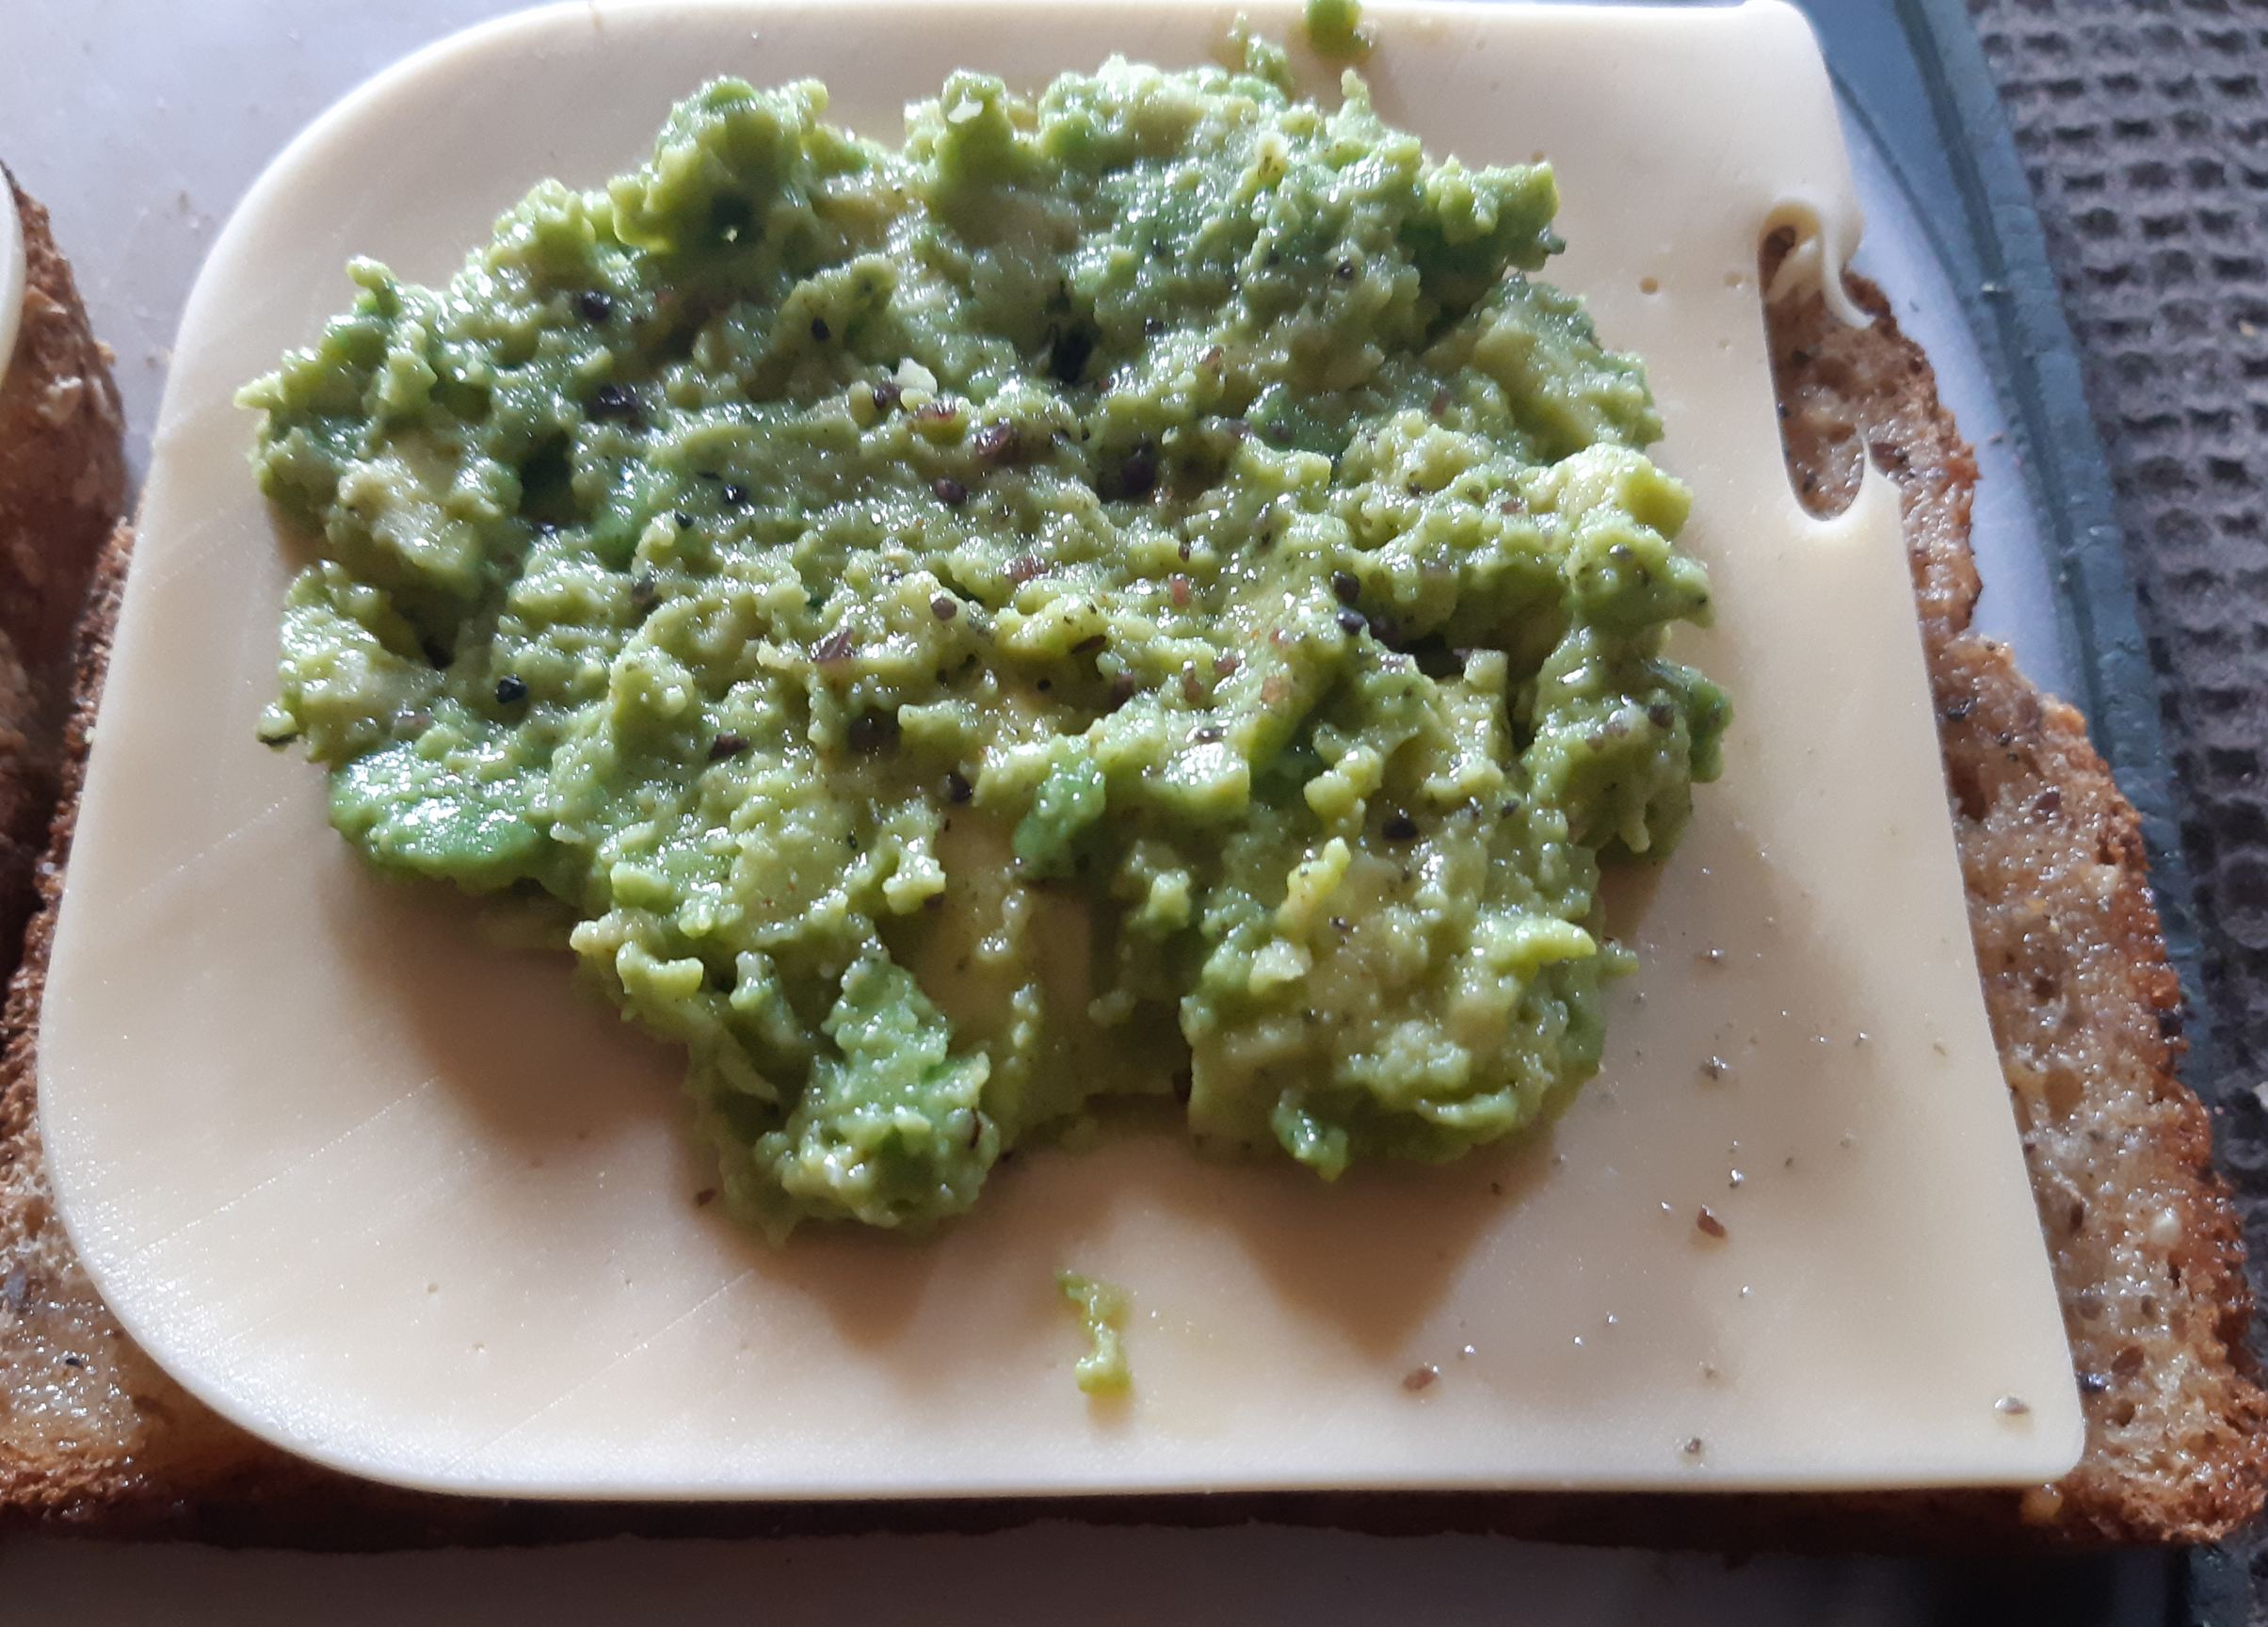
For this avo toast, I put salt, pepper, black salt (for the ‘egg-y’ tasty), a slice of PC Vegan Swiss Slices (side note: PC has come out with a whole line of new vegan products in Canada, which is awesome!), and smushed half an avocado on top, to which I mixed in some lemon juice, garlic powder, a smidge of paprika and dill.
Again, I don’t know if I liked this one more because I’m more used to eating avocados, or if it’s because I used less of it, but the second one I definitely wouldn’t mind eating more often. (… Which I realize isn’t that great of a selling point on a recipe, but hey, you’re here for honest opinions anyway, right? If you want awesome vegan recipes, go check out HotforFood)
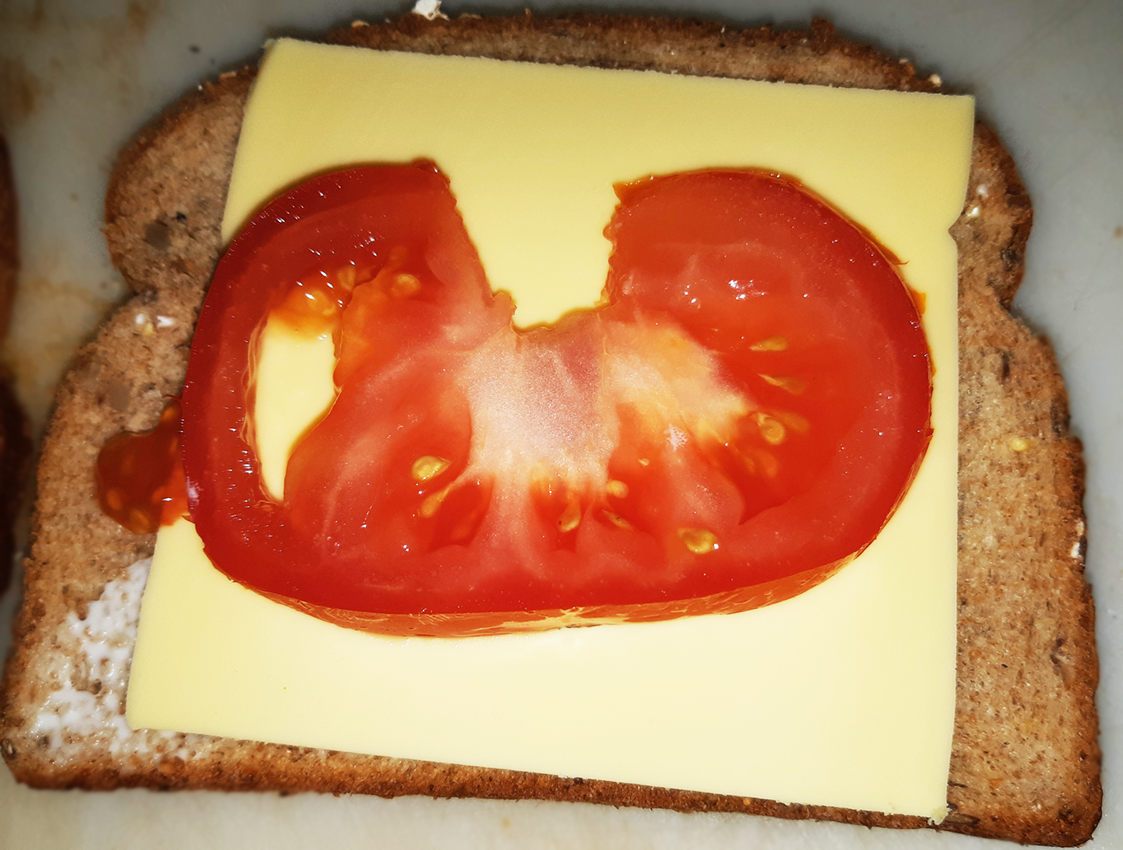
Cheese and Tomato Sandwich
This one is probably the easiest recipe in this post. You literally take a slice of cheese, and a slice of tomato (or two) and add them to bread. Boom, done.
If you’re feeling adventurous, you can add some vegan mayo, and/or salt and pepper.
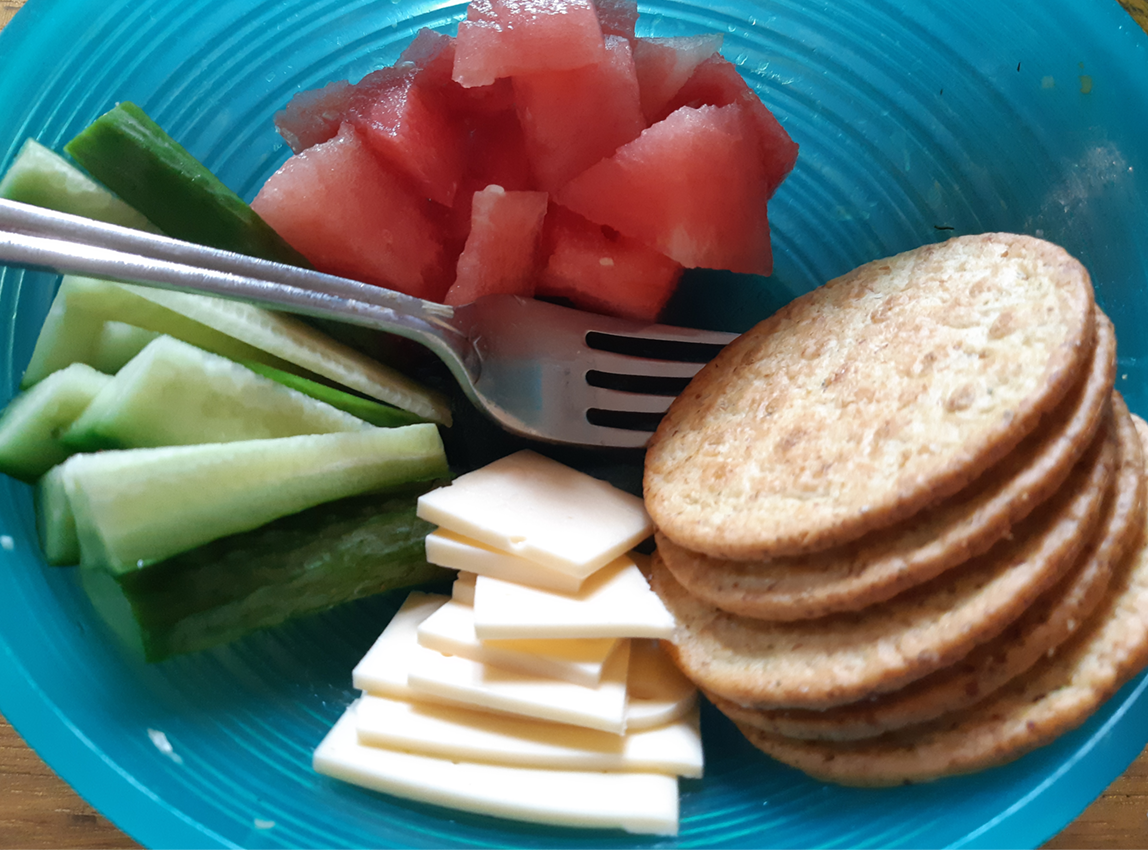
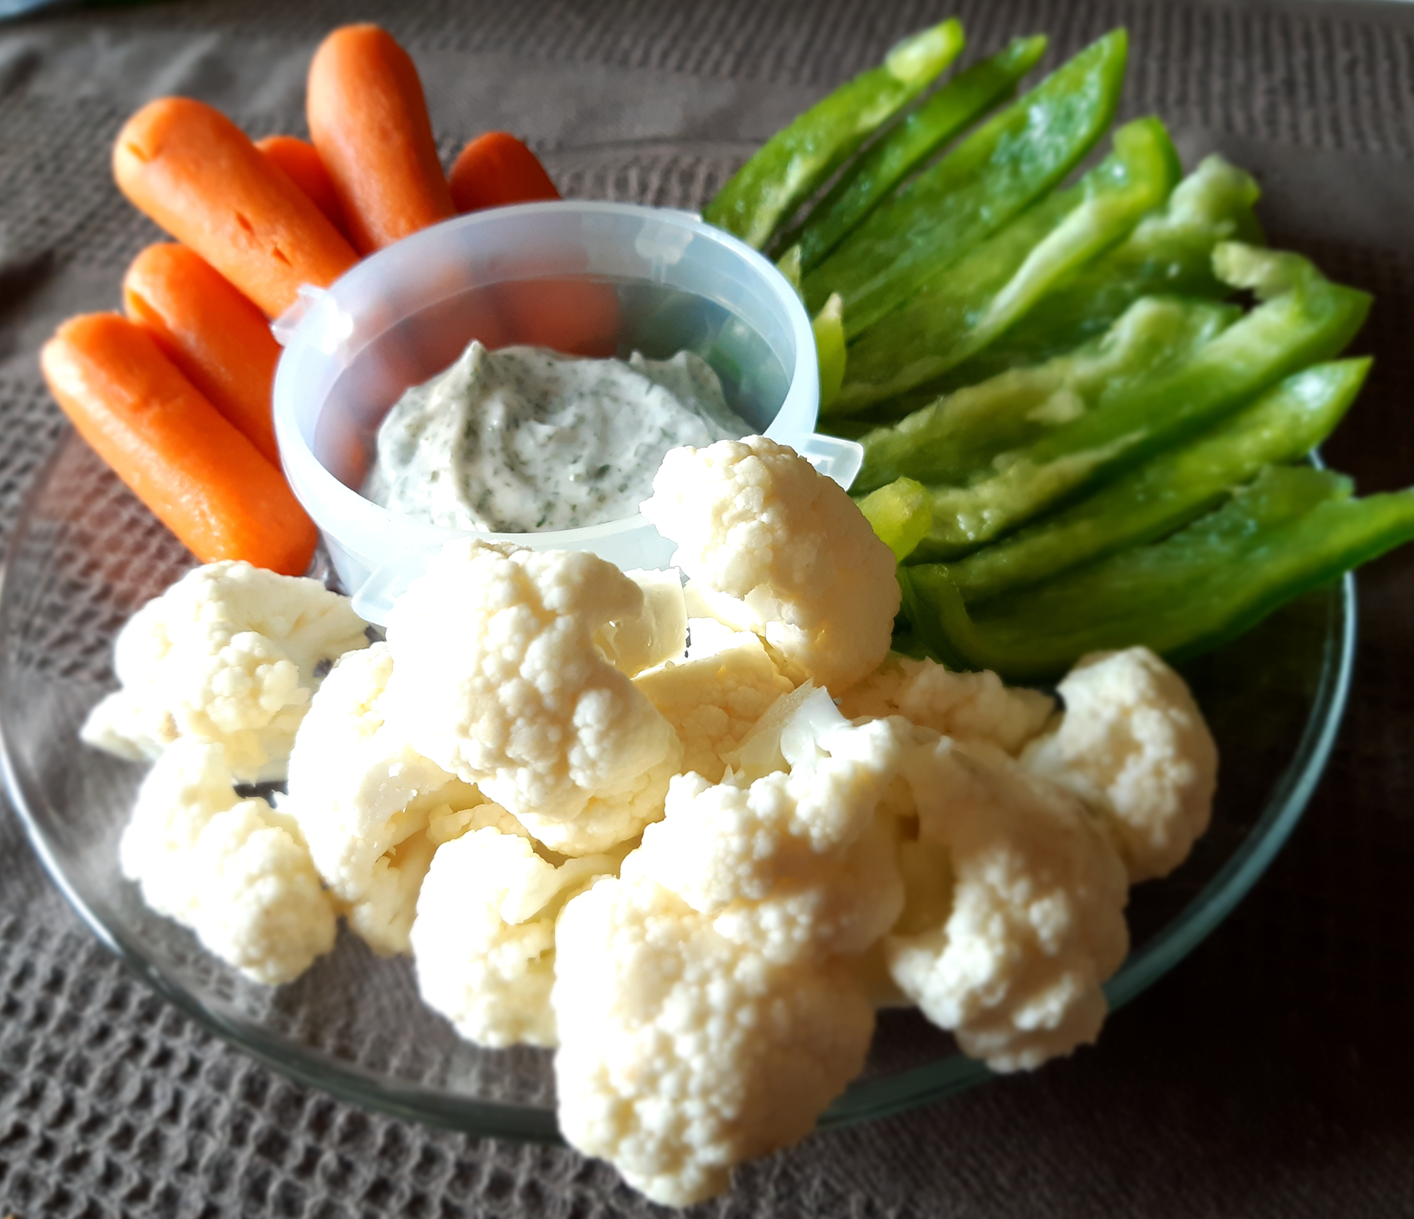
Snack Plates
Like salads, snack plates are awesome, because you can basically make them whatever you want to eat.
In summer especially, snack plates are great, because you can cut up a bunch of fruit and/or veggies, and then just mix and match them onto 1 plate, whip up a quick dip, and boom lunch is done.
I eat snack plates all the time and love them. Mine usually consist of: cucumber, green pepper, broccoli (or cauliflower), carrots and dip. But you can add whatever you want to them, really. It all depends on what you like to eat, and what you have. Sometimes, I’ll swap out one of the veggies for crackers and cheese, or some frozen nuggets or something. Or you could do a fruit mix with watermelon, strawberries, grapes, golden berries, etc.
Or, you could do little lunch meat + cheese sliders and cut up veggies. Or meatballs, mozzarella sticks, and crackers, or… pretty much you want to center your snack plate around whatever your dip is. As long as all the foods you choose pair well with the dip, they can go on the same plate.
The possibilities are literally endless!
And there you have it! Hopefully this small list of summer recipes has inspired you to create your own no-cook recipes. It’s really not that hard! Most veggies are great to eat cold, and all it takes is (usually) a little bit of creative thinking, and usually a tortilla to make a kick-ass, cold meal.
Do you have any favourite no-cook summer meals? Are you going to try any from this list? Let me know in the comments!
I know I’ve been on sort of a rice kick lately, but I have to use it, right?
Don’t worry if you’re sick of rice though – summer IS coming, so I’ll be making much less ‘hearty’ dishes for the warming weather. Stay tuned!
But, for now… more rice-y goodness!
5C white rice (I used Jasmine Rice)
5 carrots
5 potatoes
1 head of broccoli
1 Container of Mushroom Broth*
½ container of vegetable broth*
Spices:**
S&P
Garlic and Onion Powder
Paprika
Oregano
Basil
Parsley
Nooch
Directions:
Cut up the carrots, potatoes and broccoli. The carrots I just left as slices (feel free to make them smaller) and the potatoes I cut into eighths. The broccoli I left pretty chunky.
Place the cut up carrots and potatoes into a bowl. Add the broccoli to another bowl. Fill the bowls up with the Mushroom Broth until all the pieces are covered (or mostly covered).
Add the spices and stir the veggies around.
Cover and place in the fridge. Let the veggies marinate in the broth for about an hour and half. (I went for a bike ride while they were marinating so the timing might not be exact)
Preheat the oven to 350. Take veggies out of the fridge and spread out on a baking sheet. (Carrots and potatoes on one, broccoli on another) Keep the liquid! (We’re gonna use it to cook the rice)
Bake the carrots/potatoes for about 40 minutes, (until soft enough to poke with a fork), then cook the broccoli.
In the last twenty minutes of cooking time, make the rice. Use the marinating liquid instead of water. (To give the rice more flavour)
Once the rice is done, transfer to a container (or a serving dish) and mix in the veggies.
*I used Campbell’s Mushroom/Veggie Broth, it comes in a red square container, 900ml/container
** I didn’t measure out how much spice I put in, but if I had to guess, I’d say it was a couple of Tablespoons for each bowl
So, what do you guys think? Like it? Hate it? Let me know in the comments! Also, I know this one takes a while, but marinating definitely gives the veggies (and rice) way more flavour.
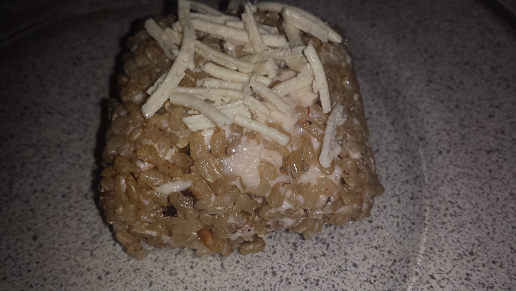
Okay guys, here’s the recipe for the Wrap I posted last week.
I used Gardein Mandarin Orange Chick’N, but since I don’t like the sauce packet that comes with it, I just left them plain. They taste more like ‘regular’ nuggets that way too. If you like the sauce though, feel free to make them with it, just beware – the wrap might get mushy because of the sauce.
Cook the Gardein Chick’N according to instructions.
While nuggets are cooking (in the last half of the cooking time), cut the green pepper and cucumber. I cut the green pepper into strips, so I could line them up on the edges to keep the rice in. I cut the cucumber into slices.
Heat up the cheesy rice in a pan until it’s warm, just enough to get the cheese to re-melt.
Now to assemble: take the cheesy rice and make a little mountain, (be sure to leave room at the bottom of the wrap so you fold it), lay out some of the nuggets on top (I could only fit 4), then add the cucumbers on top of that. The add the green peppers along the side of the rice, like a border. Sprinkle some extra Daiya shreds on top and roll up. (Use toothpicks to keep together if needed)
Here’s a picture of how I assembled the wrap:
5. Heat about 1Tbsp of oil up in a medium-hot pan. Once oil is hot, place the wrap fold side down and let heat for a few minutes, until the side gets golden/brown, then flip it over. (I didn’t time it, but I’d guess about 3 minutes)
6. Once done, take out of pan and cut in half. (Optional)
Usually, I don’t make cheesy rice spicy, but I had some left over Pepper-Jack shreds from something else and decided to try it. It’s not overly spicy, and for some of you, you might not even be able to tell it’s ‘spicy’. But since I don’t eat a lot of spicy food, this has a bit of a kick to it for me. That’s why I called it ‘Wee Bit of Spicy’.
Also, I only made 4C of rice so that I would have room to add the cheese shreds to the rice cooker without spilling anything. If you need to make more, feel free, just be careful when mixing in the cheese that it doesn’t spill.
4C brown rice
Daiya Pepper-jack Cheese Shreds (it was the end of the bag, about ¼ C)
Half a pack of Daiya Mozz Shreds
Spices (All 1Tbsp)
S&P
Garlic Powder
Onion Powder
Oregano
Nooch
Paprika
Poultry Seasoning
1/2Tbsp Cayenne
1/2Tbsp Red Chili Flakes
Directions:
Cook rice according to rice instructions (I used my rice cooker, but you could do it on the stove if you don’t have one.) I also mixed in all the spices here before turning the cooker on.
Once rice is done cooking, fluff around with fork and make sure none of it stuck onto the pot. Add the cheese and mix in. Replace the lid and wait until cheese is melted. (About 5-10minutes)
Once cheese is melted, you can add veggies if you want and turn it into a cheesy rice stir-fry. I left mine plain because tt’s kind of like mac n cheese – you can add veggies, but it’s good by itself too. Also, I added it to a wrap and put the cold veggies in that separate.
Liking the site? Consider signing up for my Patreon, so I can continue bringing you the content you love!
This was one of the earlier recipes I tried to make, and it actually turned out pretty good. Only thing was it was too sweet for my taste, so when I make it in the future, I’m going to use less sugar.
For you guys though, I left the amount the recipe I followed said – since everyone has different tastes, you might not find it too sweet.
3Tbsps Cornstartch (Divided)
½ C water plus
2 Tbsps water, divided
½ tsp garlic powder
Beef strips (I used a whole bag of Gardeins Beefless Tips*)
2 Tbsp veg oil, divided
4C broccoli (I used frozen, but you can use fresh if you want)
1 onion (small)
1/3 C soy sauce
2 Tbsp brown sugar
1 tsp ground ginger
Directions:
Combine 2Tbsp cornstarch, 2Tbsp water and garlic until smooth. Add the beef and toss
Over medium-high heat, stir fry beef w/ 1 Tbsp oil. Remove from heat once thoroughly cooked and keep warm.
Stir fry broccoli and onion in remaining oil until onions are translucent.
Return the beef to the pan. Combine soy sauce, brown sugar, ginger and remaining cornstarch and water. Blend until smooth and add to pan.
Cook for about 2 minutes or until everything is well combined and the beef is hot.
Remove from heat and serve over rice. (If desired)
*I know that Gardein stopped making the Beefless Tips, so I would suggest, either seeing if you can find another one, or maybe make some beef-style seitan to go with it? Or, if you want to really not eat beef, you could substitute Tofurkey Sausages (cut into pieces).
Let me know in the comments if it was too sweet for you, or any other question/concern/comment you might have about it!
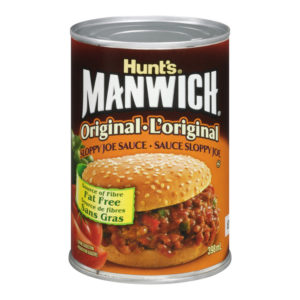
This being the first Sloppy Joe I’ve had, I think it tasted pretty good. I mean, the sauce I found I’m pretty sure is what makes it, so unless you’re going to try making the sauce from scratch, I wouldn’t worry about getting it to taste exactly the same. Also, I felt like the sandwich needed something on the side to go with it, so I made some gnocchi too. And, I have to say, the gnocchi goes really well with the sauce.
1 package of Ground Round (I used Yves Italian Veggie*)
1 kaiser bun
1 package of White Mushrooms
¼ of an Onion
1 can of Hunt’s Manwich Original Sloppy Joe Sauce
1 package of Gnocchi (I used Italgusto Gnocchi Di Patate)
Dice the onion, and cube the mushrooms.
Throw the onions, mushrooms and ground round (I used half the pack) into a pan and cook it on medium-high, until the onions get translucent.
Open the can of sauce and dump half of it in (if only using half the pack of ground round). Mix so the ground round gets coated evenly.
Bring a large pot of lightly salted water to a boil and throw the Gnocchi in. As soon as they float to the top, drain. Pour some of the remaining sauce on top of the gnocchi and mix. Once coated, add to the side of the plate and top with a little bit of oregano.
Cut the kaiser in half and place in the oven to toast for about 2min.
Once the kaiser is toasted, take the ground round mixture off the heat and place in the bun.
*I bought the Italian one because that was all that they had. That’s also why I didn’t spice the ground round mixture. If you buy the Original/Plain one, I usually spice it with: Salt, Pepper, Garlic Powder, Oregano and Basil.
So… vegan Sloppy Joe – did you love it? Hate it? Have any questions? Feel free to leave me a comment below to let me know what you think!
Have you guys tried Ketchup Doritos? If not, you’ve GOT to try them! SO glad they’re vegan! The only problem with them? They aren’t available all year round, only ever limited time with such greatness…
Well, before they disappear this time, might I suggest make them into nachos? Ooohhh yeah – I went there.
These are split in half with Sweet Chili Heat Doritos (also vegan, and available all year!), but if you’re really craving ketchup, feel free to just use one chip.
Or, if you love Sweet Chili Heat but find eating them alone is a little too spicy for you – cut them in half with Ketchup Doritos. They pair really well together – the little kick from the Chili and the coolness of the ketchup are great.
Spices (salt, pepper, garlic powder, oregano, basil, tumeric and cumin)
Salsa
Directions
Make rice according to instructions and add spices if desired.
Cut up the bell peppers and mushrooms to desired smallness (I made them cubes) Put bell peppers to the side.
Throw the mushrooms in a pan with a little bit of olive oil. Add spices as you wish, and cook until tender, add soy sauce close to the end of cooking.
Preheat oven to 375. Put foil over baking sheet and add 1 layer of chips. (Make about half ketchup, half sweet chili)
Layer toppings as desired (except salsa). I layered: rice, mushrooms, red/yellow peppers and then cheese. Place in oven for 10 minutes or until cheese is melted.
Scoop salsa into a small bowl to have on side. Serve and enjoy!
Love this recipe so much, wish I could make it all year but what can you do? Let me know what you think of this masterpiece in the comments!
Okay, so… this actually started out as risotto (or, just, cheesy rice, I was gonna make a rue and then just dump some rice/veggies in that, also I’m pretty sure risotto is actually more complicated than cheese+rice) but we were out of margarine, so there went that plan. So, I had to change the plan, but didn’t want to make rice stir fry (which would’ve been a hell of a lot faster/easier) because I had just made that last week and was trying to not make the same things over and over.
Then I started thinking about stuff I hadn’t made in a while that had rice and thought of making stuffed peppers. I checked the fridge – out of peppers. Then I thought about other vegetables I could stuff (I had also just seen this GIF on Twitter of stuffed spaghetti squash, hence the intent on stuffed something) and I turned around and saw a bag of potatoes and… yeah, stuffed potatoes.
And for those wondering, I will be making cheesy rice tomorrow after I go to the store because I have lots of rice left over. 😀
Okay, so, on to the recipe:
Ingredients:
6C Brown Rice
6 (big/big ish) Taters
Coconut Oil
3C Frozen Veggies (peas, corn and broccoli)
Spices:
S&P
Garlic Powder
Paprika
Oregano
Basil
Parsley
Poultry Seasoning
Onion Powder (I’m out of this too but would’ve put it in if I had it)
Cook the rice (I add the spices to it before setting it in the rice cooker, if you don’t want to do that just spice it after it’s done)
Preheat oven to 350. Place whole taters on a lightly oiled tray. Let cook for 30 minutes.
Leave the oven on after you take out the taters and allow them to cool enough you can pick them up without burning yourself.
Cook the frozen vegetables in a pot on the stove. (Tip: if you fill the pot with water and dump the vegetables in right away and then take them out after it starts boiling you can cook them faster)
Cut the taters in half vertically and scoop out innerds. I didn’t go right to the skin for them, I left an edge of potato, so that they were sturdier. (Also, the last time I tried to go right to the skin, I failed horribly and ended up making potato balls. If you want you can go right to the skins though) Spice the potatoes as well and then mash. Make mashed potatoes how you normally would (adding the milk/butter) and mix until the spices are not all in one spot. They also don’t have to be completely un-lumped, just do your best. Mine were kinda lumpy but that’s okay.
Add the vegetables and rice to the mashed potatoes and mix until all that goodness is evened out.
Scoop the mix back into the shells and place back on the tray and in the oven for about 15 more minutes. (I had to do this in two batches because I have a small oven, and cut in half, there was more potatoes to line up)
Take out, turn the oven off and allow to cool past the point of burning your tongue before serving/eating.
I know that on the spices it doesn’t tell you how much to put in, but that’s because I just kinda eyeballed/know how much I need to put in to flavour the amount I make. I have a big family and cook a shit-ton of food (whole packs of pasta, 6-8 cups of rice, etc.) so even if I told you the amounts I put in for spices, you’d have to adjust it anyway to fit the amount you were making. If I had to guess though, I’d say maybe a few Tbsps of each.
So… Stuffed Potaotes: Did you like/love/hate/its complicated them? Let me know how feel in the comments, or if you have any questions, I’d be happy to answer!