![]()
Happy New Year everyone! I hope you all had a relaxing holiday.
I thought I’d start off this years’ round of photoshop tutorials with a simple one, and work our way up to the harder stuff later on.
The Outer Glow effect can be used to create a wide range of different looks for text, in a not-so-complicated way. (Seriously, there’s only 4 steps)


For this tutorial, I’ll be showing you how to do the first Outer Glow example, but feel free to play around with it yourself.

Step 1:
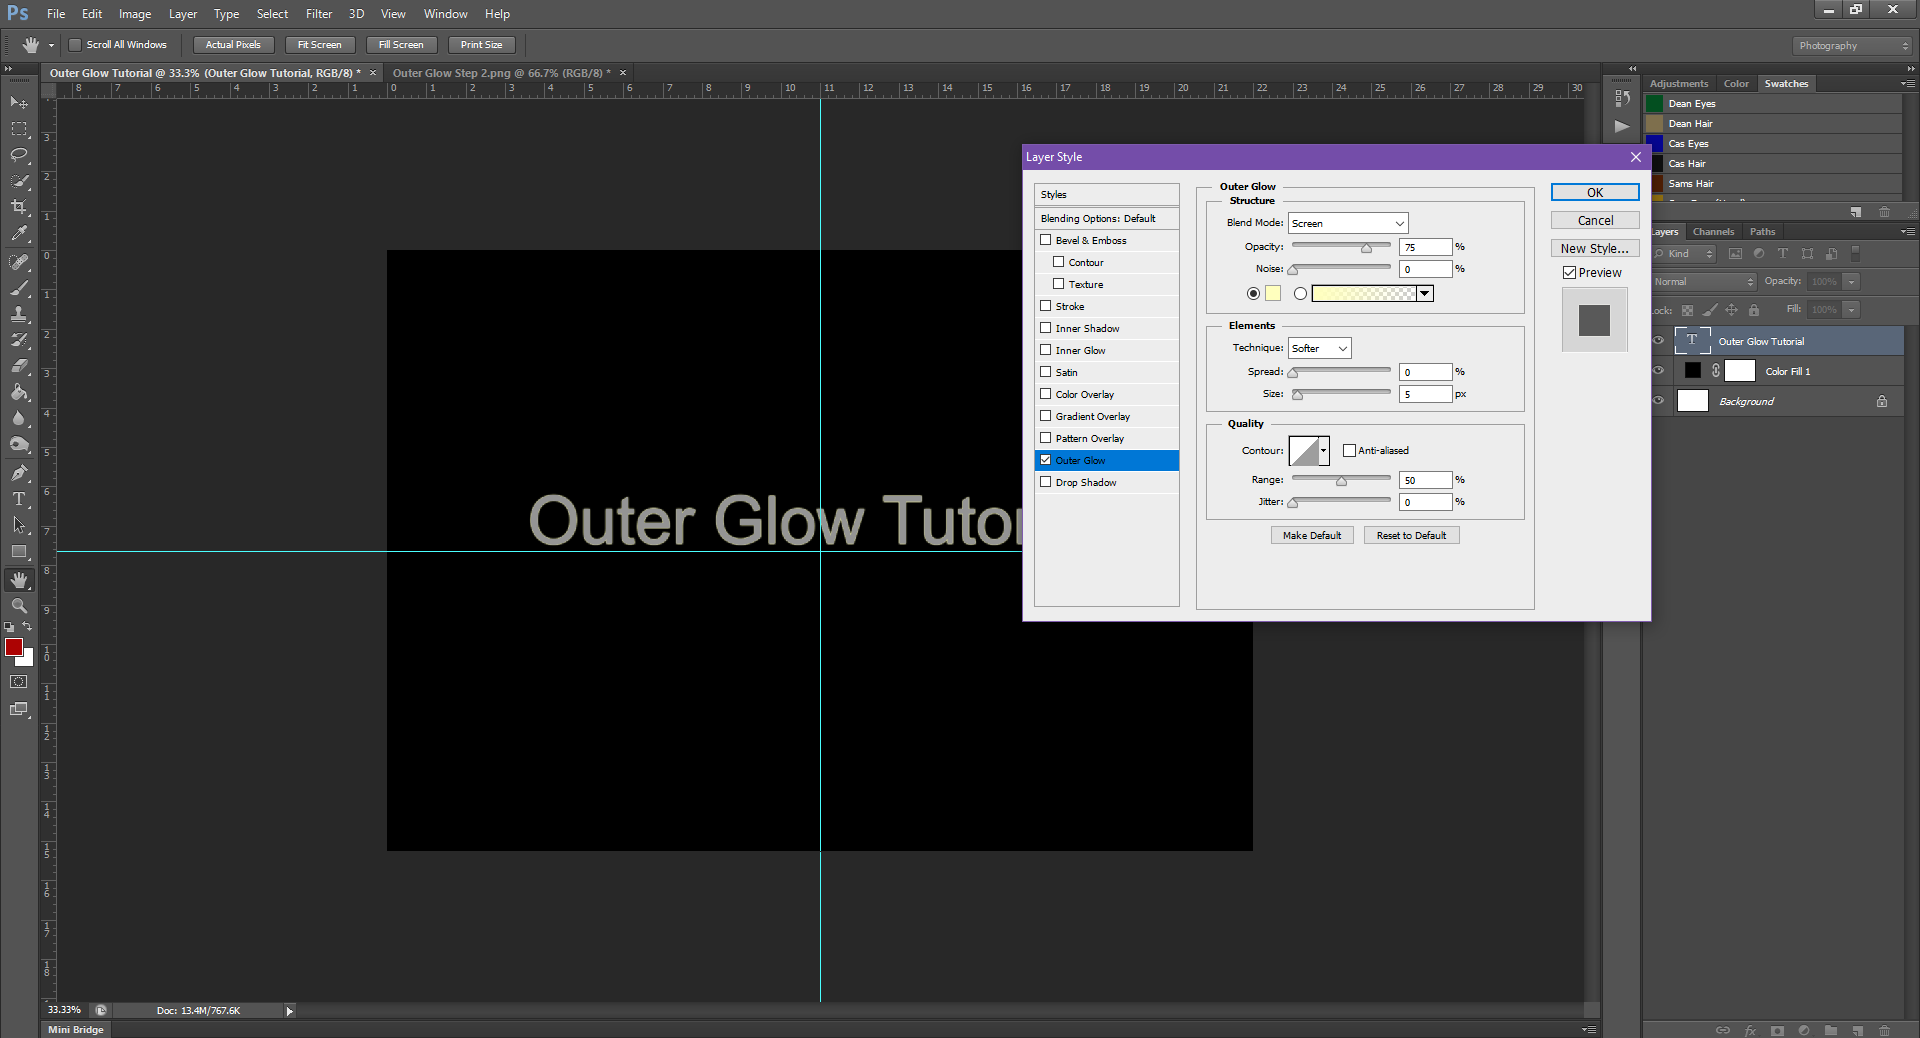
To start, I’m just going to add a Black background, and some text. It usually doesn’t matter what colour the text is, depending on the effect you’re trying to create. For simplicity sake, I’m gonna use grey so you can see it. (In Example 1, I made the colour of the text black)

Step 2.
After this, you’ll want to head over to the Layers Panel, and right click on the text layer, then select Blending Options. Go down your list until you find Outer Glow listed, and check-mark the box.


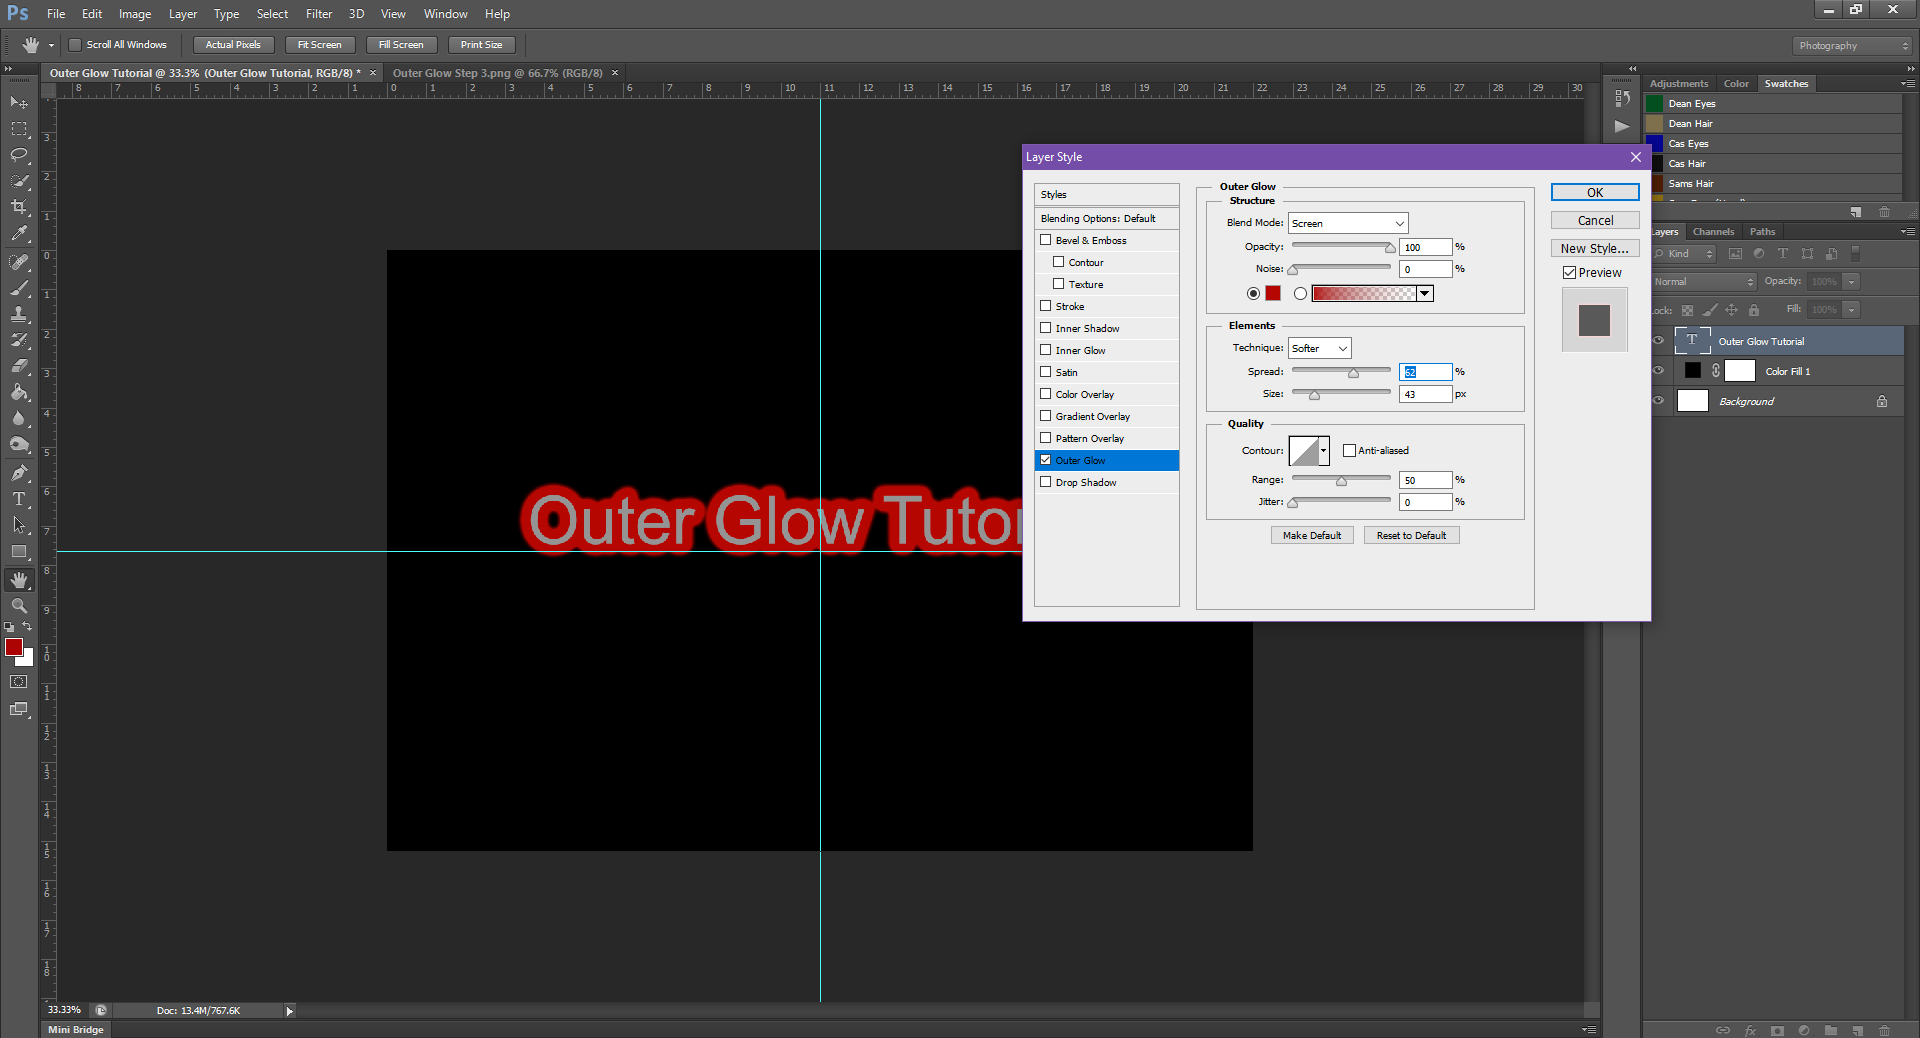
Once you do that, you can play around with the Size and Spread levels, to adjust how the Outer Glow will look. Do this until you get your desired effect.
You can also change the colour of the glow by double clicking the coloured square at the top of the dialogue box, and then using the Colour Picker to pick your desired colour.

If, for some reason, the Outer Glow is not showing up against your coloured (non-white) background, change the Blend Mode at the top of the dialogue box from Screen to Normal.
Step 3.
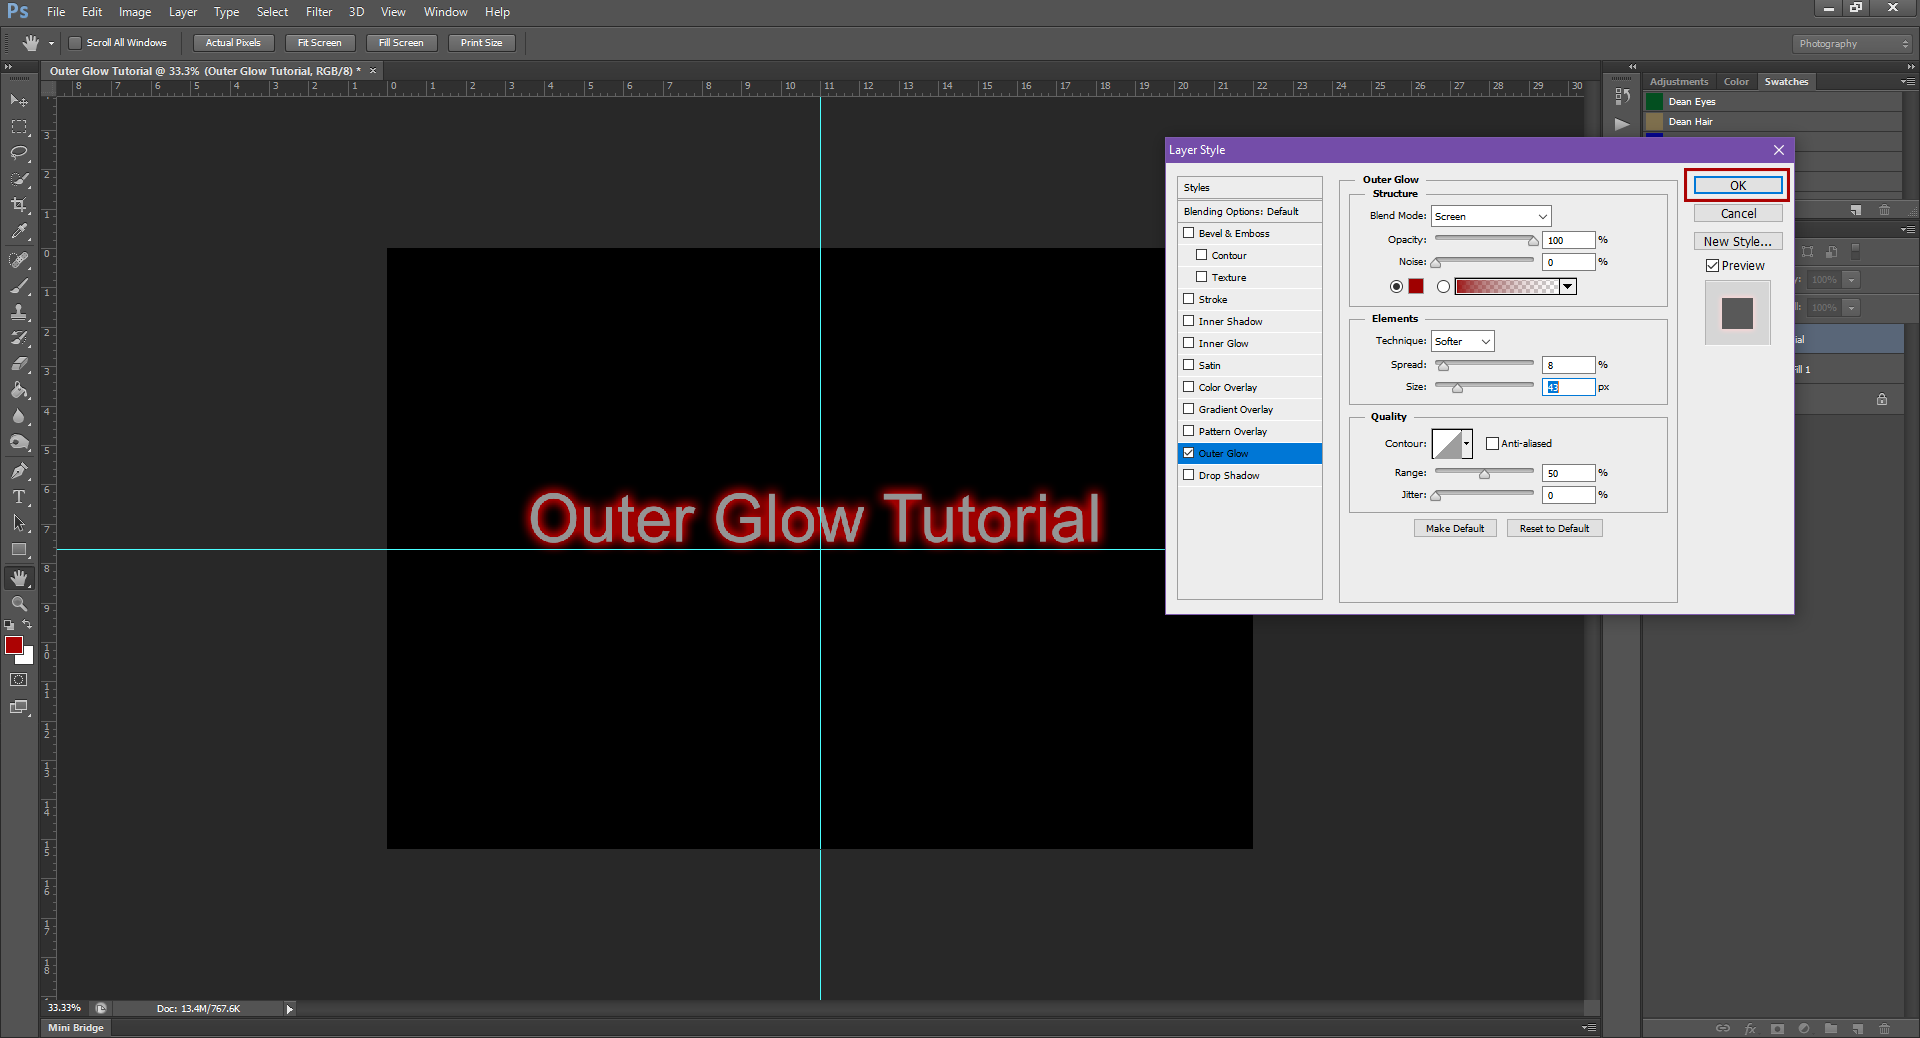
Once you’re happy with how it looks, click Okay to apply the effect to your text.

If you need to change it, don’t worry, you can always re-right click on the text layer and go back to the Blending Mode options to play with things until you’re happy with it.
Step 4.
I’m pretty sure I covered this in the Intro, but just in case I didn’t: to save, you’ll usually want to save a PHSH file (with all the layers intact, so you can edit it at a later time without starting over, if needed) and a picture file (the one you’re going to post places).
To save as a PHSH file, go up to File – Save As, and then name the file something that you’ll remember, I usually save it as ‘Whatever Project I’m Working On UNFlattened’ so it’s easy to pick out of a list of files.
To save the picture version, go up to Layers (in the same menu as File), and scroll down to Flatten Image. Doing this will compress the layers into one (1) single layer, and will make the file you’re saving smaller. (Which is very handy if say, you’re uploading the picture anywhere that has a ‘file size cannot exceed x amount’ message)
Once compressing the layers into 1, you can go ahead and save it as a JPEG or PNG file. (Select these from the File Type drop-down menu that comes up under the File Name you want to save as)
And that’s it! Just 4 easy steps to upgrade your text. (I told you most of these were easier than they seemed!)
Next month, I’ll be re-visting an old tutorial and will show you how you can change/add colour to almost anything.


Like this tutorial? Check out more here!
Liking the site? Consider signing up for my Patreon, so I can continue bringing you the content you love!
