Yes, that’s wishful thinking. Unfortunately, there’s still snow on the ground over here. But, the theme of this article is in line with spring cleaning, so, just go with me, okay?
Now that we’re coming out of the hibernation of winter, it’s the perfect time to do a little spring cleaning. Clearing out old clutter can do wonders for your mental health – and closet space – but, you might be wondering: can you still do your annual spring clean now that you’re on a zero waste journey?
The short answer, is yes! You absolutely can.
Cleaning doesn’t necessarily mean throwing things in the garbage.
In today’s article, I’m going to tell you about the two best things I’ve found for clearing out old clothes. There were originally going to be more tips, but the more I thought, the more I realized all the ‘other’ things I’d come up with were really just sub-categories/off-shoots of these two things.
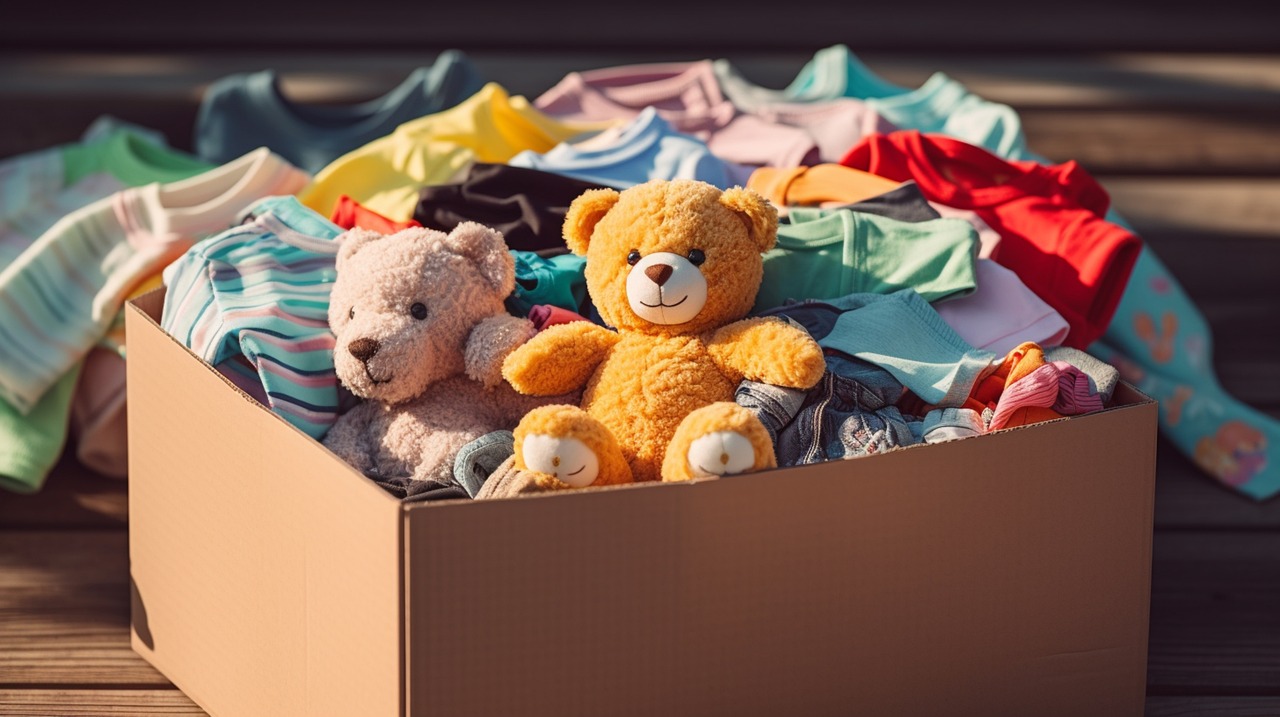
Donate Them
Whether it be to a charity, homeless shelter, second hand store or even a friend’s kid – there are tons of options for giving away old clothing to people who need it. (As long as they’re still in good shape, of course)
Search your local community and you may be surprised to find how many clothing donation options you have. In my own for example, the gym class I started going to has an annual clothing swap in December. People bring in their old clothes, and then are free to pick up one or two of the items left by others. It’s a great way to give your clothes to people who need it, to ask other people directly about the clothes if you’re a little unsure (or if they’re missing tags or something) and it’s a great way to meet people who have similar interests as you!
Just be sure to double check the types of clothes that are allowed and for the love of God, please remember to wash your clothes before donating them. You don’t want to be the person who brings in a sweater that smells of B.O.
Up-cycle Them
If the clothes are too far gone for donation, see if you can turn them into something else. Personally, I’ve used old jeans to make coasters and mug sleeves, used old t-shirts for rags, made a snowman Christmas decoration out of an old sock I’d lost it’s pair for years prior and even used an old blanket to make reusable pads.
There are tons of blog posts, Pinterest boards and Youtube videos you can look at to give yourself inspiration. Some of them are obviously more elaborate than others, which can be cool to watch! But a little daunting to think of yourself attempting.
But, the great thing with up-cycling is: you are in charge. You can use clothes to create basically anything if you have tape or a glue gun and a little hands-on motivation.
You also don’t need to start with something super complicated. Start with an easy thing that you will actually use – like a coaster, since that’s essentially just cutting out a circle – and see how it goes. Then, as you get better at it, you can start to create more complicated things.
And who knows? If you get really good, you might be able to start hand-making gifts for your friends! Or, hell, even sell your creations!
Plastic. It’s been quite the topic of conversation in recent years, and for good reason!
More and more people are becoming aware of the reasons plastics are bad. Once your eyes are opened to all the horrors plastics involve, it’s easy to get carried away in wanting to purge every single piece of it from your life.
Unfortunately, as we’ve discussed in a few previous articles, just throwing out everything you currently have and replacing it all with zero waste alternatives is actually counter-productive. It should take time to slowly build up a home filled with zero waste alternatives, but when do you know exactly when the correct time to purge is?
Different products degrade at different rates, and as we know, plastics can leech microplastics into our food, so it can be hard to draw the line between remaining environmentally conscious, and unnecessarily consuming microplastics.
Of course, the main factor in buying new products is always going to be cost. If you don’t have the money to revamp your storage containers, all the wanting to in the world won’t make a difference. Money, like most other things, can sometimes take years to save up. But just because you have to wait a little longer than someone else to replace the plastics in your home, does not mean you care any less!
I’ve been on my own zero waste journey for about 5 years now, and I still have plastic containers in my home. I’m not exactly proud of them – and a little sad some of my friends and family didn’t respect my wishes as some of them were gifts – but I’m not going to toss out perfectly usable containers, either. I need them!
At the time when I no longer need them and are ready to switch, if they’re still in good condition, I’ll donate them to a second hand/thrift store. So someone else can get a good use out of them. Yes, plastic is bad, but it’s worse to just dump it in a landfill. It’s perfectly usable, so might as well get as much use out of it as we can.
“But Ater,” you ask, “aren’t you worried about consuming microplastics from your containers?” And the truth is, I’m not, really. Maybe I should be – or maybe I’m just not as good of an environmentalist as I think – but I don’t really think about my impact, or that my plastic containers are ‘bad’, unless I’m writing an article.
It’s not like I’m horrified every time I open my cabinet and have to put food away. I just know there’s nothing I can immediately do about it, so it’s kind of like… why bother worrying, you know? Living with all that anxiety day in and day out isn’t actually helping, and I’d even argue, it’s probably not good for you. Like, mentally.
Telling yourself you’re a failure, or ‘not doing enough’ or whatever, is going to do nothing but upset you. It’s not going to change your circumstances. You can’t berate yourself into making more money.
You have to keep living while you work toward your zero waste plan, and sometimes that will mean continuing to do or use things you’ve changed your mind about. But, doing things practicably, and in a way that allows you the easiest transition is a smarter way to do things.
You also don’t want to burn out by doing too much too soon. I hate to use the example, but it’s like the frog slowly being boiled in a pot. Do things slowly, gradually, and then you’ll hardly notice a change once you’re on the other end.
This also helps keep the excitement going. As your plastic containers begin to degrade, or break, you can get excited about buying a replacement.
And, it allows you time to research!
Don’t just buy a glass container because that’s what the influencers on Instagram have. Get a zero waste alternative that works for you. Is glass really your best option, or would you benefit more from a non-breakable replacement, like stainless steel?
All that said, only you can decide when is the ‘correct’ time to replace your containers. Some people say plastic containers only last 1 year, some say 10, or even longer! It depends on so many factors, there’s no one definitive answer. If they start showing signs of wear and tear – such as scratches, holes or cracks – and/or begin to hold onto food scents even after properly washing, those would be good signs it’s time to say goodbye, whether they’ve reached the ‘proper’ time or not.
Different lifestyles require different rules. You have to find the ones that work for you.
Like this article? Check out more zero waste articles here!
Liking the website? Sign up for my Patreon as a way to show your support. (Tiers start at just $1)
Hope you all had a relaxing holiday and are ready to get back into a whole new world of content.
I thought I’d start the year off as I’ve been doing for the past couple years now: with my intended zero waste goals!
I find setting these up at the beginning of the year – and re-reading what I hoped to accomplished last year – really helps keep things in perspective of what’s manageable, what I keep putting off, and if I need to change anything to make new goals easier to reach.
So, let’s dive in and see what I said my 2024 goals were going to be:
To-Do list alternatives
Reduce single use paper towels/test out Roll Up bamboo paper towels
Let’s start with the good news first: I found a great To-Do list alternative to the paper notebook lists!
Instead of getting one of those Rocket Notebooks, I ended up just getting a big dry-erase board. I put a very detailed break down of everything on it: daily hour chunk to-dos, month to-dos (for both work and real life), a weekly work-out break down, a Buy Next section (to keep my wallet organized) and the daily general to-do list.
It has been working amazingly well! It’s everything I was looking for in a To-Do list re-placer and then some. Originally, I was just going to get a small one so I could put it beside my laptop and use it strictly as the notebook paper alternative. But then I thought: it makes more sense to just get a big one, so I can replace all my To-Do lists, instead of just the one on my desk!
Then, I got to work mapping it out in Photoshop. I found this sort of break down was great for two reasons: it helped me organize my millions of To-Do lists, and it helped me figure out what size board I needed.
I’d definitely recommend getting a big dry erase board for all you visual organizers out there. It sounds cliche, but this has literally been a game changer for me. Not only is it every To-Do list all in one place (which saves massive amounts of time trying to find them scattered around), it’s also a giant board, so it helps with the visual aspects of having them all right there. There’s no way I can ignore the board.
My only sort of issue with the board, is that it wasn’t cheap. At all. However, for how much paper it’s replacing, and how many years I’m hoping it holds up, I’m thinking it’ll be worth it.
I know I’ve said it before, but the upfront cost vs long-term cost really seems to be a thing with these zero waste alternatives. Which isn’t a bad thing! I just see why some people are adverse to switching. You need slightly more money now, but it’ll save you money later. Unfortunately, humans aren’t so great at the concept of ‘later’, so it doesn’t seem worth it to a lot of people.
Onto the bad news: I did not get a chance to test the Roll Up paperless paper towels or the tissues.
Honestly, some real-life stuff happened that made me get a little behind on work (which you guys hopefully didn’t notice, because I believe all the posts went up on time, but behind-the-scenes, instead of being 3+ months ahead of schedule, I was maybe 1 month ahead, or less) so I forgot.
That said, it didn’t really make a difference, because as I explained in last year’s post, I don’t use tissues very often, and I was able to reduce my paper towel usage significantly by just… using the intended dishware.
So, what are my zero waste goals for 2025?
Honestly, I’m not sure.
I would like to say reducing my plastic bag usage, but as I’ve mentioned previously, I don’t really use them that often (I was also gifted a butt-load of silicone reusable bags last Christmas) so I don’t feel like they’re as big of an ‘issue’ to tackle.
I’m pretty sure I’ve actually cut out all of my biggest single use garbage usage already. Not to sound too high horse-y, but I don’t think there’s another area that’s a really big problem.
I will of course continue working on the smaller aspects: completely switching out paper towels and tissues, completely changing out the single use plastic bags for the silicone ones, etc but I don’t think there’s any real ‘big’ zero waste goal I feel the need to list and tackle this year.
Obviously not saying I’m completely done, I just can’t think of anything as specific as those first few goals.
How about you? Do you have any zero waste problem areas you want to work on this year? Are there any problem areas I’ve mentioned in other posts that you haven’t seen me address that you’re curious about? Have I forgotten any big things?
Let me know in the comments!
Like this article? Check out more zero waste ones here!
Silicone bags are almost as famous as reusable straws in terms of products that mainstream society knows about as being good for the environment alternatives to single-use plastics.
Walk into basically any home-goods store nowadays and see displays of reusable bags on the shelves. It seems like every day there’s a new brand that pops up. But how good are reusable bags, really? And, are they actually a good choice for you?
Unfortunately, like most of the zero waste products on the market: it depends.
Whether or not you specifically need to buy silicone bags will depend entirely on your own lifestyle. If you don’t already rely on things like Ziploc bags for food/other storage, your silicone bags would probably just end up collecting dust and never get used.
If, however, you’re constantly using Ziploc (or another brand) of bags, you would probably get a lot of use out of silicone bags. You might think they’re the best invention ever and feel dumb for taking so long to buy some.
With such two extremes, how can you decide whether or not they’re worth the hype? Take a look at some of the pros and cons, then imagine if you’d actually use them in your everyday life.
Not that distant ‘someday’ utopia you often daydream about, I mean your actual everyday life.
Pro 1: They’re Versatile!
Since they’re made out of silicone, these bags are pretty versatile! You can freeze them, put them on the stove or microwave and/or even a dishwasher.
This isn’t true for every silicone bag though, so you’ll want to be sure to read the instructions for the specific brand you’re looking at. In my own research, I’ve seen a lot of them say they can at least go in the freezer and at least one source of heat, which are too of the best qualities you could ask for, in my opinion.
Pro 2: They Can Store a LOT!
Another perk I’ve seen is the sheer volume some of these bags can hold!
Obviously this depends on the brand and what size you buy, but I’ve seen ones that come in packs with snack-size, sandwich-size and 1 liter sized bags. I’ve also seen a few that have a fold-out bottom type thing so they can free-stand! That is not only a perk for the extra room they provide, but it’s also great for when you have to store the bags.
I’ve seen some Youtubers who use the non-free-standing kind, and they have to lay them all flat on top of each other to maximize their space. They also need to use three or four of the smaller bags.
Instead, you could use one of the free-standing bags, and that not only cuts down on the amount of bags you’ll have free for other storage, but might also be an easier way for you to store things like soups right side up.
Pro 3: They’re Better For The Environment!
Hopefully by now, I don’t need to tell you why single use plastics are bad for the environment. But, what you might not know, is why silicone is a good alternative.
Silicone is better than single-use/regular plastics because it’s an easier material to reprocess and it’s designed for longevity. This means you can use your silicone bags over and over, unlike Ziploc bags, which are designed to be thrown away after one use. This also means they won’t degrade as fast and don’t leech plastic into whatever you’re storing in them. (Like food)
Pro 4: They’re NOT Made Out of Plastic!
Though they may look and feel similar, silicone bags and disposable plastic bags are not made out of the same materials!
Plastic bags are (shocker) made out of plastic, whereas silicone bags are made out of a mixture between synthetic rubber and sand. Yes, you read that correctly. Silicone is (partly) made out of sand. How cool is that?
Con 1: They’re Pricey
Like most other zero waste products on the market, silicone bags have a bigger upfront cost. However, since they are designed to last you years, they actually help you save money in the long run, because you won’t constantly be buying disposable bags!
Don’t believe me? Let’s do a quick math check:
A 90 pack of Ziploc small size snack bags are $5.99 at Loblaws (at the time this article was written 24.06.28) and a 60 pack of big freezer-safe ones is listed at $13.99. Together, that’s only $19.98.
So, let’s say you bring a sandwich with you to work every day until you run out of the small bags. 90 bags means you’d run out in 90 days, which is about 3 months. And since there’s 12 months in a year, this means you’d have to buy Ziploc bags 4 times per year.
5.99 x 4= 23.96
This means your yearly cost of just the small Ziploc bags is $23.96. Which might not sound like a lot – 20 bucks is like the Adult $1, right? – but we’re not done. We still need to add the cost of the big Ziploc bags. Also, the small snack size bags aren’t listed as being freezer safe, which means you won’t be able to use them (safely) for long-term food storage.
The big Ziploc bags only come in a 60 pack, which would be only 2 months worth of bags. This means you’d need to replace them 6 times a year.
13.99 x 6= 83.94
83.94 + 23.96= $107.90
So your actual yearly cost of Ziplocs is about $107.90.
Now for the silicone bags.
I found a company that sells a 4 pack of different sizes for $49.99. (Linked here) So even if you bought 2 of these packs, that’d still only be $99.98. And that’s not a yearly cost.
Silicone reusable bags are as the name suggest, reusable. I unfortunately couldn’t find an exact number of disposable bags they replace, but the silicone bags are supposed to be reusable for years. So a one-time payment of $99.98 for let’s say, 4 years, instead of a multiple payments totaling $431.60 for the same amount of time, should hopefully highlight why silicone bags are actually the cheaper choice.
The above calculations are obviously for a very specific scenario of use, however I think it helps illustrate the true difference in prices. Reusable silicone bags aren’t actually more money, they’re just more money right now.
Con 2: They’re Not Infinitely Recyclable
Unfortunately, unlike some other reusable alternatives (like glass or metal), silicone bags are not infinitely recyclable. This means that though they are reusable, they will still eventually break down/become unusable and at some point, and contribute to our garbage problem.
Granted, this can be as far away as five years, ten years or longer, our world does not need us producing even more garbage. I know there is no perfect alternative, but as mentioned above, there are a few other ‘better’ reusable options.
Con 3: Can Become Unstable If Heated Too High (Passed 300F)
Remember how above I said some types of silicone bags can be used on the stove or in a microwave? Well, this doesn’t mean you can heat them to any temperature.
Silicone bags can become unstable if they are heated too high – my research has indicated this number is around 300F. This is bad for obvious reasons: the bags become unusable if they melt and you definitely wouldn’t want to eat a meal that’s covered in melted silicone.
And this actually brings me to the last con of the day:
Con 4: Not All Silicone Bags Are Completely Inert
If you heat the silicone bag too high, not only does it have the potential to melt, but it also might start to leech its chemicals into whatever’s being stored in it.
This means you could potentially ingest the materials that make up silicone bags like sand and synthetic rubber.
These are obviously not the only potential pros and cons of silicone bags, but I feel these are the most important to consider before deciding if you should start to introduce them into your lifestyle.
Though silicone bags clearly aren’t flawless, don’t let them being imperfect be the only reason you don’t buy them. It’s better to take a baby step forward than stay exactly where you are, hoping that eventually you’ll be able to take a leap.
Like this article? Check out more articles about zero waste here!
We’ve all been there. Whether it be a butt-ugly Christmas sweater, itchy socks or even just something that’s so far removed from something you’d actually want you begin to question whether or not the gifter knows you at all.
There’s unfortunately many reasons you might’ve received an unwanted Christmas gift this past holiday season, and while the ever polite smile and stash might’ve saved you on the night, stuffing the unwanted present into the back of your closet and then never thinking about it again isn’t actually going to make it go away.
So, what are you to do?
Well thankfully, throwing it in the trash isn’t your only option – and shouldn’t even be on your list of options for a brand new still-wrapped-in-plastic product – but that rant is a whole other article.
For now, let’s just focus on what your other non-polluting-the-planet options are. There might be more than you think!
Re-Gift It
While some may see this as some sort of gift-giving sin, it’s really one of the simplest options you have. Ask your friends and family to see if anyone else in your life would like/use/appreciate the gift you were given more. If so, give it to them! And just like that, it’s problem solved. You don’t even have to wait until the next holiday season!
In fact, if you plan on having a party or get-together where the original gifter will be attending, I’d recommend not re-gifting in front of them. You can either give it to the person you know privately, for their birthday or even just on a random day of the week. Who wouldn’t love to get a present (they actually want) on a random Tuesday?
Donate It
This is sort of a branch out of the first option. If you don’t personally know anybody who would like the gift you received, see if you’re able to donate it to a second-hand store like Value Village or a charity.
This way, somebody out there will get to use/enjoy the item, even if you didn’t get to see it. Do some research into what second-hand stores and charities are around your area and what items they allow to be donated. You might be surprised to learn it isn’t all food and clothes!
Up-Cycle It
This will obviously depend on what the gift was, but if you’re able to, see if you can up-cycle it! What I mean by this is see if you’re able to take the less-than-stellar gift and turn it into something you’d actually use.
Whether it just needs a paint job to match your aesthetic or a bit of minor sewing to get it to fit ‘just right’, up-cycling is a great way to breathe new life into any item.
You also don’t have to keep the item as whatever it was when gifted. Again, this depends on what the item is, but for example if it’s some sort of electronic, see if you’re able to save the charging cable for your other ones or the headphones, etc.
Or if it’s something like a dresser, maybe you could reuse the drawers for some other storage you have, or reuse the wood to create some shelves, or even those spin-y wheels that the drawers use to slide in and out, or the bolts holding all the pieces together or…
Well, hopefully you get the idea. If you can’t up-cycle it as is, pick it apart to see if there’s pieces of it you can use for other objects/projects.
Sell It
Obviously you’ll want to decide on this option before you go picking it apart to see if you can up-cycle it, but selling the item is also a very handy and helpful option to remember.
There are over 7 billion people on the planet, so chances are good somebody out there needs/wants what you have and there’s also a good chance they’re willing to pay money to get their hands on it.
If you think you could get an unwanted gift off your hands and make a little profit off of it? That’s about as win-win as things get.
Tell The Truth
I know this isn’t a very popular opinion – especially when it comes to the holiday season, for some reason – but just tell the person the truth!
If you found out someone you gifted something to ended up giving it away, or selling it basically immediately after you gave it to them (instead of say, 5 years down the line when they no longer need/use it), wouldn’t you feel… disappointed? Sad? Embarrassed? Possibly even a little bit angry? If they just told you in the first place, you wouldn’t have bought it for them! Now you’re feeling like you wasted some money because they didn’t like the gift. Right?
Right.
So why are you going to do that to somebody else?
If you don’t like something, you are under absolutely zero obligation to keep it to yourself. Tell the gifter! This will not only be a good way to not have to take something you don’t like home with you, but can also open the door for a conversation about things you do like/want, which will (hopefully) lead to better gifts in the future!
Nobody (or at least, nobody I’ve ever met) want to think of themselves as being a bad gifter, but the person will never know their gifts suck if you never tell them!
Sure they might be a little hurt at first, but just be sure you let them know you absolutely appreciate the gesture of the gift, you just don’t particularly like that item. And you know what? Tell them why! If it’s something not very serious, like it’s the wrong colour or size, chances are good you can probably get it exchanged for the right colour/size.
If it’s something more serious like it reminds you of a deceased relative… well you maybe don’t have to tell them that exactly, but you can tell them it reminds you of a personal tragedy, or you associate negative feelings with it, so you’d rather not have it in your house.
Most people who care enough about you to go to the trouble to give you a gift will also care about your well-being, so if you tell them something like that, they’ll most likely get embarrassed and apologize profusely – maybe even swear to ‘make it up to you’ by getting you something else later.
If they’re one of those people who just give a gift for the sake of saying they did – instead of because they want to – you can also politely tell them you don’t want a gift. Or if that would be weird (why did you only tell Aunt Sheila not to get you anything?) see if you can ask them for a gift card or homemade good, instead.
Are they into Christmas baking or crafty? Great! You’d rather have some homemade cookies or a cool, handmade card. They might be relieved to not have to buy for one more person, and it’ll give them a chance to share what they love with their loved ones. (That’ll also give you something to talk to them about next year)
And, if it’s baking, it’ll save you from having to make/buy your own.
In case you missed it, my 2023 goal post said my goals for the year were going to be:
Continue reducing my single-use paper towel consumption
Find a substitute to Who Gives a Crap toilet paper
Stop/reduce my use of notebooks and notepads
I’m happy to report I was able to find a great Who Gives a Crap alternative – they’re called Roll Up and they’re a Canadian bamboo toilet paper company (yes I’ll be reviewing them at some point) – and I was able to reduce my use of notepads and paper towels!
While I still haven’t cut paper towels out completely, I’m using way less than I was in 2022 and even early 2023. The notepads on the other hand…
I was going to write this article and say that my notepad use was almost a non-issue because I really haven’t been using them to write down story ideas or phone messages – I’ve been using my phone’s note app for that – but I had to stop myself because sitting beside my computer is my To Do list, which I wrote on a piece of notepad paper.
While this might not seem like a big deal to you, I don’t have just one To Do list. In addition to the paper one I have sitting beside my laptop – which I change/update every month or so – I have a Year To Do list taped to the wall that my desk is facing and a daily To Do list on my phone!
I’m one of those people who needs To Do lists in order to not only manage my time, but to also help organize my brain. Unfortunately I can’t just have all of these lists on my phone… well, I could, but they wouldn’t be helpful. I’m also a visual person, and if I don’t have my To Do list somewhere I’ll see it every day, I’ll forget about it and nothing will get done. Or different things will get shuffled to the top of my priorities, and then the whole system gets out of whack.
Luckily though, while I was doing the research for resuable options, I found one thing called a Rocket Notebook that seems to be a digital tablet of sorts that let’s you write on it like paper, but it saves as a digital copy. I don’t know too much about that, but it seems like a good option from what I’ve seen so far. I also saw something at one point that looked like a dry erase notebook and I think that would also be a helpful alternative.
I’m definitely going to have to do more research into my options, but from what I’ve seen, those seem to be the best two for me.
So, what are my zero waste goals for 2024?
Well, I’m going to stick with my paper towel goal and modify it a bit. I recently discovered that Roll Up has expanded their line of products to now include not only bamboo paper towels, but also tissues!
I’d like to test those out as I’ve still been using regular/paper tissues. I wasn’t too worried about switching my tissues because I really don’t use them that often – I use maybe 1 box a year – but that’s still contributing to cutting down 50 year old (or older) trees for something you use once then throw away. So I’m going to take the necessary steps to changing that.
That’s also a great change for my wallet, since their website says they only sell in cases, and there’s 12 boxes per case, so I’ll be good for a while after just 1 order.
The other goal I’d really like to focus on this year is the To Do list alternatives that I mentioned above. They’re sort of my last big hurdle in cutting out paper from my day-to-day, so I’d really love it if I could sort of buckle down and figure that out.
While I know it’s impossible to live completely paperless in today’s society, I’m hoping that by focusing on reaching these goals this year, by this time next year, I’ll be as paperless as I can be.
So, what about you? Do you have any zero waste goals for 2024? Do you have any tips on how to achieve my goals? Let me know in the comments!
Like this article? Check out more about zero waste here!
Important: This is the 3rd last article for 2023. I’ll be taking the last half of December and first half of January off from posting.
I’ll be back January 12th, 2024 with the first short story of the new year! (The first article will go up January 15th)
Whether it was a pack of gum at the check out line, a box of cookies you tossed in the cart because you were hungry, or “it was on sale!” impulse buys are something we’ve all done in the past.
Unfortunately, these buys are usually nothing more than us just wasting money we don’t have. We end up regretting them sometimes as soon as we’re done paying, or at most a few days later.
Luckily, I’m going to give you my top 3 questions to ask yourself next time you’re shopping, to hopefully help you not get anything you don’t need.
Do you really need this?
This question is the most important one you can ask yourself before buying something. If this item isn’t vital to your survival, the answer to this question is “no”. Yes, this includes cookies. Just because they’re food doesn’t mean you need them. Things that are vital to your survival: water, healthy food, clothing and shelter.
I’m assuming you didn’t walk into the store naked and you’ve got some kind of dwelling to bring your haul back to (not to mention you can’t buy a house from a regular store) so unless you’re grocery shopping: step away from the shelf!
Now obviously this question will have exceptions – I’m not saying you’re not allowed to buy fun things anymore – but this is a great first step in making you stop and think instead of mindlessly grabbing things off the shelf. (Or mindlessly adding to your cart if you’re shopping online)
Is it on your list?
If you don’t go shopping with a list, you need to start! Shopping with a list helps tremendously in keeping impulse buys to a minimum. Also, making a list will help you feel organized and can even help you from wasting products.
What do you do if you can’t remember if you don’t have shampoo (for example) at home? Do you buy an extra one now while you’re here, or go home and check and possibly come back?
Smart shopper’s would say it’s better to grab an extra bottle while you’re already out. However if you’re not out of this item and you buy a replacement, it might expire before you get a chance to use/finish it, and thus you’ve just wasted money.
Using a list however can minimize if not completely eliminate this! Keep a list somewhere you’ll see it everyday/have easy access to it (I keep mine on my fridge) and then any time throughout the week/month/whenever you run out of something, write it down.
Once you’re ready to go shopping again, take a look at your list and put a star next to the items that you absolutely need to buy next. (Or, if needed, make a new list)
For example, if your list is something like:
Apples
Toilet paper
Parchment paper
Ginger
Flour
Bananas
Unless you’re planning on baking before the next time you go shopping, the parchment paper and flour can wait. Also, depending on how often you use ginger, you could probably leave that off, too. I’m hoping you’re not one of those people who buys toilet paper when you’re down to the last roll (or completely out), but if you are, then getting more toilet paper is an absolute must for this trip. Also, if you eat fruit everyday, the apples and bananas would be essential.
Congrats! You just whittled your master list down to essentials. So now when you’re standing in the store, this will be your list:
Apples
Bananas
Toilet Paper
This actually brings me to the last question:
Go shopping less often.
Okay, I know technically this one isn’t a question, but it’s still good advice! If you for example run to the store after work every day (or every other day) to pick up one or two items, the only thing you’re doing is increasing your risk of impulse buying.
I don’t care if you live 2 minutes away from the store and it’s “convenient”. Learn to plan ahead so you can reduce your number of shopping trips. Whether this means going grocery shopping once a week, or becoming an ultimate planner and only going once a month: planning ahead is a vital life skill!
You’ll not only get more organized but planning your life/meals out one month (or further) in advance may also help you reduce stress. How can you function day to day when you don’t have a clear picture of what your future looks like?
No, I’m not talking existentially – even just in terms of meal-prepping, being prepared and planning ahead is a great skill.
For example, I live in Canada and as I’m sure some or most of you know, Canada = snow/winter for a good chunk of the year. Who wants to go to the store when there’s 4 feet of snowbanks and it’s -40C? (No this isn’t an exaggeration. We actually get some pretty cold winters)
And that’s not even mentioning the weather advisories where they tell people not to go outside, and/or what if there’s a power outage? (This happens more often than you’d think because the winter weather freezes the power lines) Because of this, it’s absolutely essential to start planning ahead in September, or sometimes even the summer to make sure you have your pantry stocked for winter.
This is talking strictly about things that can be stored for long periods of time: canned/frozen meals, shelf-stable products (nuts, trail mixes, peanut butter) and of course, household essentials like toilet paper. (You do not want to run out of toilet paper on the coldest day of the year, trust me)
Planning your meals ahead of time will also help you keep to buying in season. It’ll help you rotate what you eat and therefor, you’ll end up with a more well-rounded diet. Look forward to the changing seasons because they mean changes in food!
Buying in season may also help you reduce your overall cost because when foods are in season, they’re usually cheaper. (Because they don’t have to be shipped in from another country)
Now, if you’re not already shopping with a list and/or asking yourself the first question, you should prepare yourself for an adjustment period. Unfortunately change doesn’t happen overnight, and however many years you’ve been impulse buying won’t be erased just because you read an article.
You’ll need to work at it, but if you stay consistent (and try not to beat yourself up too badly when you still find yourself coming home with things you don’t remember picking up) you will change your habits! And your wallet – and the planet – will thank-you for your efforts.
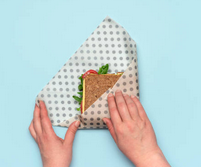
No matter where you are in your zero waste journey, you’ve surely heard about wax wraps to replace plastic containers for keeping your food fresh. While the dream of being completely plastic free may be alluring, it’s important to keep practicality in mind.
Before tossing every piece of plastic you own, give yourself a moment or two to really think this through.
First question you’ll want to ask yourself: would you really use these wraps? Sure they may fit the aesthetic of the life you want to achieve, but would you be buying them just for the sake of saying you have them, or because you’ll actually end up using them?
They may keep your fruits and veggies fresh by sealing off the cut ends, but what about your leftover spaghetti? If you throw out all your plastic containers, you’ll have to find some other receptacle to put your leftover dinners in. Unless you plan on storing your spaghetti loose in the wrap?
Most of the wraps I’ve seen come in bundles of 3 or 5, which might work if you’re only planning to use them for your fruit and veggies, but they’re also pretty expensive. And, are you really going to go to the trouble of buying, shipping and having something manufactured because you only want 3? That seems more wasteful to me than just… keeping the plastic containers you already have.
That’s not even mentioning what kind of wax wraps you’ll get. Most wraps on the market are made with beeswax. And as we all know, beeswax comes from you guessed it, bees, that means these wraps aren’t suitable for vegans. Maybe you’re not vegan, in which case, it doesn’t matter what kind you get. But if you are, are you willing to bend your morals just so you can buy a new product that you really don’t even need?
Or, perhaps you think you’ll just make your own wraps out of candilla wax. If you’re planning on doing that though, you’ll have to buy the raw materials: the wax, fabric, essential oils and an iron, if you don’t already have those products on hand. Then there’s the measuring, cutting, using melted hot wax, and you’ll have to put them somewhere while they dry.
I know it may sound like I’m trying to talk you out of buying these wraps, and I kind of am. But not for the reason you think!
I’m not saying they suck or think wax wraps are bad. I actually bought myself the raw materials so I could make my own vegan wraps a few years ago. Do you want to know what happened?
Absolutely nothing.
I was all set to make them one day, and I got distracted and didn’t end up doing them. Then life got in the way, and I ended up shoving all the materials into a drawer and honestly? I haven’t touched them since.
Because I don’t need to!
I have plenty of plastic containers that are doing the job just fine for now. I was also gifted some silicone resealable food bags last Christmas that I haven’t put to the test yet, either.
Reusable products are amazing inventions, and I absolutely love how much more accessible they’ve become. But, it’s hard not to get caught up in the newness and fanciness of it all.
I wish my kitchen was all glass storage containers, silicone bags and wax wraps, but guess what? That’s just not practical! One day in the future, once all my single-use-turned-reusable plastic containers die (or get lent to friends and never returned), then I can start incorporating my reusable swaps.
But as it stands now, my kitchen is full of products that I need to use first. I’m sure a lot of your kitchens look the same way, and that’s perfectly fine! Maybe if you were starting from scratch, you could have a more zero waste kitchen – like if you were first moving out to live on your own – but the fact is we bought (or were gifted) items long before we ever thought about going zero waste, and we’ll need to use those items instead of trashing them because they no longer fit our aesthetic.
Remember: the most zero waste item that exists is the one you already own.
Plastic lives forever, which everyone originally thought was great, and I understand the urge to purge it all from your life now that you’ve learned the dark side to that, but unfortunately, that’s just not practical or the most zero waste way to change your life.
As much as you may hate it, you have to use your plastic containers until they’re unusable, then you can get yourself some more aesthetically pleasing products. Just think of this time as your transition period between how you used to live, and that dream life you’re envisioning.
Dreams take time to get to, so don’t try to rush.
Like this article? Check out more zero waste tips here!
Yes, I know the title is an oxymoron, but it’s also true!
Not all paper towels are created equal, and luckily for the zero waste crowd, some of them aren’t even made out of paper!
Like toilet paper, I think it’s dumb (and unnecessary) to cut down a tree just to use it’s mangled remains once then throw it away. And sure, paper is biodegradable, but that still doesn’t make it okay!
Again, cutting down a 40-year old (or older) tree just to wipe my face? Uh, no thank-you. There are better alternatives out there, and that’s exactly what this article is about!
When it comes to paperless paper towels, there are a few different options you can choose from. I’ll be listing out some of the benefits to each alternative, but as always, I leave the decision up to you.
Bamboo Towels
This option is probably the closest to the “real” thing as you’re gonna get. As the name implies, instead of being made out of paper, these products are made out of bamboo.
The bamboo makes them more sustainable than paper (bamboo is a grass and grows back much faster than a tree) and some people have reported that bamboo towels have more structural integrity (read: don’t disintegrate as easily when used with water), and because of this, they can use less towel per activity/meal.
However they are still a single-use product, and they may be harder to find – and more expensive – than “regular” paper towels.
2. Napkins
You’ve probably (hopefully) heard of napkins before, but just in case: these squares are made out of fabric, and were the original go-to for wiping your mouth during a meal.
That’s right, napkins are the OG paper towels!
Somewhere along the way, the industry standard changed to single-use/convenience products over substance, and napkins are now usually only thought of as being “fancy” and used in similar settings. (Think: weddings, 5-Star restaurants, etc.)
What makes napkins better than your standard paper towel is the fact that they’re reusable! You use as normal, then toss the soiled napkin into your laundry (or a wet bag, then laundry once you have enough to make a load out of) and bam they’re good to go for the next use.
The down sides of using cloth napkins are that you have to wash them, so you’ll be doing an extra load of laundry, which means you’ll be using more water. Another downside is that they may stain, and though you do wash them, that can make them appear not as clean as they are to guests.
You do also run the risk of running out if you don’t launder them frequently enough.
3. DIY Reusable Paperless Towels
These ones are sort of a mix between the other two alternatives. You can make them yourself out of basically any material you want (like reusable pads, most people tend to use fleece, or terry cloth) and attach snaps to one side of them so you can roll them up and house them on a paper towel holder for convenience.
The great thing about these DIY paperless towels is the fact you can make them with scrap fabric from around your house, which means you don’t have to ‘waste’ money on buying fancy cloth napkins. (Not to mention, the wait for them to get shipped to your house)
Another good thing about them is that, just like cloth napkins, they can be washed and reused!
One downside to these DIY paperless towels is that you may not like the idea of a wet bag holding your dirty/used napkins in your kitchen. Or, if you’re sewing skills aren’t that great, you may need to repair them should they begin to unravel.
Like I said above though, that’s a decision you’ll need to make for yourself. I don’t know your lifestyle, so I can’t tell you which of these three alternatives will work best for you.
Do some research into the paperless towel scene and take a chance on one to try. Or hell, try all three!
There’s literally no harm in testing out all three zero waste options before deciding to stick to one. Or, you may even find you use different alternatives for different days/occasions, which is also totally fine!
Whatever you decide, just remember any of these alternatives are better than using paper.
Paperless paper towels: have you tried them? Which alternative is your favourite? Let me know in the comments!
Like this article? Check out more zero waste articles here!
I’m going to get pretty candid in the below article. If you can’t handle/don’t like talk about period blood, general dirty laundry, personal hygiene or pictures of pads, please don’t read!
The time has finally come to tell you all about my experience with reusable pads! While I’m excited to get into things, I’m also strangely nervous… this may be the most intimate article I’ve written. I’m also going to be going into pretty strong details, so this article will probably be on the longer side.
Buckle up!
Reusable pads in square/folded form (how I keep them for storage)
I don’t actually remember the specifics of how I got onto the reusable pad road, but I do remember I made my first reusable around this time in 2020. Before starting down the reusable journey, I was using NatraCare Pads, and before that (before going vegan and starting down the rabbit hole of living more naturally) I was using Always.
My periods have never been ‘easy’. They’ve always been the kind that literally makes you unable to get out of bed for 2 days with a heavy flow. Like, bleed-through-a-10-hour-night-time-pad-in-4-hours-or-less heavy. This means I was using roughly 18 disposable pads every period, and since my cycle comes roughly every 24 days… yeah. That’s a lot of garbage to be producing. (We’ll get to that math in a minute)
Now, in early 2020, I was still in my infancy of researching zero waste living, so when I came across an article for the first time that mentioned reusable pads, can you guess my reaction?
“Yuck! I could never do that!”
I bet there’s some of you out there reading this who feel the same way, and that’s perfectly fine! Life is a journey, and if you’re not comfortable with something, you absolutely do not have to do it.
That said, speaking as someone who had that thought, using reusable pads turned out to be a lot less gross than I was expecting it to be. It also very quickly becomes part of your routine so it goes from ‘oh that’s weird’ to normal amazingly fast. I’m not gonna bullshit you and say I was completely over it after the first cycle, but it was definitely no longer weird by the 4th.
If you want to try reusable pads, it might take you longer (or shorter!) to get okay with them, and that’s fine! Any new thing you introduce into your routine will have a learning curve, and that curve will depend on the individual person. For example, I think that snot is grosser than period blood, and I know not everyone would agree with that.
Which again, is perfectly fine.
I’ve also got a secret to share. You ready?
It’s not all or nothing!
You can decide to test out reusable pads, and if for whatever reason you’re uncomfortable or decide they’re just not for you after trying them, you can 100% go back to disposable pads!
There’s no zero waste police going to show up at your door and haul you off to jail. No one is going to make fun of you for ‘not hacking it’ or whatever. You tried something and it didn’t work for you. You know what you do then? You move on!
Though while we’re on the topic, reusable pads are not the only reusable period option that are available. There’s cups, period underwear and more. So if you decide pads aren’t your thing but are still interested in using a reusable, test out one of those.
Hell, I might even try one of the other methods at some point. But for now, reusable pads are working for me, so that’s what I’m sticking with.
Anyway, when I decided to test out reusable pads, I also decided if I was going to do it, I was going to do it ‘right’ and make my own. (I also didn’t have $80 to spend on some of the pre-made ones)
I ended up using some old bath towels and an old fleece blanket I was actually thinking of getting rid of. Instead of turning these items into waste, I upcycled them into something new!
I not only avoided producing garbage when I did this, but I also ended up taking items I barely used and turned them into things I now use monthly! (And sometimes more)
To make your own pads, you’ll unfortunately need to do some math. But don’t worry! I’ve outlined it below to (hopefully) make it easier for you to figure out.
To keep things super simple, I decided since I used 3 pads a day for 6 days, I was going to make at least 18. This way, I wouldn’t have to worry about running out/washing them while I was still in the middle of bleeding, and could instead wash them all at once after my period had ended.
Originally, my plan was to make 12 ‘day’ pads and 6 ‘night’ pads. (3 pads/day for 6 days)
Now, you may be wondering: this is all well and good, but how the heck do you actually go about building a reusable pad?
That’s an excellent question!
As I mentioned above, I ended up using some old bath towels and an old blanket. I used bath towels for the inner/absorbent layers, and the blanket for the back and front of the pads.
I also don’t own a sewing machine, so I ended up sewing all the pads together by hand.
Reusable pads unfolded/open (how they look when in use)
And as you can see from the picture, they turned out pretty good. (And have held up pretty well for almost 3 years of use)
The purple and white you’re seeing the blanket, and yes, that other denim looking material is denim. I ended up miscalculating the amount of blanket I had and had to use the only other fabric I had on hand: denim.
Despite it not being part of my plan, the denim thankfully worked! (Though I wouldn’t recommend using it and won’t be when I make new ones)
Denim pad front (the purple is the blanket)
Denim pad back
As long as you’re using fabrics that have high absorption rates, you can use basically whatever you want. If it soaks up blood and you can wash it, go nuts! The fabric store is your oyster, so to speak.
If you’re like me however and plan on using old towels, I originally did a double layer of towel in the day pads, and triple layer for nights. I say ‘originally’ because I was a few pads in before I realized “wait a minute, I could just make them all the same and then not have to worry about using a day or night pad”.
After I got over how dumb I felt for not thinking of that sooner, I did the rest of the pads with a triple layer of towel in the middle.
‘Middle’ towel layer – if you peeled off the purple or white front, this is what you’d find
The blanket I was using was also double fabric-ed (before cutting up the blanket, the white was hidden by the purple) and after I had the realization about the towels, I also realized I could peel the blanket layers apart and use them separate, so that it could be used on more pads.
That’s why some pictured are purple on both the front and back, and some are only one colour.
If I haven’t said it already, this was my very first time attempting to make reusable pads so yes, there was a bit of a learning curve and when I start making new ones later this year, I’ll be much better prepared.
The very first few pads I made ended up being much skinnier and shorter than I thought they were going to be. This is because of the technique I used. First, I sewed the 3 towel layers together, then attached that to the back, and finally to the front. However, when attaching to the front and the back, to get the towel layer on the inside, you have to attach them backwards, then leave a hole in the front end to pull the pad through.
Sound confusing? That’s because it was!
What I didn’t know at the time, is that when you sew something inside out and then flip it around, you end up losing fabric so the final product ends up smaller than your original design.
These were the very first pads I sewed. (The red one was an extremely failed attempt to use an old night gown)
This means that for example, if you started with something that was 30cm, once sewn and flipped inside out (which is actually the right way) it’s closer to 26-24cm. Which doesn’t sound like that much of a difference, but when you’re dealing with products you’re going to be bleeding on, is the difference between coverage and waking up to having to wash your pants and/or sheets.
So, if you want to make the final product 30cm, you need to cut out your layers bigger than that. Once I figured this out, I believe I made them closer to 34cm. I also wasn’t exactly sewing in the straightest of lines, so if you have more experience sewing by hand (or are going to use a machine) you won’t have to leave this much of a margin.
Luckily, I discovered the error of my ways not too far into the process, and was able to create 18 usable pads.
These finished pads were comparable to not only disposable ones in terms of size, but they also were just as, if not more absorbent!
Reusable pad (right) compared to Always Ultra Thin Extra Heavy Overnight pad in square/folded form
Reusable pad (purple) compared to Always pad length
Reusable pad (purple) compared to NatraCare’s Nighttime Maxi pad length
Reusable pad (purple) compared to NatraCare’s pad thickness
How do you test absorbency? Easily!
All you have to do is place your finished pad on a plate (or in a large container) and spoon warm water onto it.
… I know how it sounds, and I don’t know exactly why, but I read that warm water is the closest thing to period blood you can use to test absorbency. To know if your pad will stack up against your period, it only needs to be able to hold 9 Tbsp (that’s Tablespoons) of water without dripping/leaking.
If it holds more? Even better!
Since I planned on making them all the same (and before using up all my materials), I did the water test on one of the first pads I made. The first pad I did the test on was one of the ones that had the double fabric (before I learned I could pull the purple and white layers apart) and 3 layers of towel in the middle.
Honestly, I was pretty nervous before starting the experiment. I wasn’t sure if my shoddy hand-sewn creation would hold up.
Luckily, it passed the water test!
This is what the pad looked like after 15 Tbsp of water. When I picked it up off the plate, it had no leaks, drips, etc. This meant it could safely hold 15 Tbsp.
Since I’m me and I like to find where the line is, I kept going and stopped again once I reached 20 Tbsp. Again, I thought this amount of water was absorbed and was starting to get just the tiniest of ego boosts. This didn’t last long however, as when I picked the pad up from the plate, it began to steadily leak water.
So I wrote down 15 Tbsp was probably the max and went about making the rest of the pads.
Once I ran into the problem of not having enough blanket and started using denim, I redid the test with one of the denim backed pads, and that one also passed with flying colours.
Water tested denim-backed pad. The blue showing through is from the towel layer
The denim backed pad had absorbed 20 Tbsp of water without dripping. This one I did the same as the first to find out where the line was, and discovered 25 Tbsp was too much.
But since the goal was only 9 Tbsp, I was ecstatic!
Once I was about half done sewing all the pads, I had another realization: I have to put the dirty ones somewhere.
Crap.
Now what?
Could I put them in a container? Maybe, but wouldn’t that start to smell? Do I have a container big enough to fit them all? No, I didn’t.
After a bit of research, I discovered this company Colibri that makes reusable wet bags for well, anything you could need a reusable wet bag for. Food storage, cloth diapers and yes, reusable pads!
I promptly ordered a bag and eagerly awaited its arrival.
Colibri bag with a folded pad to show size
This bag works great, by the way. Though I haven’t really used other wet bags so I can’t compare, it’s done an amazing job of housing my dirty pads, has not ripped, leaked, etc. in the 3 years I’ve had it and when it’s closed is completely smell-free! (The smell from the pads doesn’t get into the air)
I absolutely love this bag and would recommend this company to anyone who needs a wet bag. The bags come in all kinds of fun designs (I got the shark one for Shark Week) and as if that wasn’t enough, they’re also Canadian!
This is actually a good segue into the next thing I’m going to talk about: how to wash your reusable pads.
Now, if you’re one of those people who hears reusable pad and thinks ‘ew’, I’m sure this is the part you’re referring to. But, not to worry. As I said above, it’s actually not that gross!
So, just like with anything else, there’s multiple ways to go about cleaning your pads, but I’m going to stick with telling you about what I do. (Since this article is my experience)
Once a pad is full/it’s time to change it, I unbutton the wings to release it from my underwear (did I mention I sewed buttons onto the wings?) and I place it in the bathroom sink. Then I put a new one on in it’s place (ladies, I don’t have to tell you how that part goes, do I?) and tend to the one in the sink.
I run the dirty pad under cold water and let the blood/water drip out of it until the water starts running clear. Once it’s turned clear, I place the pad back down in the sink, squirt some vinegar onto it, then use a scrubbing brush to scrub the front of the pad clean (the part that was touching my body).
Once I’ve scrubbed as much blood out of the top layer as I can (which is usually all of it, to be honest), I rinse it again with water, then gently ring it out and place it in my wet bag. I repeat this process with the rest of the pads I use during my period.
At the end of my period, I take my bag of pads and squirt them with vinegar again (especially if they smell) as I place them into a mesh laundry bag, put that and the Colibri bag in the wash. I wash the pads on the Delicate cycle with tap/cold water.
Once they’re done being washed, I hang them up to dry on a drying rack.
After that, it’s as simple as taking them off the rack, refolding them (I like to keep them in square form for easier storage) and placing the bag in their spot to be ready to go for next time.
The only reason I don’t put my pads in the dryer is because they’re hand-sewn and I’m worried the strain from the washer and dryer will rip them apart faster. This is the same reason I use a mesh laundry bag, instead of throwing them in my washer loose. If you have machine sewed or store bought reusable pads, this shouldn’t be an issue. (If you bought them, I’d recommend reading the washing instructions that came with them, or checking the company’s FAQ section)
That said, now that I’m in my 3rd year, some of the sewing is starting to come undone anyway and while yes I can re-sew them, I don’t want to repair them after every cycle. Since I switched to using soap nuts I haven’t had any problems with getting them clean. I also haven’t really had any issues with staining.
Sure the purple ones might not show it, but even the white ones don’t really have stains. Two of the white ones finally got stained earlier this year, but they’re so minor it’s very hard to tell. And they still went 2+ years without any, so I’d say that’s pretty impressive!
If I didn’t tell you it was stained, would you be able to see it?
Also, as long as you wash them properly you shouldn’t be worried about stains. Not like anyone but you is going to see them, right? (Unless you decide to start a blog)
Okay, now that we’ve gone through how to make them, how to wash them, etc. let’s get down to details: is the myth about them helping your period symptoms true?
Honestly?
I don’t know!
Your period changes throughout your life naturally anyway, so it could be a coincidence that when you started using reusable pads your period symptoms did. That said, every body is different, and I won’t discount it if people say it has! If you feel it’s helped you, then more power to you.
Has it helped my symptoms?
I can’t say for certain. My cycle has changed since I started using them, but I also turned 27 back in February…
What I can tell you though is that my flow has remained heavy (even though I’m no longer bleeding for 6 straight days) and since I’ve been using the reusable pads, instead of 18 per cycle, now I only use about 8.
I can also tell you that it feels amazing to no longer be contributing to period garbage. It’s something most women don’t think about because it’s a natural process, and because they’re spread out (usually only about 1-2 per month), but if you go back and calculate it, you might be surprised how many pads (or tampons) you’re using.
For example, I keep track of my cycle for planning life purposes, and since I started using reusable pads, I’ve had 15 periods per year. (2020-2022)
So if we wanted to math it, that’s been 45 periods. And if we multiply the number of periods by how many pads I was using (45×18) we get 810.
I’ve saved 810 pads from going to a landfill since I switched to reusable pads. And I’m only in my 3rd year of using them!
Can you imagine how much garbage you’d save if you switched for 5, 10 20+ years? Even if you decide to try them for just one cycle, that would be (roughly) 18 pads you saved.
I don’t want to end on a preachy note – you’re either going to try them or you’re not, no matter what I say – but just take a minute to let it sink in how much good for the planet that would be.
Reusable pads, have you tried them? Do you have any questions I didn’t answer? Leave it in the comments below!
Like this article? Check out more lifestyle tips here!


 Reusable pads in square/folded form (how I keep them for storage)
 Reusable pads unfolded/open (how they look when in use)
 Denim pad front (the purple is the blanket)
 Denim pad back
 ‘Middle’ towel layer – if you peeled off the purple or white front, this is what you’d find
 These were the very first pads I sewed. (The red one was an extremely failed attempt to use an old night gown)
 Reusable pad (right) compared to Always Ultra Thin Extra Heavy Overnight pad in square/folded form
 Reusable pad (purple) compared to Always pad length
 Reusable pad (purple) compared to NatraCare’s Nighttime Maxi pad length
 Reusable pad (purple) compared to NatraCare’s pad thickness
 Water tested denim-backed pad. The blue showing through is from the towel layer
 Colibri bag with a folded pad to show size
 If I didn’t tell you it was stained, would you be able to see it?