Important: This is the 4th last story of 2025. I’ll be taking the last half of December and first half of January off from posting. I’ll be back January 16th, 2026 with the first story of the new year!
Written: 25.10.23
Words: 851
Wee!Chesters, 2025’s Halloween fic
“Uncle Bobby?”
The voice startled the father figure awake from his place on the couch. He snapped his eyes open and saw a costume-clad Sammy staring at him with those big, round eyes. He let out a yawn and sat up straight, “Dean still bitching about taking you out?”
Sammy’s brows furrowed at that, “What?”
Bobby shook his head, “I’ll get him,” he cleared his throat, before looking toward the stairs, “Dean!”
“Yeah?” The blonde came out of the kitchen in the next moment, beer in hand.
That got Bobby to his feet. He snatched the drink from the pre-teen while giving him a look, “What the hell do you think you’re doing?”
“Hey!” Dean’s mouth fell open as the drink was taken away and he defiantly stomped a foot, “You said I could have one!”
Bobby let out a chuckle, “Nice try.”
Liking the story? Read the FULL story on my Patreon!
Signing up gives you access to all 199 short stories, cool insider benefits and helps your favourite indie author continue doing what she does best: write!
Are you in the spooky spirit yet? Not to worry if you’re not, today’s tutorial will get you there!
Like I said in the previous tutorial, the effect I’ll be showing you this week will be building on that one, so if you haven’t checked it out, now would be the time to do so.
I’ll even wait!
…
You back? Okay, cool!
Then let’s get started on this week’s tutorial: Embers.
This tutorial only has 4 steps but it is time consuming! We’re going to be painting in the embers by hand, so, fair warning. Also, I’ll apologize now for any (inevitable) frustration.
The finished product should be worth it, though!
Step 1
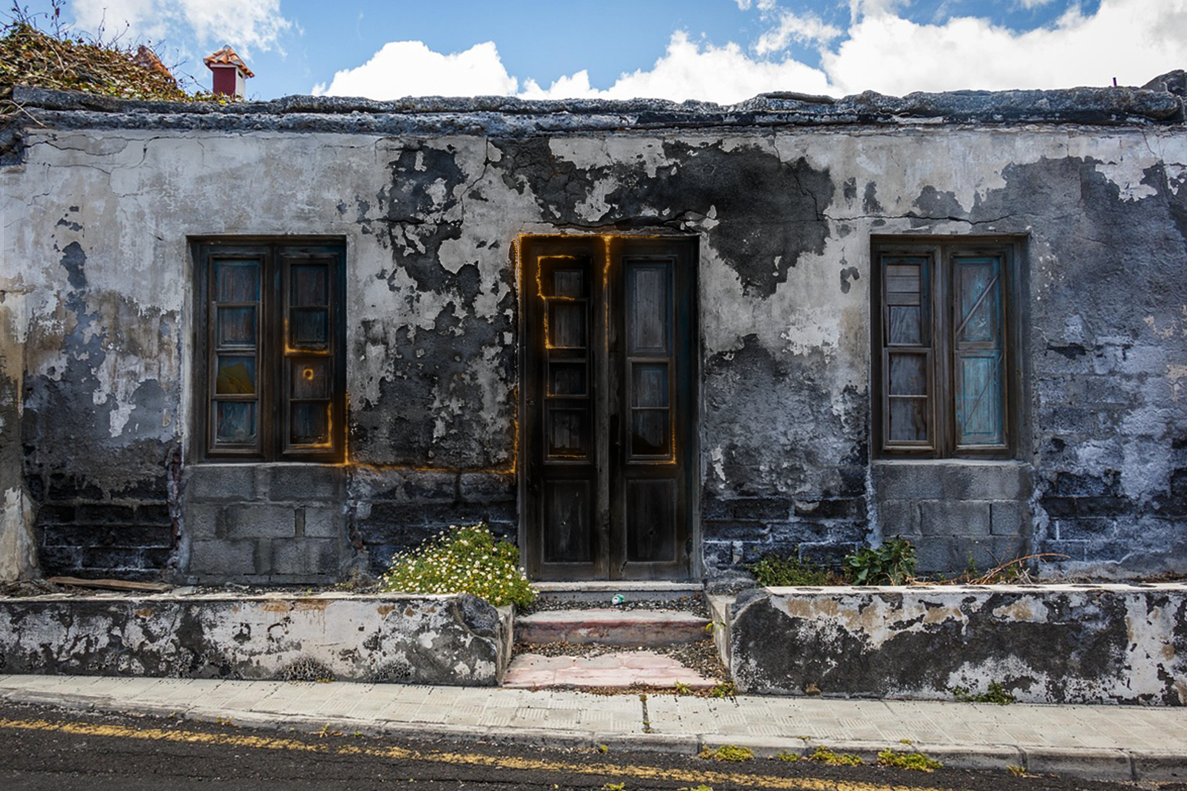
This week, we’re actually going to start in last week’s tutorial document, not a blank one. So, go ahead and open up your Photoshop file version of last week’s Burn effect. (It will be the .psd file, not the .jpeg or .png)
Or, if you prefer, you can create a new project and name it Embers, then drag and drop in your picture file of the Burn effect. Just keep in mind if you do this method, you won’t be able to change, add-on or alter the burn pattern, since it’ll be part of the image. If you end up wanting to tweak it, you’ll have to go through all the Burn tutorial steps a second time.
If you’re wondering: no, you’re not crazy. This is a different burn pattern from what I showed last week. If I haven’t mentioned already, I always do the effects at least twice: once when I’m experimenting/playing around, and the second time is a ‘live’ version I do when I write out the tutorials. (This is the one all the screenshots come from)
It’s the same picture and over-all concept, but if you ever notice the patterning doesn’t exactly match the tutorial pictures, this would be why. Also, despite my initials, I am in fact, not a robot, so I can’t replicate the patterning/brush strokes to look 100% the same between the versions. (Depending on the effect)
Step 2
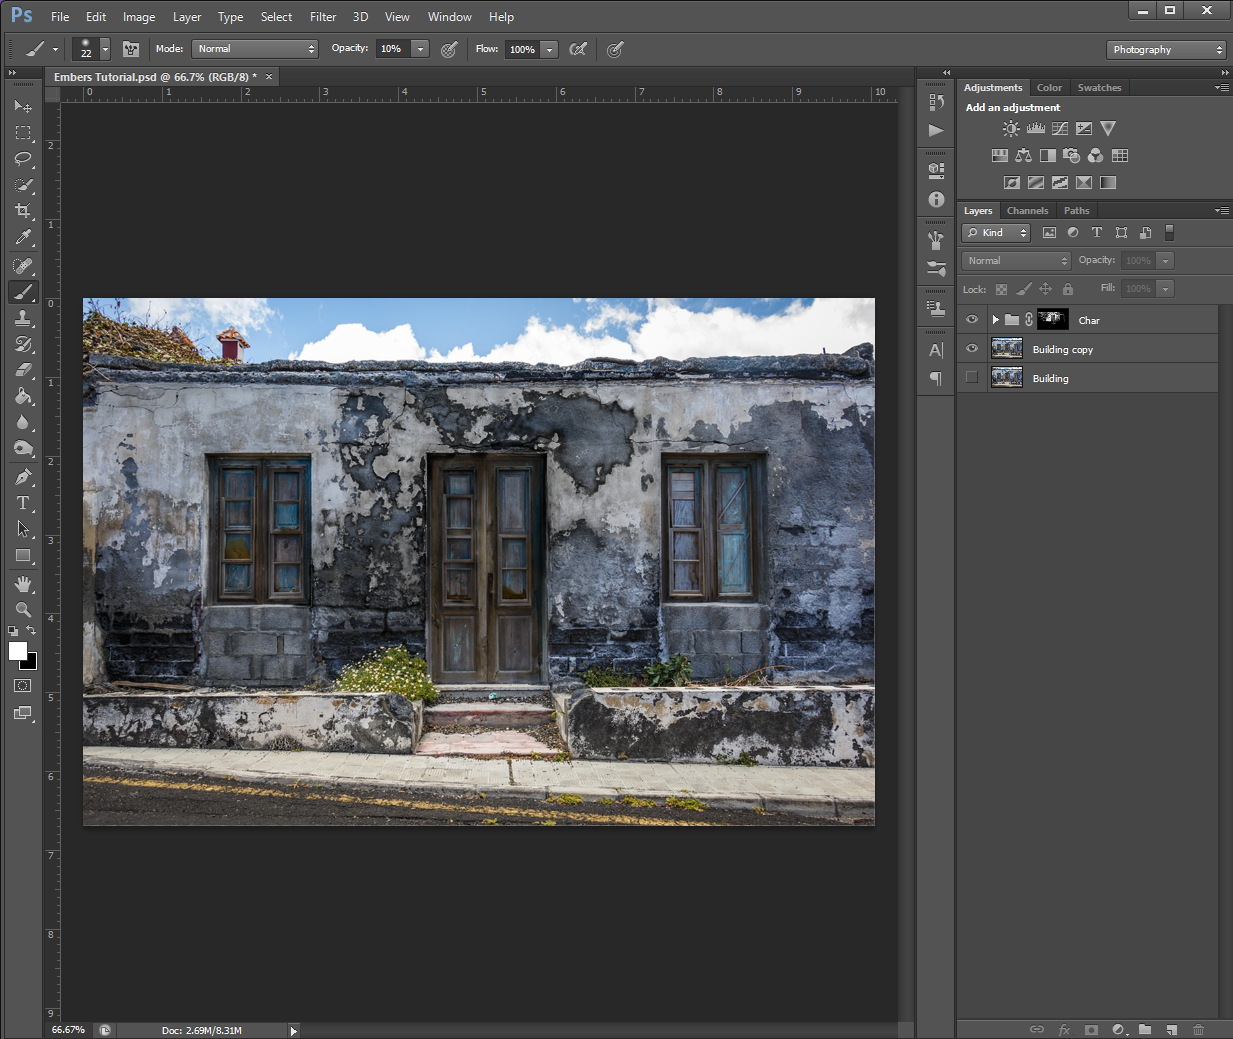
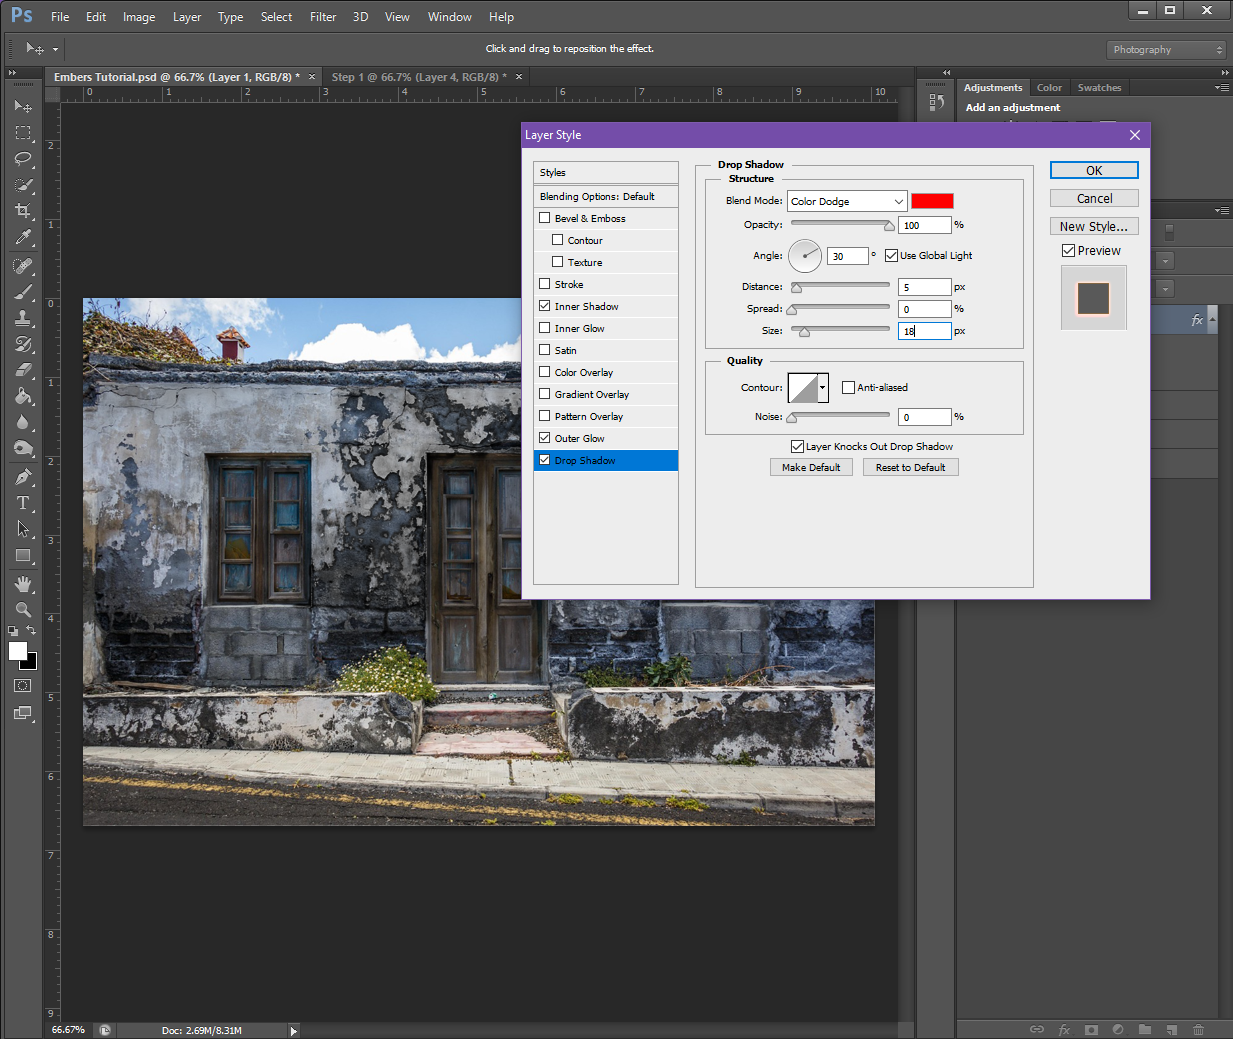
On a New Layer, go to the Blending Options menu (right-click on the layer) and turn on and fill in the following values:
Inner Shadow:
Structure
Blend Mode: Normal (Make the colour a Light Orange, I used #ff8d03)
Opacity: 100%
Angle: 30 (Check the Use Global Light box)
Distance: 0px
Choke: 0%
Size: 3px
Quality
Contour: Make it the top-right to bottom-left straight diagonal White and Black option (the one that looks like this / )
Anti-Alias: Make sure is un-checked
Noise: 0%
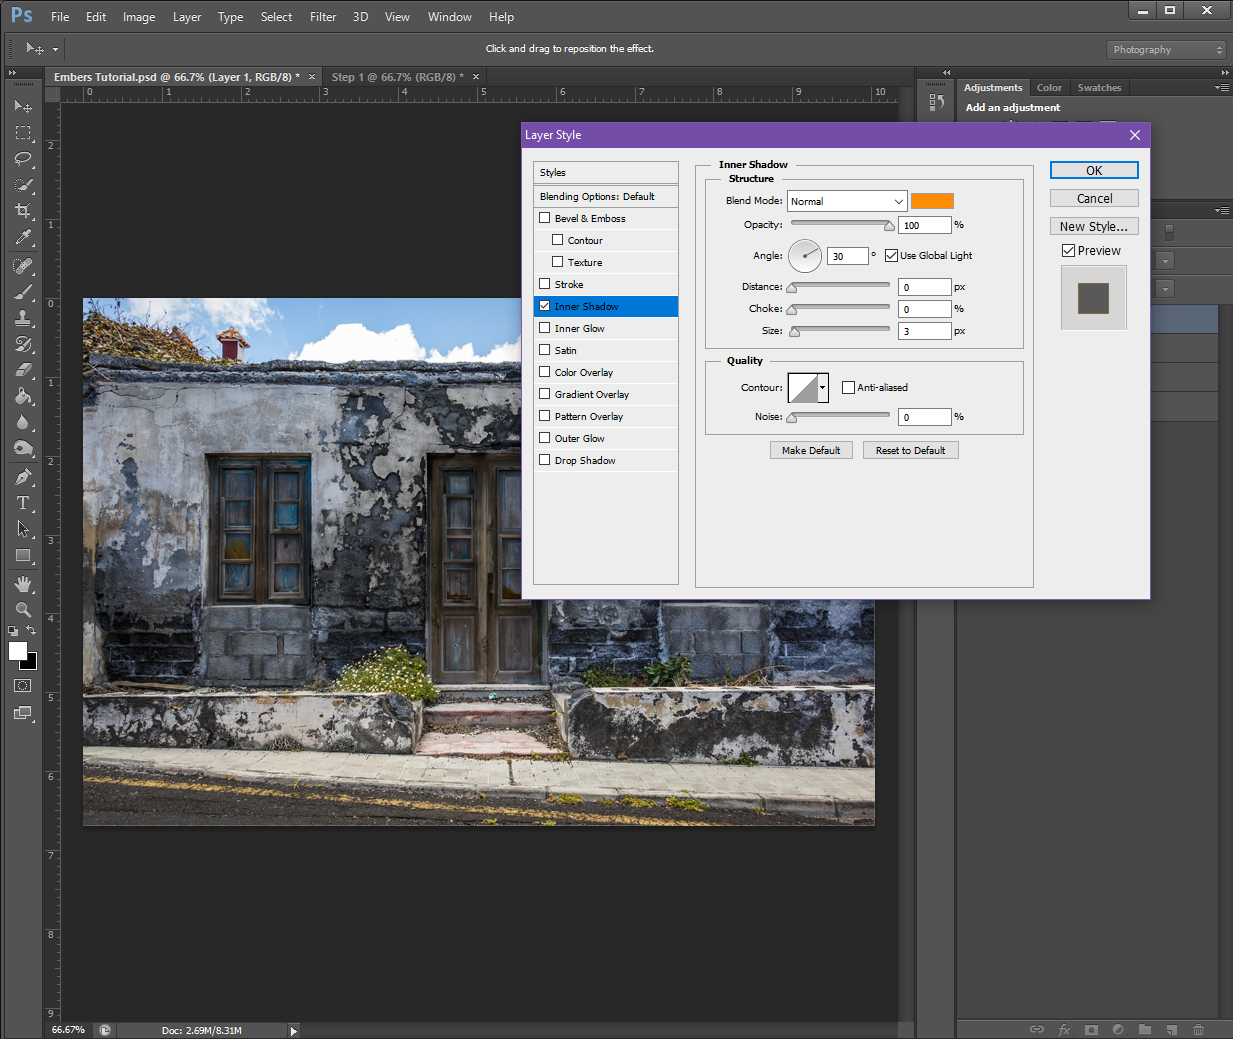
Outer Glow:
Structure
Blend Mode: Screen
Opacity: 100%
Noise: 0%
Colour: Make sure the Solid square is selected (not the Gradient) and set it to a Red-ish Orange (#fe7801)
Elements
Technique: Softer
Spread: 0%
Size: 18px
Quality
Contour: Make it the same as Inner Shadow
Range: 50%
Jitter: 0%
Drop Shadow:
Structure
Blend Mode: Colour Dodge (Set the colour to Red, #fe0000)
Opacity: 100%
Angle: 30 (Check Use Global Light)
Distance: 0px
Spread: 0px
Size: 18px
Quality
Contour: Make it the same as the Outer Glow
Noise: 0%
If you have a check box at the bottom that says Layer Knocks Out Drop Shadow, make sure it is check-marked.
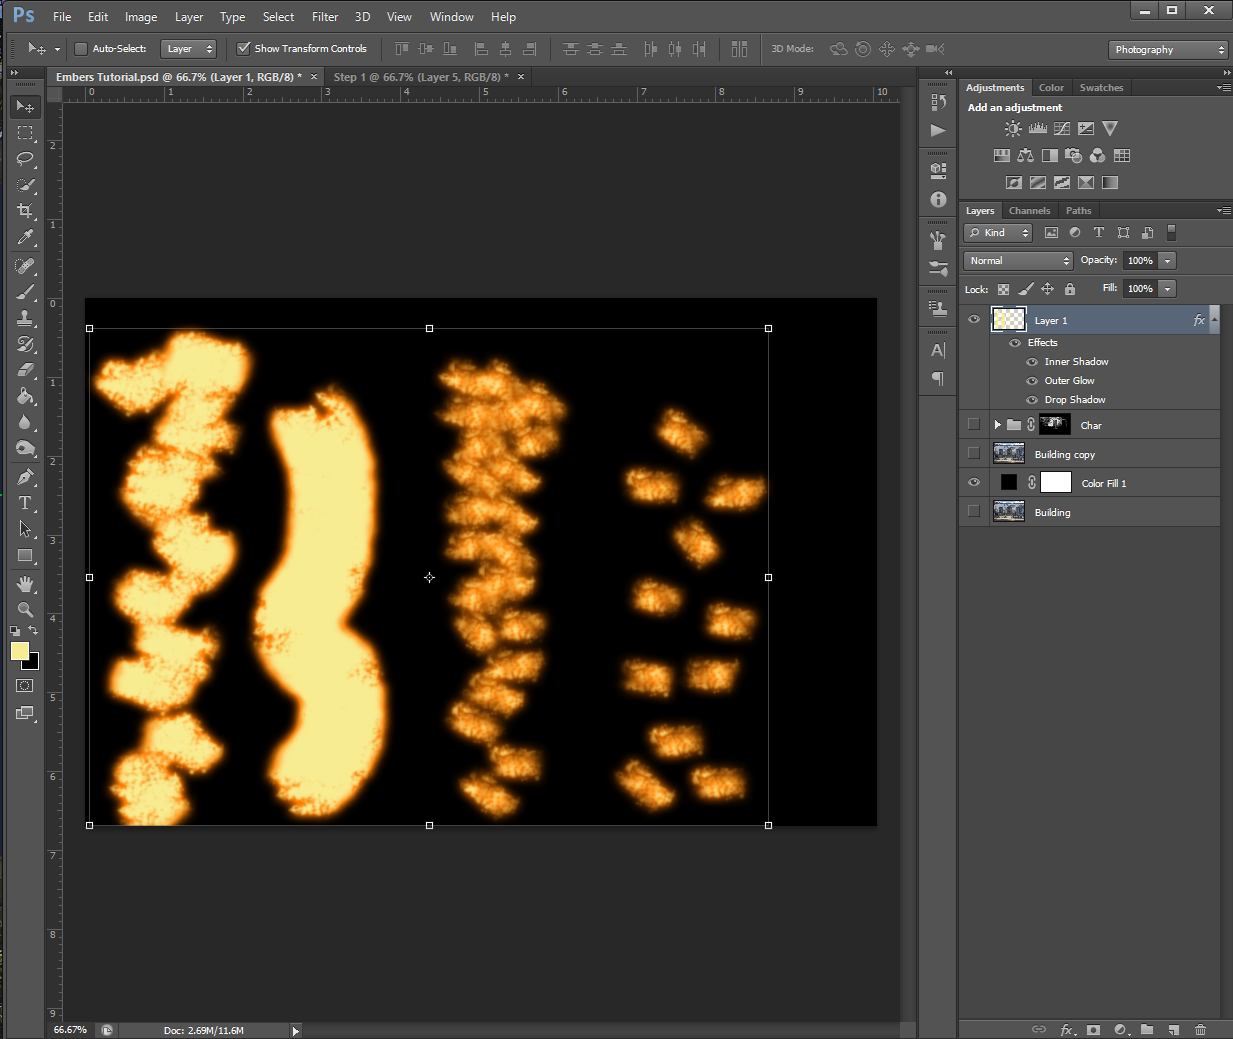
If you’d like to preview the effects, you can do so by going over to your Brush tool and selecting one of the ‘grungy’ brushes from the list, and then – while using a colour of Pale Yellow (#f8ec92) – make some brush strokes on the image.
The ‘grunge’ brush options – I don’t know why they’re called that, but in my PHSH quest, it usually just refers to the charcoal, chalk and pastel brush options
Or, you can set a Solid Colour background to preview the effect, like I did below:
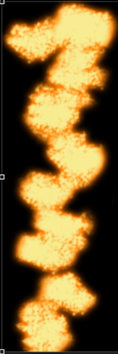
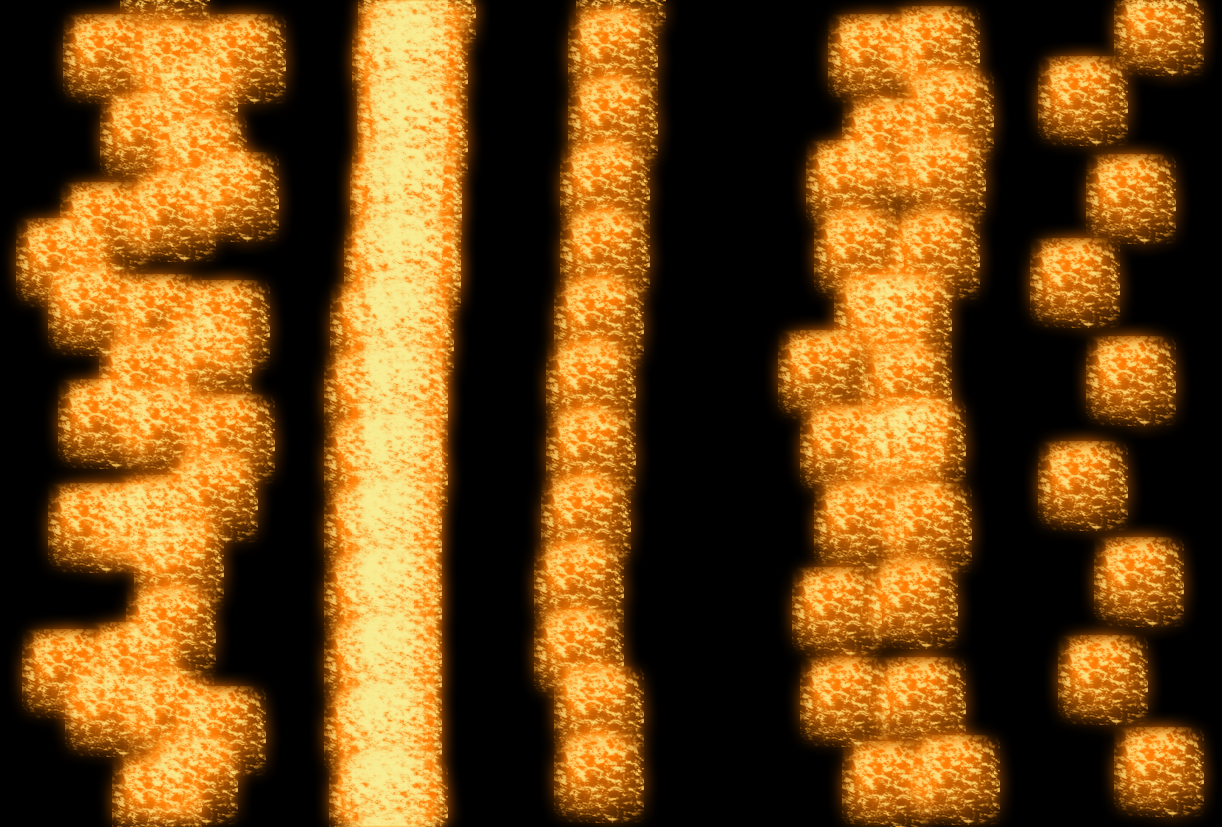
It may take some experimenting for you to figure out which brush you like best for the effect. I personally, ended up choosing a Charcoal brush. I also wanted to show you how using the brush differently will change the effect:
The furthest right pattern is what happens when I just clicked the brush once before moving to a different spot. (In my head, I call this ‘stamping’ because of the one-and-done method, but I’m not sure if it has a different name) The brush I chose also randomly changes directions, that’s why some of the pattern is horizontal and some are vertical.
The second in from the right is the same stamping method, but I did the brush strokes closer together.
The almost-solid yellow line is what happens when you use the brush normally. (Click and drag the brush in a direction you want, I made the line not-straight myself)
And lastly, the furthest left pattern is what happens when you combine the stamping and normal methods. For this one, I clicked and dragged in very short distances/spurts before moving on to the next part.
I want to emphasize here that there is no objectively ‘wrong’ brush to use. If you think it looks good and it works for your image, use it! There are a lot of different brushes you can experiment with, but I will say, as with the ash/burn effect, the ‘grunge’ brushes might work better than the plain round ones.
As I said above, I ended up using my Charcoal brush, but here is the effect with some different brushes:
Chalk Brush (I have multiples of these in different pixel sizes and slightly different patterns)
Star 26 Brush
Grass Brush (Apparently I have one of those?)
Sponge Brush Projection Brush
Soft Fur Brush (I’m pretty sure this is the brush I use when I make snow)
I have a range of brushes that are just called Spatter with the pixel size, this is a mix of the brushes in various sizes
and finally, here is what it looks like when using the plain Round brushes:
Step 3
Now that we’ve got the style and brush set up, it’s time to add the embers to your image!
To do this, select the appropriate brush Size and Hardness and start painting them in along some of the edges of the burn pattern. Try to think about how fire behaves – in most cases, fire takes the fastest path upwards, so if you chose a building, for example, you’ll want to add embers trailing up toward the roof. I’d also recommend zooming in (CTRL +) to your picture so you have better control over the placement of the embers.
If you’re not super impressed with how it’s looking at this stage, don’t worry. Most effects don’t look that great when you’re zoomed in. To check the actual progress, I recommend zooming out (CTRL – ) so you can see how the embers are looking in the picture as a whole.
If you’re still not happy with them even when zoomed out, you can use the Eraser tool to erase any parts that aren’t looking quite right so you can re-do them. (This is why it’s important we added the embers effect to their own Layer)
Depending on what brush and stroke technique you’re using, this part could take a while, so go slow and try not to get frustrated.
Also keep in mind, you can vary the Size and Hardness of your brush to help keep the embers from looking too monotone.
I actually re-did my ember trails a bunch of times because I just couldn’t get it to look ‘right’. One thing that helped me, was painting in the ember effect and then going back in with my Eraser tool to dirty up the lines and add a tapper to some of the trails.
Step 4
Once you’re happy with all your embers, to give it an even more realistic look, change the brush size and shape to one that is close to that snow one I showed above, then paint around the outside of some of the trails. This will make it look like some of the embers are floating off.
I did my floating embers on a different layer so I could easily erase and replace any I didn’t like without having to re-do the ember trails.
This also leads me to a very helpful tool when working with PHSH Effects: If you need to apply the same effect to a different layer, you can do so quickly by holding down the ALT key on your keyboard, then clicking on the FX symbol in the Layers Panel and dragging it to the layer you want to apply the effect to.
You’ll know if you did it correctly if all the Effect Text under the layer and the FX symbol transfers to the new layer.
And that’s it!
Because I didn’t do my char/burn layer super dark, I had to do my ember trails more subtly, so it looks like the building is just starting to catch fire, opposed to being in the middle of burning. I also took out the floating embers, because realistically, I don’t think there would be enough embers to have some floating up around the trails I made.
This means, my finished project, looks like this:
Which is the image I used on social media.
But, don’t worry – up next, I’m going to show you how to add flames to your burning image, so you’ll get to see a much cooler/less subtle version of the embers, just in time for Halloween!
Important: This is the 5th last fic of the year! I’ll be taking the last half of December and first half of January off from posting. I’ll be back January 17th, 2025 with the first story of the new year!
Written: 24.10.17
Words: 492
Wee!Chesters, 2024’s Halloween fic
Bobby awoke with a loud gasp, flying into a sitting position. He rubbed his eyes as he looked around his dark room, chest heaving as he attempted to get his breathing back under control.
I’m not old enough to go choking on my own spit…
Bobby’s brows furrowed as he heard faint mumbling floating from up the stairs, what the hell? He reluctantly got out of bed to investigate, not missing the clock on his nightstand reading 3:30am.
He shook his head as the sounds got louder as he descended the stairs, the boys should know better than to leave the TV on. His frown deepened as he heard a scream then the unmistakable sound of a chuckle.
Not 100% sure if his tired brain wasn’t just playing tricks on him, he made his way into the living room, unable to hold back his exasperation as he saw Dean was laying down in front of the TV, fake fangs and empty candy bar wrappers sprawled out around him on the carpet.
“What the hell are you still doing awake?”
Dean jumped about a foot in the air at the sudden intrusion. It took a moment for his wild eyes to make Bobby out in the dim light, to which he let out a big breath of relief, “You scared me!”
Bobby walked over to turn the lamp on, “Do you know what time it is?”
Dean winced as the room flooded with light and he sat up, “The movie’s not over!”
The father-figure didn’t even bother glancing at the television as he raised an eyebrow, “No horror movie is 5 hours long.”
Dean averted his eyes at that and rubbed a hand at the back of his neck, “Well… I might’ve started it later than that.”
“No shit.” Bobby grabbed the remote off the table and paused the movie, “Bed. Now.”
“Oh, come on!” Dean looked back to the screen and gestured at it, “There’s only ten minutes left!”
Bobby narrowed his eyes, “You sure you’ll be able to wake up for school tomorrow?”
“I swear, Uncle Bobby. I’ll even wake up early!” At the look, a sheepish grin split the blonde’s mouth. “Okay, probably not early, but I will wake up on time!”
Bobby plopped down on the couch and rubbed his chin as he pretended to think, “I don’t know…”
Dean turned his best imitation of Sammy’s puppy dog eyes on the eldest, “Pleeeaaase?”
Bobby couldn’t resist chuckling at the face and waved his hand, “Fine. But I’m serious about you going to bed when it’s over.”
“Yay!” Dean practically bounced with excitement in place as he snatched the remote back off the table. “I don’t know why you’re so worried,” He sank back down onto the carpet just as he let out a big yawn, “I’m not even sleepy.”
Bobby couldn’t resist a yawn of his own as the movie came back to life and chuckled again, “Goodnight, Dean.”
Important: This is the 4th last story of 2023. I’ll be taking the last half of December and first half of January offfrom posting. I’ll be back January 12th, 2024 with the 1st story of the new year.
Written: 23.08.29
Words: 1,946
C2C, Destiel (ish), 2023’s Halloween story
Prompt: Popcorn Poppin’ Month
Cas approached the door cautiously, eyes scanning the space but finding nothing disturbed. He got up on his tiptoes to see out the window in the door, eyes narrowing as he saw a tall hooded figure standing with it’s back to it.
Cas steeled himself with a deep breath before he ripped the door open, raising his angel blade just as the creature turned around.
“Hey Ca- whoa, whoa! It’s me! It’s Sam!”
The fallen angel blinked in surprise as the hood fell off the creature’s head, hand faltering around the raised blade. His eyes adjusted to the dark and he slowly lowered the weapon as he saw it was Sam standing before him.
Cas tilted his head to the side as he took in the outfit the giant was wearing – it wasn’t his typical plaid and faded jeans. He nodded to the hooded cape and silk pants, “What’re you wearing?”
Sam lifted the sides of his cape and turned from side to side, “I’m a vampire!” Now that he wasn’t actually in danger, he took a minute to check out the fallen angel’s costume, “Aw man, he made you a vamp, too?”
“I guess.” Cas looked down at his own outfit with a huff, “None of the vampires we’ve hunted have dressed like this.”
“If we dressed like actual vamps, no one would know what we were.”
“I thought that was the point?”
“It is if they’re actually vamps, but…” Sam let his voice trail off at the lack of understanding on the ex-angel’s face. He chuckled and shook his head, “You know what? It doesn’t matter. Uh, here,” He turned around, grabbing two plastic pumpkin baskets up off the porch, holding one out, “Take this.”
“What’s this for?”
“Just…” Sam took a few steps up to the door before ringing the doorbell.
“It’s not locked.”
Sam couldn’t help but chuckle again. He lowered his voice as they heard footsteps approach, “When the door opens, say trick or treat.”
“I don’t-” Cas cut himself off as the door swung open, revealing Dean, who had a cleaver sticking out the top of his head and a bloody apron.
Sam bumped his arm before holding his pumpkin out, big smile splitting his face, “Trick or treat!”
Dean got some candy out of his apron pocket, dropping it into his brother’s basket, “Here you go.” He then turned expectant eyes to the ex-angel, “Do you have something you want to say?”
Liking the preview? Finish reading the story on my Patreon!
I post new short stories every two weeks and have 100+ just waiting for you to fall in love with them!
Reminder: This is the 3rd last story of 2022! I’ll be taking the last half of December and first half of January offfrom posting. I’ll be back January 13th, 2023 with the 1st story of the new year!
Originally From: 15.06.25
Rewritten: 20.06.02
Finished: 22.08.10
Funny, 2022’s 2nd Halloween story
“Excuse me, but have you seen my granddaughter?” She held up a worn picture, eyes focused on Dean.
“Uh,” Sam shot his brother a look and shook his head, “No, we haven’t. Sorry.”
The lady just stood there, staring at the blonde, apparently not hearing Sam.
Dean glanced at his brother before shaking his head, “Don’t think so. Sorry.”
The old lady deflated with disappointment, before placing the picture into her purse, “If you do, can you give me a call, Dean?”
“Yeah, of cour-” Dean cut himself off and shot his brother another look, “S-sorry,” He reached for the bottle of holy water in his jacket pocket, eyes flicking back to her, “what did you say?”
The lady looked at him, confused by his sudden change in demeanour, holding out a folded piece of paper, “Will you give me a call, dear?”
Dean stared at the paper for a moment. The old lady tilted her head to one side, letting out a small huff before she placed the piece of paper down on the table, sliding it across the table so it was in front of him. He looked down and saw a phone number written on it and let go of the water bottle, “Uhm… yeah, I-I guess.”
“Thank-you, dear.” She gave him a small smile before shuffling away, heading for the door.
Dean turned unsure eyes to his brother, “That was weird, right?”
Sam nodded, “Yeah, it was a little… odd.” He lowered his eyes to the paper sitting in front of his brother, brows furrowing, “Do you think she was a demon?”
Dean shrugged, “Since when are demons ever that polite?”
“Maybe it’s a new tactic? To… I don’t know, gain people’s trust?”
Now you can transform yourself into a vampire – just in time for Halloween! 🧛♂️
Step 1
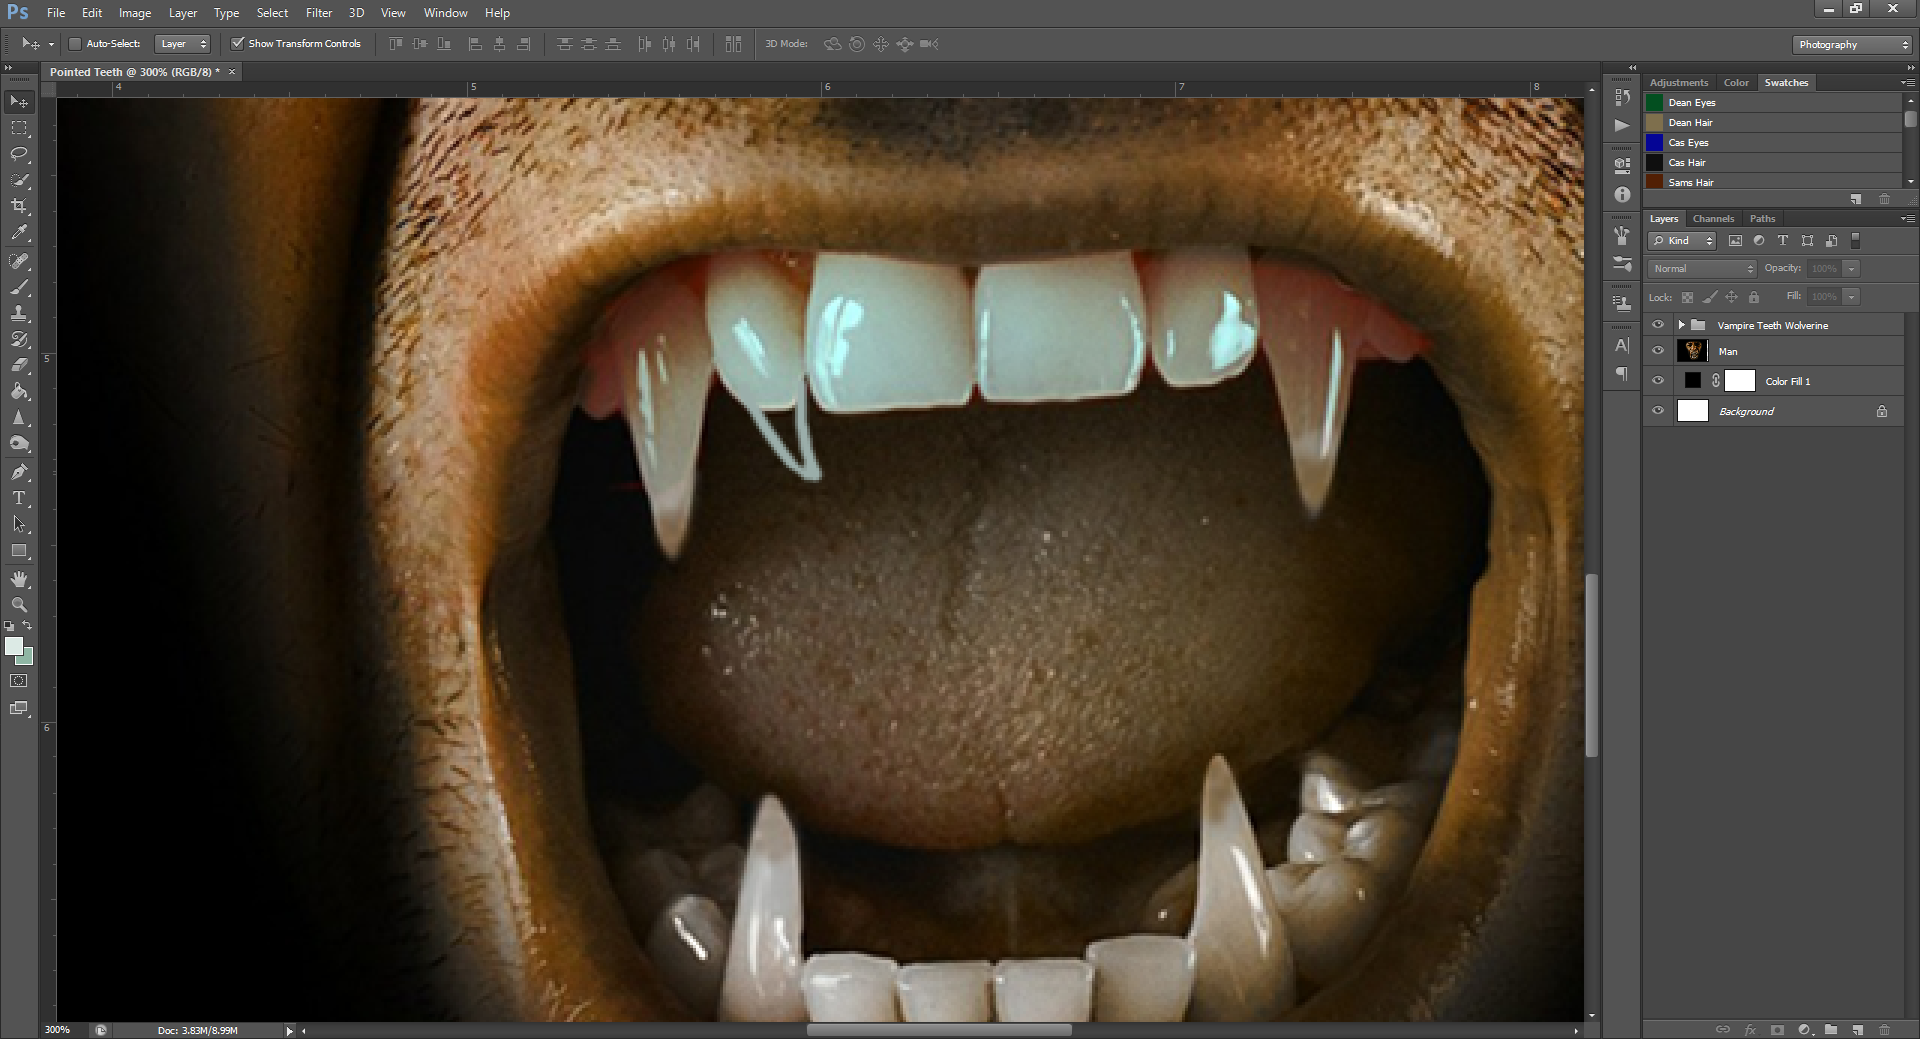
Find yourself a picture that has a nice, clear view of the teeth. I was lucky enough to find one that already has a few pointed teeth on it.
This is the picture I’ll be using. I’d like to note, your picture doesn’t have to already have pointed teeth, just a clear view of teeth, as this will make it a lot easier to attach the points will be making.
Once you have your picture, go ahead and open PHSH, and start a new project. Then, bring your picture onto it.
Step 2
Now that you’re ready to start, make a New Layer, and call it whatever you want. For the purposes of the tutorial, I’ll call this layer Tooth Outline.
On the new layer you just created, use your Brush Tool, and make an outline of what you want the pointed tooth to look like. Do this in a colour that is as close to the tooth colour as you can.
To get the colour of the tooth, you can click on Colour Swatches in the left-hand side Tool Panel, then when the Colour Picker pops up, click on the part of the tooth you want to use the colour from.
Step 3
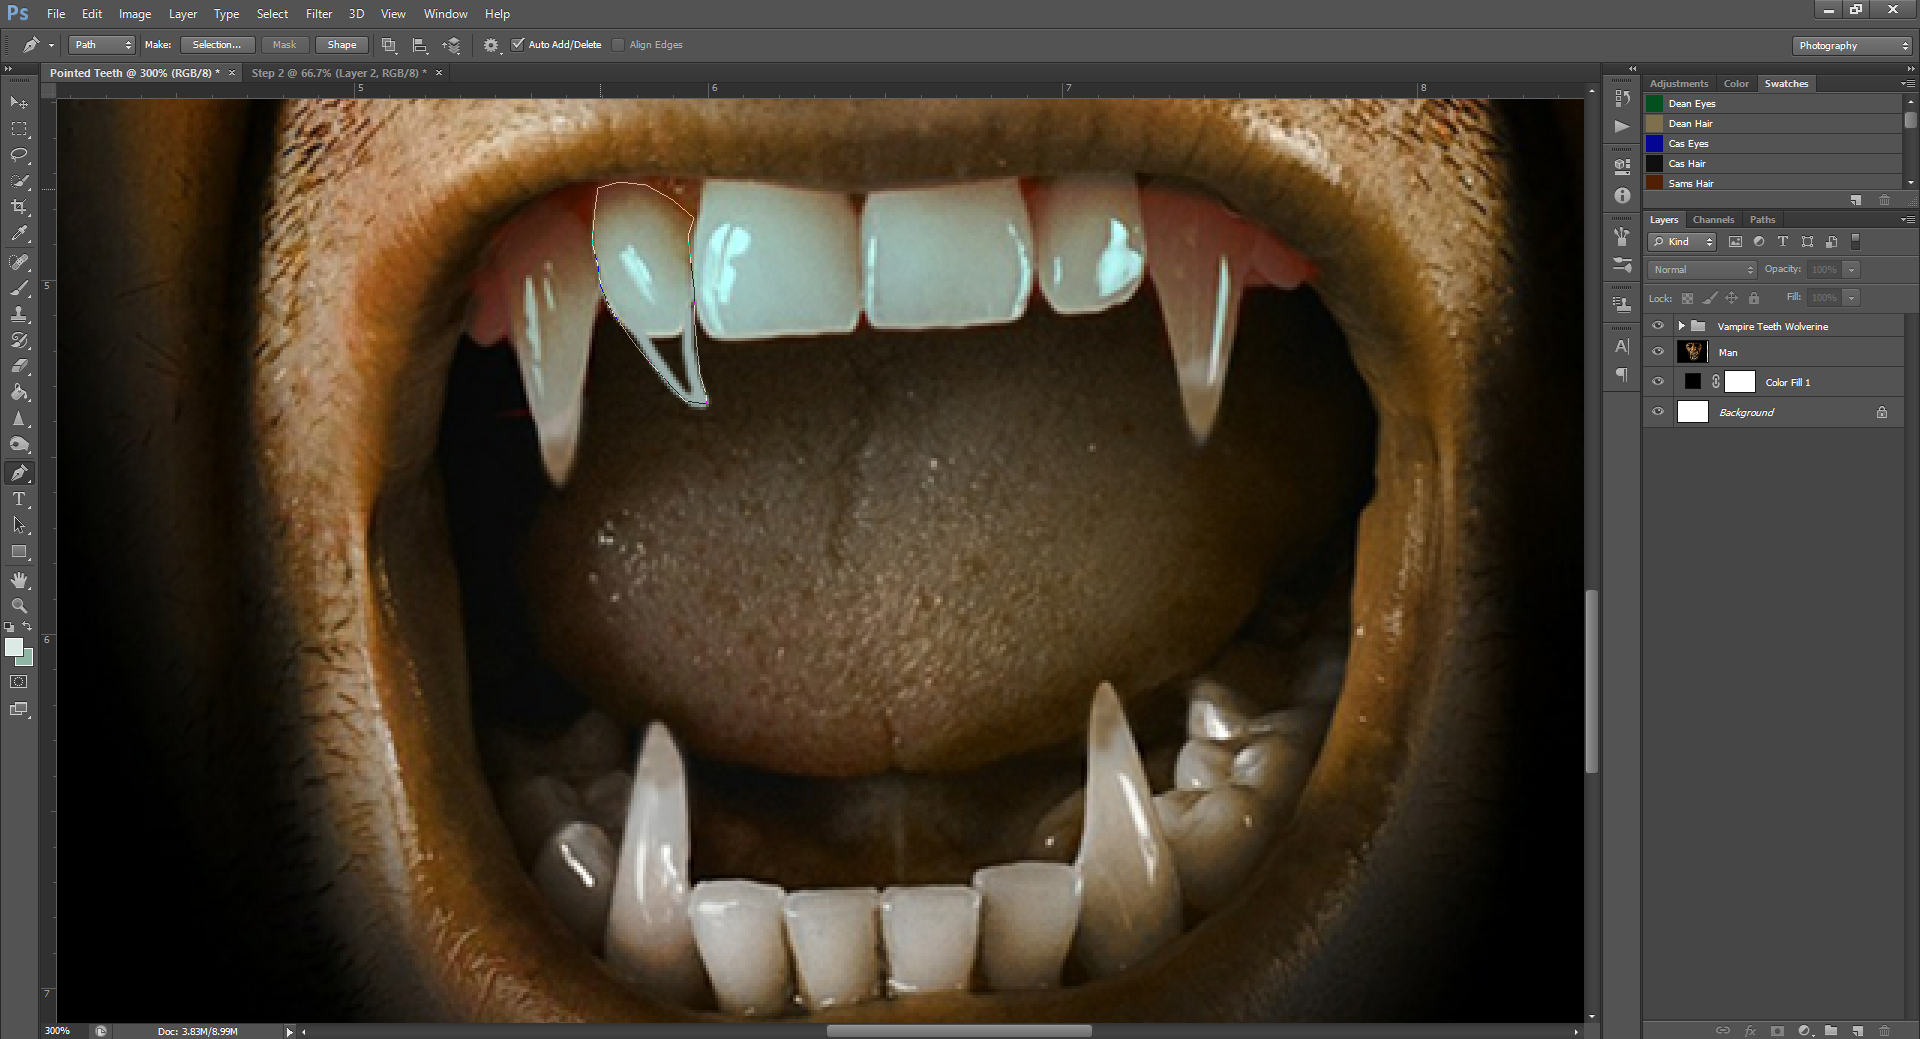
Once you’re happy with your outline, use the Pen Tool, and trace around the entirety of the tooth. Make sure you get both the pointed part you drew, and the tooth that was already there.
After making the outline, go to the Paths section (one of the tabs in the Layers Panel), and turn it into a Selection by pressing CTRL while you click on the Work Path layer. You’ll know you’ve successfully Selected the outline when the line turns to a dotted, flashing line.
Step 4
Now that you have the outline selected, make another New Layer. This layer, we’re going to fill in the rest of the tooth’s colour, so you may want to rename it to something appropriate, like Tooth Colour.
Renaming your layers isn’t necessary – the effect will still turn out if you don’t name them – but I find it’s easier to keep track of which layer is which when you rename them. If that’s not your thing though, you can go ahead and disregard the renaming part of the steps.
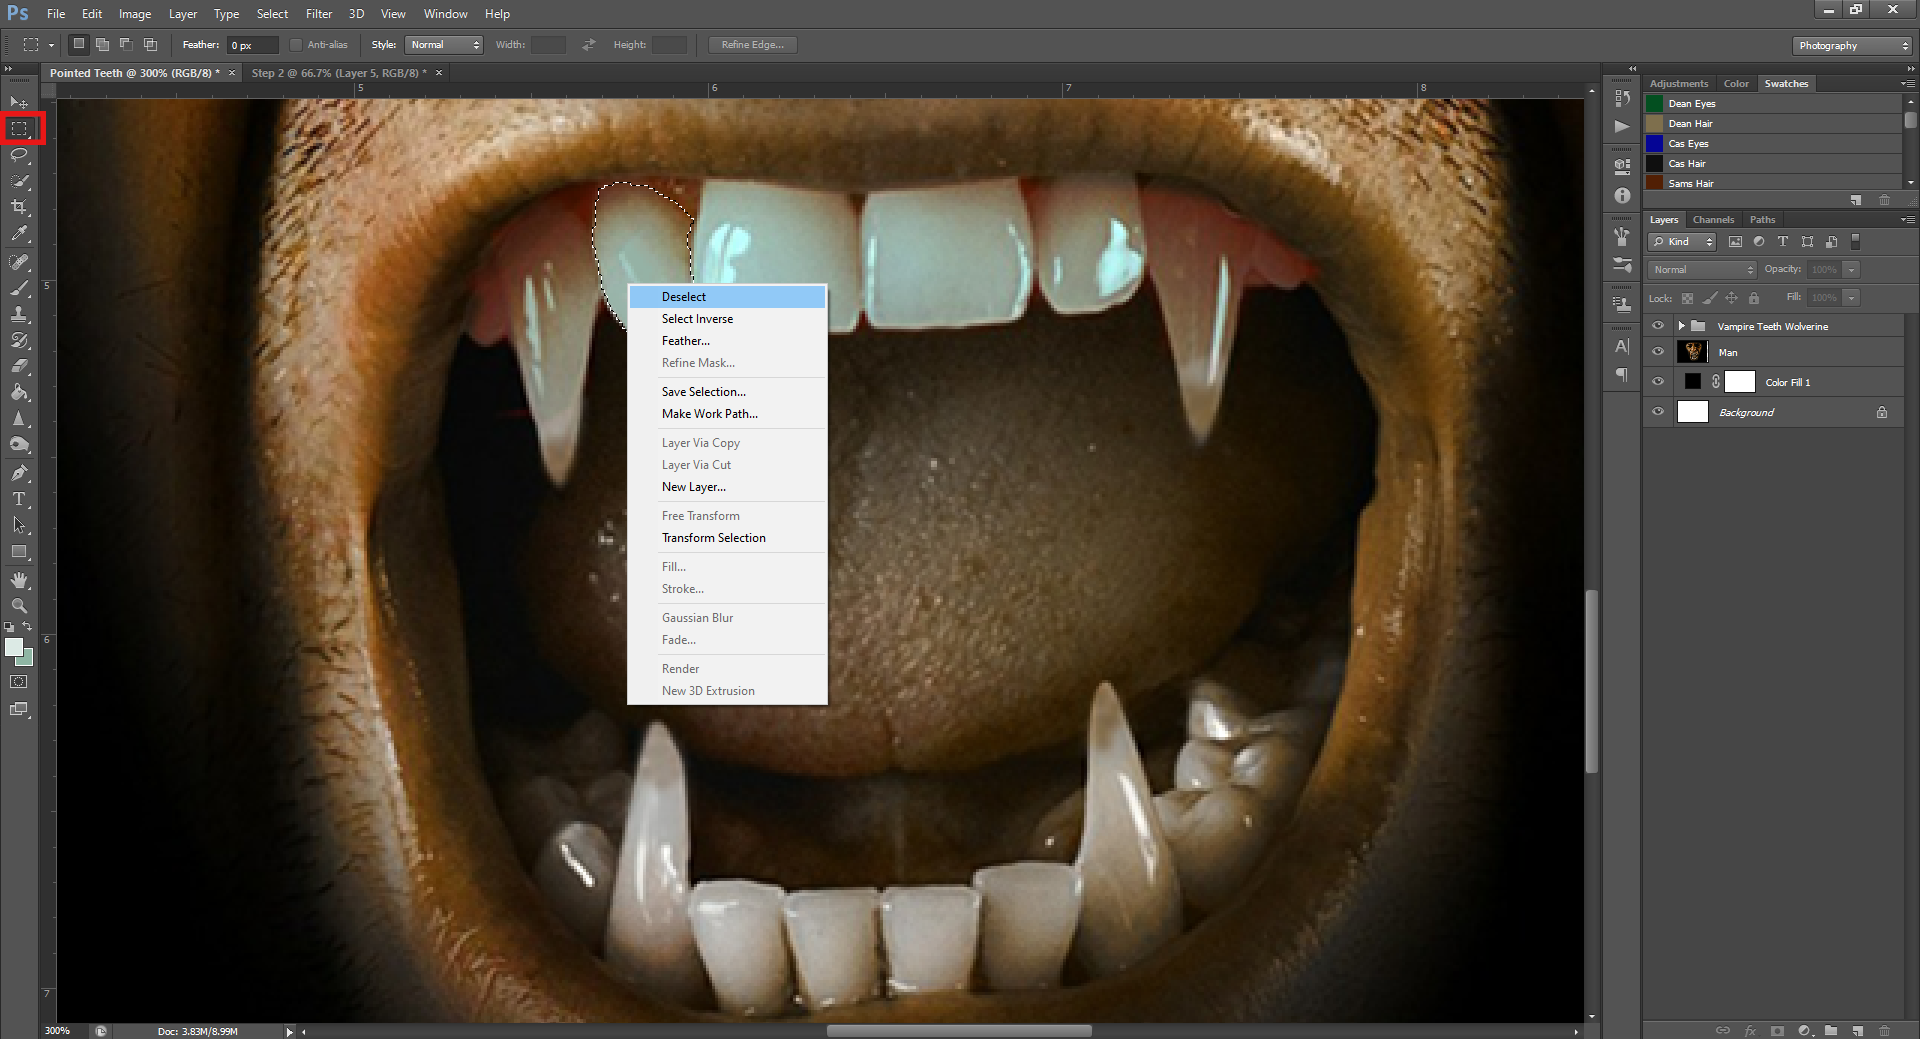
Step 5
Once you have the entire tooth filled in, and it matches the colours of the tooth that’s already there, you can go ahead and Deselect the outline. (To do this, you can go to the Rectangular Marquee Tool (the tool directly under the Mouse in the left-hand Tools Panel), and right-click on the selection, then pick Deselect from the drop-down menu that appears.
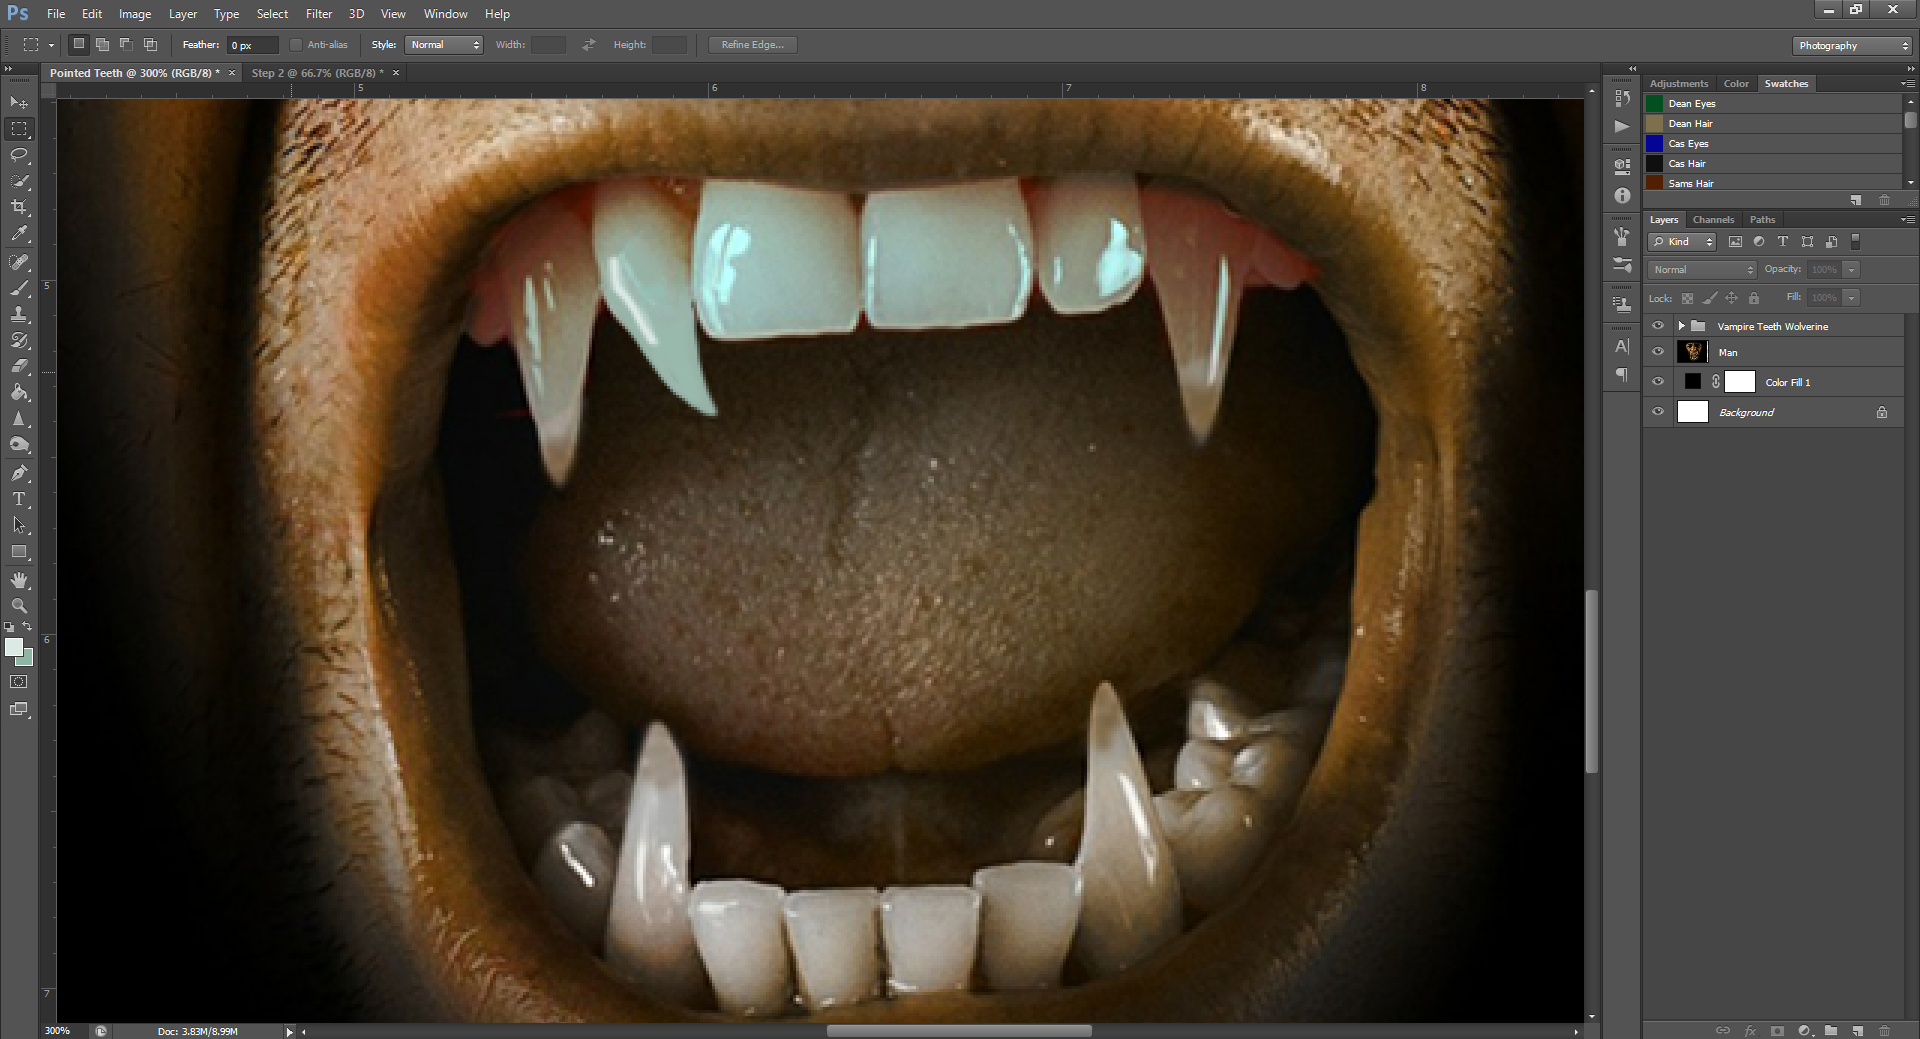
After you’ve deselected the outline, make another new layer. This layer is going to be the highlight for the tooth. Go back to your Brush tool, and use a very light white colour, then use that colour and paint a highlight down one side of the tooth.
You may have to change the size of the brush, so the highlight doesn’t look too out-of-place.
Step 6
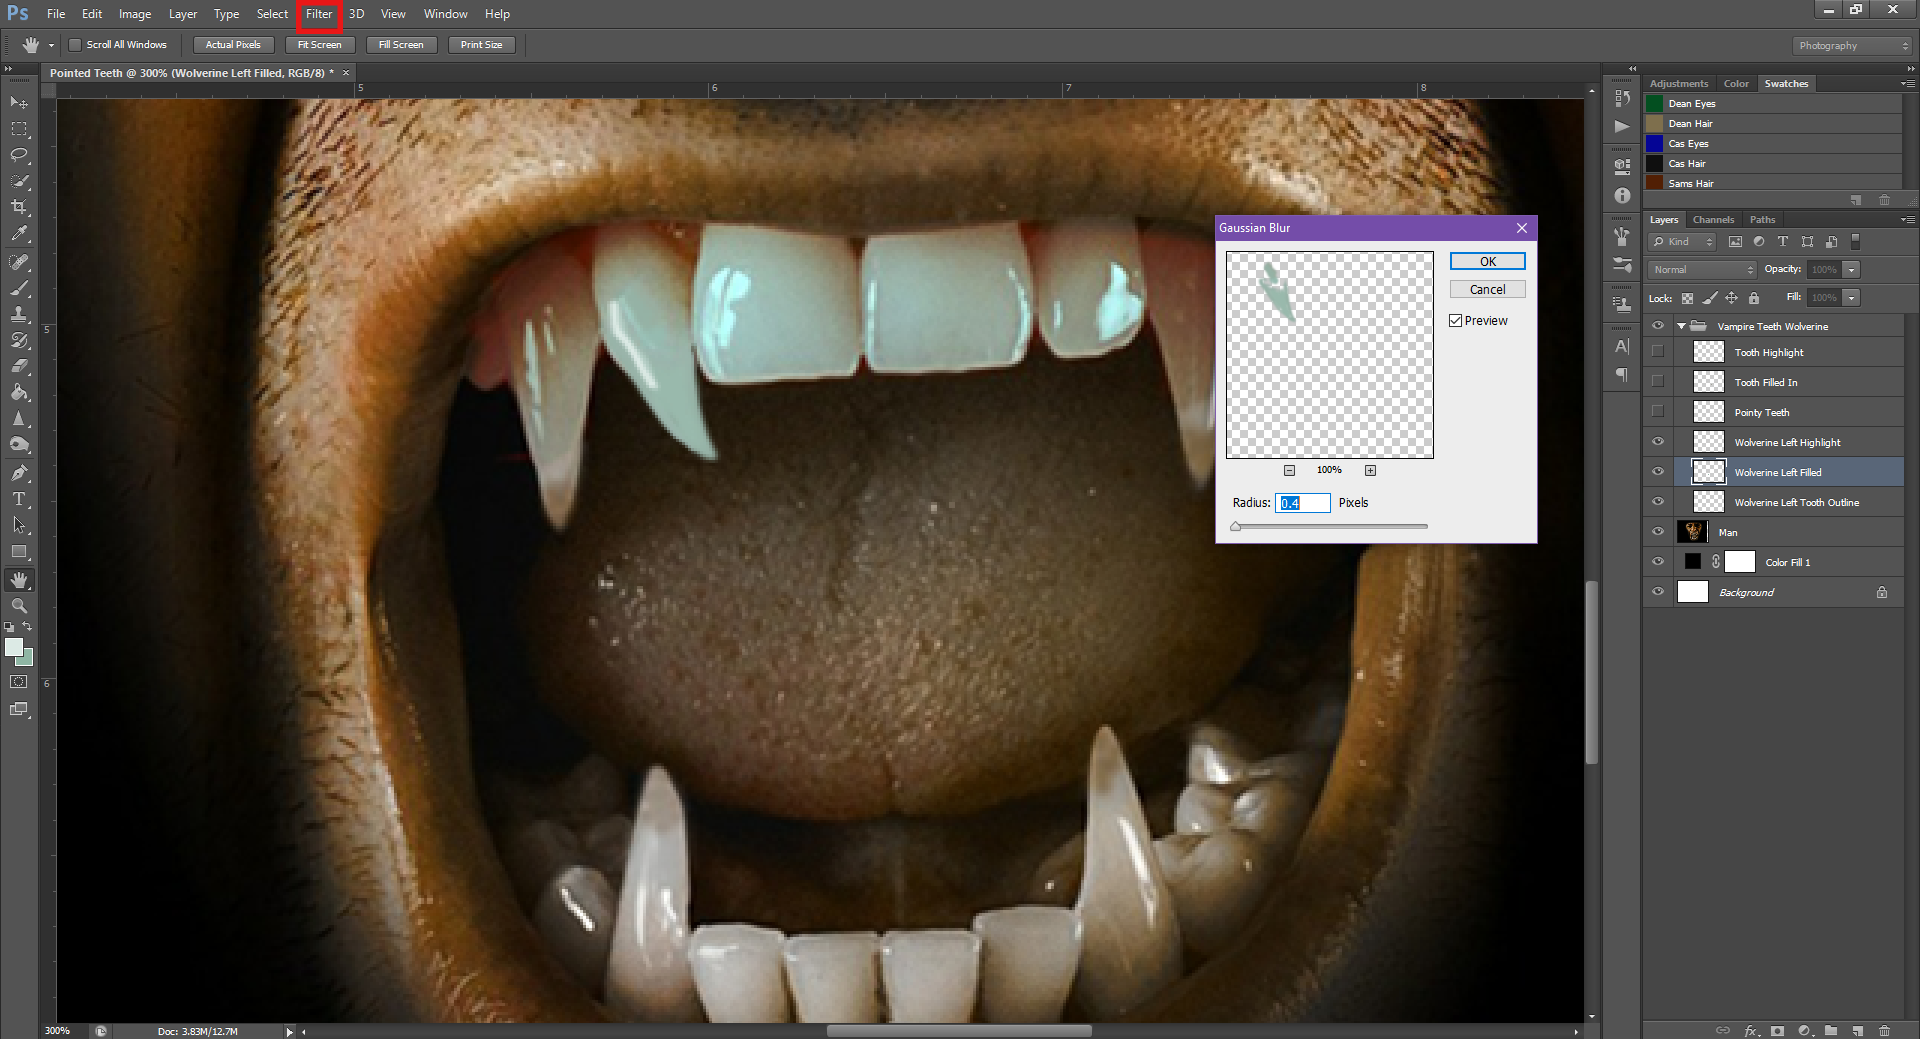
Once you’re happy with the highlight you made, you can switch back to the Tooth Colour layer. Next, go up to Filter – Blur – Gaussain Blur, and apply it to the layer.
You’ll want to use something small, around 0.4 – so that it helps blend the colours, without making the tooth look like it’s fuzzy/blurry.
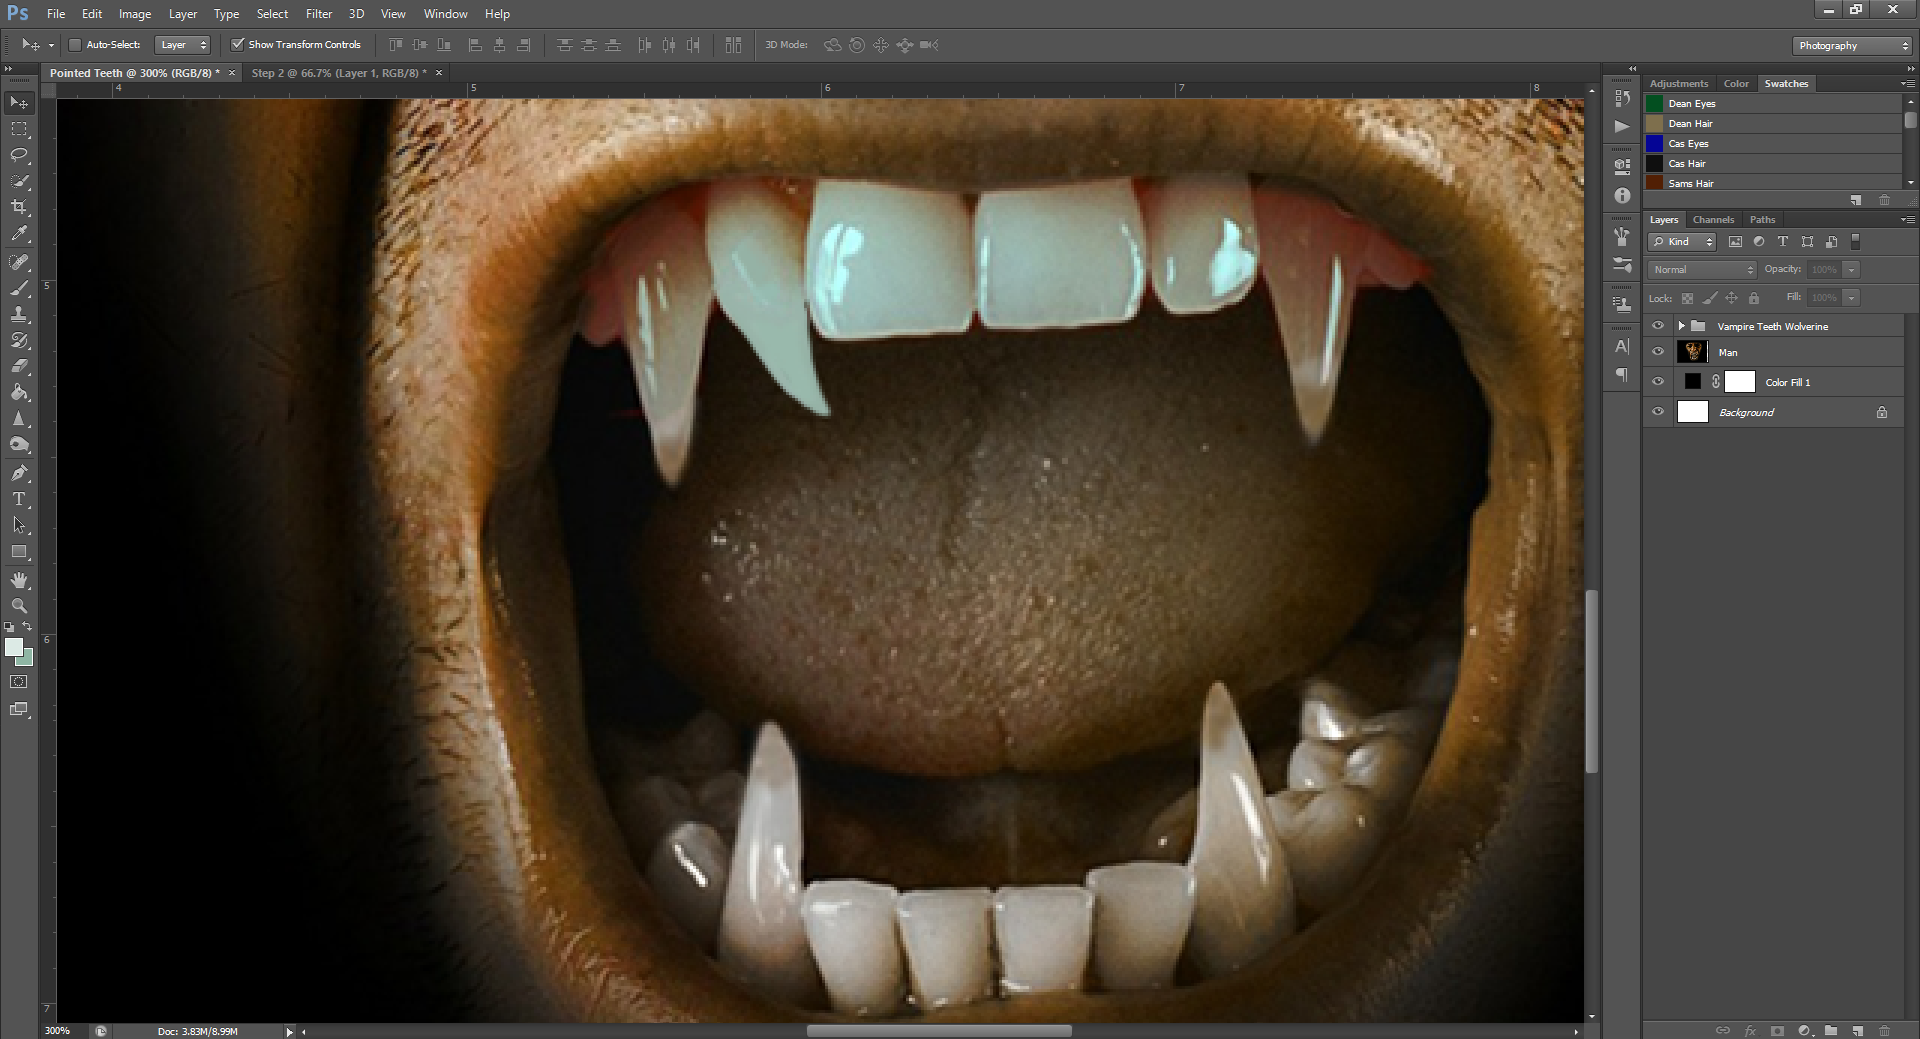
After you’ve applied that to your layer, go ahead and zoom out, to check out your handiwork from a not super close angle.
Hopefully, the pointed part of the tooth will look like it’s part of the original.
If not, you may have to go back to the Tooth Colour layer and match more of the original tooth colours to the point.
Or, you may just need more practice!
But, not to worry – this is the last PHSH tutorial for the year, so you’ll have plenty of time to practice before the next one!
This was actually the 2nd tooth I vampire-ized on this picture. I used this one for the tutorial instead of the first, because I felt like this one turned out better.
What do you think?
Like this tutorial? Check out the rest of the series here!
Important: This is the 4th last story of 2022! I’ll be taking the last half of December and first half of January off from posting. I’ll be back January 13th, 2023 (9am, ET) with the first post of the new year!
Started: 20.08.02
Finished: 22.08.11
Words: 2,448
NFF, Dark-ish, 2022’s 1st Halloween story
“Dale? You here?”
She peers into the room, maybe he left already… aw, well guess I’ll just te- she stops, half-turned, as a glimpse of something catches her eye. She takes a few steps into the room, brows furrowing as her eyes zone in on the small red streak that was standing out on one of the white walls, what the…?
She takes a few steps closer, it looks like… blood? She bends her head to get a better look, is this real blood? She feels a boulder settle into her stomach, suddenly uneasy. She straightens back up, shaking her head, no, there’s no way that’s real. He probably just got fake blood on the wall when he was changing.
They took the vest off him before he left set, though. She chews her lip for a moment, pulling out her phone, before snapping a picture of the smear, just in case. She’s unable to shake the uneasy feeling as she heads back to the door, shaking her head at her herself, just because you’ve been playing a detective doesn’t mean everything around you is a conspiracy.
She jumps as she nearly walks into the director, “Oh, shit, sorry.”
“What were you doing in there?”
“Nothing,” why does he sound… angry? She points a thumb over her shoulder, doing her best to sound nonchalant, “I was gonna say bye to Dale, but it looks like he took off already.”
“Yeah, he left.”
“O-okay,” she skirts around him, this season must’ve finally caught up with him. She flashes him a big smile, “Well, enjoy your time off.”
She turns around and heads for the exit at the end of the hall, feeling his eyes still on her, that was definitely weird… She lets out a breath she didn’t realize she was holding in as she burst through the door, being greeted by a wall of thick, sticky, heat. I hate the summer, she makes her way to her car, climbing into the back, smiling at her driver.
“Where to?”
“Where do you think?”
He chuckles as he turns the key, “Yes, Ma’am.”
She sets her purse down on the seat beside her, unable to shake the image of the blood on the wall, I’m probably over-reacting. Not everything is a clue I need to unravel. I’ll text Dale once I get home, and then I’ll feel stupid when he answers. She turns to stare absently out the window, I shouldn’t let this non-mystery ruin my time off.
—
“Well?” She turns expectant eyes to her best friend, “There’s no way it’s a coincidence, right?”
Her friend shakes her head slowly, “I don’t know…” She tosses the piece of paper down on the newspaper that was on the table between them, “Just because he hasn’t been seen in public doesn’t mean something happened. Maybe he’s just taking a private vacay?”
“Oh, please.” She grabs the newspaper, eyes searching the text again, “When have you ever known Dale to be this private? The man doesn’t even own blinds!”
Bill chuckled as he watched the brunette punch in, before walking with him to the line, “Oh, c’mon, it could be worse.”
Charlie gave him an incredulous look, “How could it possibly be worse?”
Bill shrugged, “At least you didn’t pull the short straw.”
They watched as Anderson walked by, head hanging. He looked up when he saw the two men before letting out a heavy sigh, “Church Street.”
“Oof,” Charlie let out a low whistle, “Sorry man.”
Bill clapped him on the shoulder, “Good luck.”
Anderson let out a dry chuckle, “Oh yeah, cause luck will beat that priest.”
They watched as he walked to the lockers, shoulders slumped. He sighed heavily again before heading for the door.
“He’s been here 20 years, and they just send him out like that?” Bill shook his head as they took a few steps up in the line, “Poor guy.”
“To be fair, it’s not exactly like they could give him a severance package.”
Bill shot him a look, “What’s the matter with you?”
Charlie shrugged, “I just thought things would be different.”
“Funny,” they moved up a few more steps, “I would’ve thought you’d be happy.”
“What?” Charlies’ brows furrowed in confusion, “Why would I be happy?”
“Because you got your wish.” Bill noticed his expression and gave him a sly smile as they reached the front, “More of the same.”
“Alright,” Adam looked over his clipboard, flipping through a few sheets, “What do I have left…” He ran his finger down the page before nodding, “Ah, right. Bill, you’re off to Queen Street and Charlie…” he flipped the page, “you’re going to Main.”
I’m gonna be honest, I love popcorn in basically any form. (The exception being that sweet/sticky stuff people put on it at Christmas… I think it’s called ‘kettle corn’?) And I especially love it when it comes with faux-cheese flavour. Before we discovered I was allergic to dairy products, I used to eat Smartfood White Cheddar Popcorn when we had end-of-year class parties in elementary school, and let me tell you, I was so into that stuff!
Maybe it’s because it was tied to the end of school/beginning of summer, or maybe it’s because I was just so young I still thought everything was amazing, but I was crushed when we discovered my allergy, and I learned that I couldn’t eat one of my favourite treats anymore.
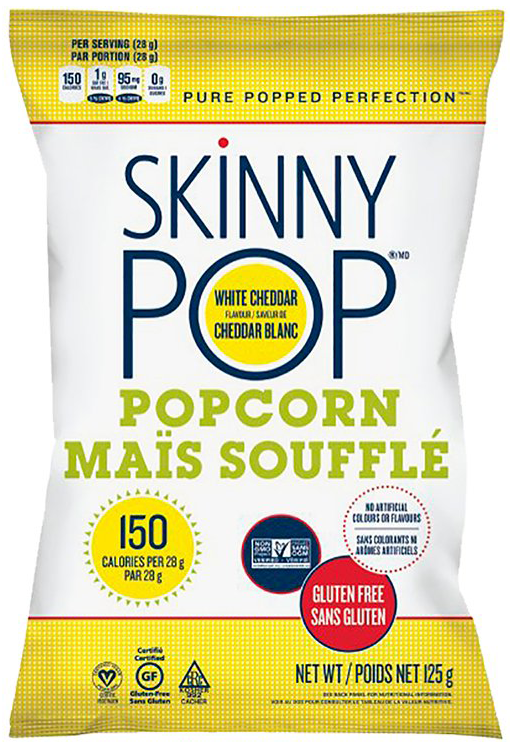
Now, as I’m sure you’ve guessed, it’s been quite a while since I’ve had the ‘real’ thing (I think it’s been about 20 years now [… how old are people in gr. 2?]), and I don’t know if Skinny Pop! was even trying to emulate it, but this tastes very similar to what I remember the Smartfood popcorn being.
Needless to say, I love this one, too!
Not only do these bags of popcorn bring back fond childhood memories with their flavour, perhaps the best part of them? They (sometimes) come in giant bags!
Seriously, this thing is roughly the same size as my torso! And yes, it still had a lot of air in it, but that’s still a big bag!
One thing I don’t like about this popcorn, is that the seasoning sometime falls all to the bottom of the bag. This has a simple fix, though. Just shake the bag/turn it upside down for a little bit before you open it to redistribute the flavour.
Speaking of the flavouring, it’s powdery, white and sticks to your fingers. Similar to ketchup dust from chips. But it’s so good, I’m sure you won’t mind licking it off yourself when you finish.
Other than that, there’s not really too much to say about this product. It’s vegan and awesome, and I recommend everyone try it. They also have other flavours, though I’m not sure if all the flavours are vegan. I’ve also tried their plain popcorn one (Green bag), that one was good too.
If you like popcorn, you definitely have to try this one!
With cheap, plastic decorations, bulk boxes of individually wrapped candies and chocolates in plastic, and even the costumes, Halloween (or, any holiday, really) definitely doesn’t spring to mind when you think of ‘zero waste’, but that doesn’t mean you can’t still have one!
Yes, it’s totally possible (and not all that much more work) to have a zero waste Halloween!
With just a little tweaking, you can have the zero waste Halloween that your wallet (and planet!) will thank you for having.
Tip #1: Make Your Own Treats!
I figured I would start with the hardest tip, and then work our way down. The most environmentally friendly and most zero waste way to still have a kick-ass Halloween is definitely to make your own treats.
Obviously, you can’t pass these out at the door (well, you could, but I don’t think parents would let them eat homemade stranger candy), but if you’re having a grown-up party, or even just your own house party with your kids, this is an awesome tip!
Not only will you get to binge on healthier treats (since you’re buying all the ingredients you need, you’ll know exactly what’s going into them), but I’m sure your kids would love to help bake/create the treats with you. It’s a fun way to spend the day, and you get a reward for all your hard work at the end!
Another bonus of making homemade treats? You can literally make whatever you want! Not that into chocolate? Don’t make it! Really craving a rice crispy square? Get yourself some marshmallows (if searching for vegan ones, I recommend Dandies), and rice cereal and go at it. Want to try homemade chocolate? Go get yourself some cocoa butter and Silk (milk) and go nuts! Rather not eat typical ‘candy’? No problem! Get your bakers hat on, and whip up some cookies, brownies, or whatever other treat your heart desires. And, to make them festive, you could decorate them with the Halloween theme in mind!
The only limitation to the treats you create is your imagination!
If you want to make actual ‘candy’ at home (i.e. lollipops, hard candies like Jolly Ranchers, etc.) you’ll maybe not want to let the kids help with those. Those items require boiling sugar and that stuff gets super hot/a tad dangerous to work with, if you don’t know what you’re doing.
If you want to give some of your homemade treats away (I only recommend doing this to people you know/who trust you enough to actually eat what you hand-make, that way your good intentions don’t end up in the garbage), you can get some jars/containers and decorate them simply before giving them away. Similar to thedry mixes some people give at Christmas. Do them up a little pretty, and people are sure to love them!
Tip #2: Don’t Buy a Single-Use Costume
My mom was always really big into Halloween, so maybe this was just my family, but some of my best Halloween memories consist of mix and matching clothes I already had to make my costume. Sure, we had to go buy Halloween make-up (weren’t gonna waste ‘the good stuff’) and maybe a wig, but the majority of our costumes growing up were homemade.
If you don’t want to wear your everyday clothes, check out past year costumes you already have, to see how you can give them a new life as something else, or, go hit up a thrift store (like Value Village), that may have some more specific Halloween-themed pieces. The trick here is to go through what you already have, see what your missing, and then either go get a few choice pieces to complete the look that can be re-used in the future, or change what your costume is, so you can use pieces you already have.
You could also keep a few things from your Capsule Wardrobe purge to keep specifically to wear for Halloween. This way, you won’t care if you have to say, roll it around in the dirt to get the specific look, (we actually did this one year) or cut some holes into it.
Or, you could just forgo the costumes if you’re not going out/not that into it. You could have a house party in your pj’s watching scary movies with family and friends, instead.
Tip #3: Buy In Actual Bulk!
If you don’t want to make your own treats, or you don’t have the skills to make one treat in particular that you just absolutely need to make Halloween special to you, try to get it at an actual bulk store!
Here in Canada, we have this place called Bulk Barn, and every year around Halloween, they have a few dedicated bins to Halloween treats. Foil-wrapped chocolates, hard candies, gummy worms with a bat decoration stuck to the bin, etc. Basically they slap a ghost or spider-web on some of their regular offerings and call it a day.
But this is still better than buying those boxes of big-name treats, because you can fill your own container* with the exact amount of treats you’ll need. So yes, this option still gives you waste (depending on what treats you’re buying), but it’s still better than getting a bunch of those giant cardboard boxes (that can’t be recycled! The dyes used to make those silly pictures sometimes prevent the cardboard from being recyclable), filled to the brim with plastic wrappers.
I recommend you go out and buy store-bought treats last, because it will create some more waste than the other options here, but if you absolutely feel you need to, then do it. Zero waste isn’t about denying yourself things you like, or feeling like you have to ‘give up’ things you enjoy, it’s about helping the planet and minimizing your environmental impact.
It’s also impossible to be ‘true’ zero waste in today’s society, so don’t worry too much about trying to be perfect. Everyone creates waste – the trick you need to remember is to create as least as you can, as often as you can. If you create a little bit more than usual once a year, there’s no Zero Waste Police who are gonna show up and fine you, or revoke your zero waste card.
So relax, and have fun!
*Bulk Barn has temporarily suspended it’s BYO policy due to COVID safety practices. Call/check your local bulk store to see if/when the policy will change back